….thanks to Becca Givens for hosting Sunday Trees


….thanks to Becca Givens for hosting Sunday Trees
….thank you Becca for hosting Sunday Trees

….check out Becca Givens’ site for more Sunday Trees
….thanks to Becca Givens for hosting Sunday Trees
…thanks Becca for hosting Sunday Trees
This year I didn’t start decorating my tree until Christmas Eve and thankfully my daughters helped me begin the process. I love doing the tree but I don’t like doing it on my own. With my husband being so sick the last few weeks I never found the time or energy to start hauling out the lights and the decorations. Earlier in the week I did bring the tree inside, sawed off bottom, trimmed the lower branches and placed it in the tree stand. That night I didn’t get to bed till 2:30. Not a good thing, especially on a school night.
Once the decorating process started it was enjoyable and I continued putting on a few more decorations the next day. Each year my tree gets smaller and the need for a lot of ornaments also gets smaller. Sometimes I think less is more. Here is the finished product.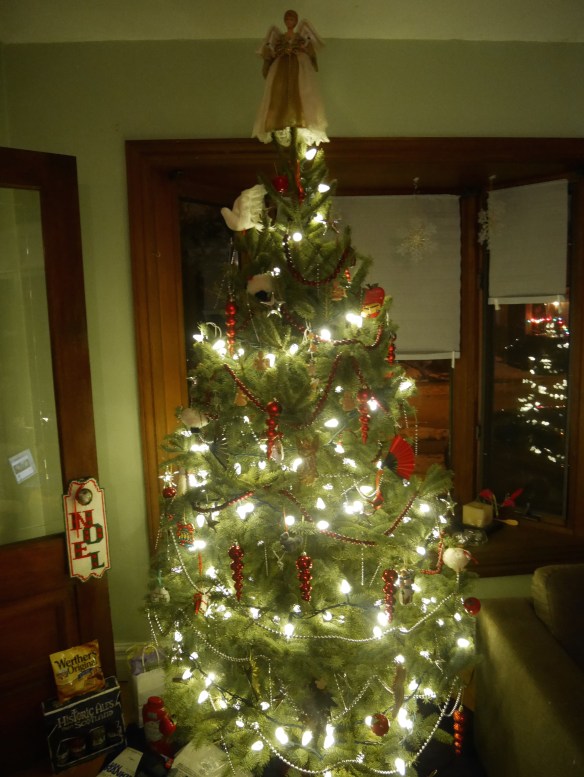

These whimsical Santa trees were made by me many years ago but they continue to be some of my favourite decorations. Do you have a favourite in your home?
….for art lessons, teaching math, classroom rules, class management and Christmas crafts
Last week we hosted our annual Craft Night at our school. It’s an event that the community of parents and students loves to attend. For weeks in advance the teachers pair up with a colleague (some go solo) and scour the internet for craft ideas that small children and their parents can successfully complete in 10 to 15 minutes or less.
The parent council funds the evening and each teacher is given a set amount of money to purchase supplies. It works out to approximately $1.00 per craft. This year some of the crafts included bees wax candles, decorating glass ornaments, making bath salts, and decorating cookies.
I went straight to Pinterest for inspiration and came across these beautiful paper trees mounted on a disc of spruce wood. Lyckoslanten is a Finnish blogger who posted this simple craft over at Lyckoslanten. I didn’t discover the translation button till much later but I easily figured out how to recreate this craft.
The tricky part was figuring out how to get the wood. At first I thought I could pick up branches from camp but that didn’t happen. Then I thought I could use the cut-offs from Christmas trees but we didn’t get our tree until after Craft Night.
into intoA week before the event I went to a Winter Market in the Junction. While there I saw a couple of vendors who used birch wood to create some of their crafts. I also saw some beautiful trees made from birch wood. I asked them where they got their wood. One of the vendors offered to cut all the discs for me but at a price of course and it would have used up most of my budget. In hindsight it might have been worth it. The other vendor suggested that I buy the birch logs from a garden centre and use a chop saw to cut them up. A much cheaper option.


I went with the cheaper option and spent two evening cutting up two twelve foot birch branches into about 180 discs. I couldn’t belief the amount of sawdust it created. I spent almost as much time cleaning up as I did cutting. After I cut the discs I also had to drill holes into each disc for the skewers to fit. My friend L photocopied Christmas sheet music onto 150 sheets of photocopy paper. We tried heavier card stock but it was more difficult to fold.


On the night of the event we set up the tables at the back of the library with all the supplies that people needed to complete the trees. We added some tiny gift boxes that could be added to the base and some stars and snowflakes that could be glued onto the paper.

The entire evening took only an hour but it was extremely busy and I spent most of my time punching holes into the pleated paper so that the skewers could go through the middle. By the way, the best tool for this turned out to be an awl and a hammer. All in all it was a very successful night and everyone loved their trees.

….thanks Becca for hosting Sunday Trees
…..thanks Becca for hosting Sunday Trees
….thanks to Ailsa over at Where’s my Backpack? for hosting Travel Theme