More Collage Art

….from a different grade 3 class

I love how unique each piece is. This class started this assignment when I was away. The concept of creating a cityscape of buildings clearly wasn’t on the radar for some of these students but I can’t fault them when I wasn’t there to give them the instructions. Some of them also created more of a fantasy land with flying turtles and smiling buildings but I love that too.

img_0772img_0773img_0774img_0778img_0779

Gathering Colours from Magazines and Old Books

….and then cutting them into squares, rectangles, circles and triangles to create buildings

The advantage of cutting out shapes from magazines or books is the added texture one gets. It is easier to just cut up construction paper but the act of looking for colour swatches in magazines teaches children and adults about the vast range of one colour (i.e., red can be cool (blue undertones) or warm (more yellow undertones), dark (with the addition of black) or light (by adding white) and vibrant or muted).

After a class of cutting and sorting colours we were ready to start cutting our shapes and layering  our pieces to create a collage of buildings. My grade threes were allowed to create a landscape of countryside buildings or a cityscape and they were encouraged to add foreground details and/or background details. The last step involved adding details with a black Sharpie and paint dots to make the whole piece come alive. The following are examples from one of my grade three classes.

img_0701img_0702img_0703img_0704img_0705img_0706img_0707img_0708img_0709img_0710

An Artful Sunday

….I stayed home to work on samples for tomorrow’s art workshop

I started mid morning. K drove to Hamilton to help our daughter put in her garden. Normally I would have gone with him but I knew that if I didn’t get an early start on my samples they wouldn’t get done or I would be staying up until the wee hours of the morning to finish them.

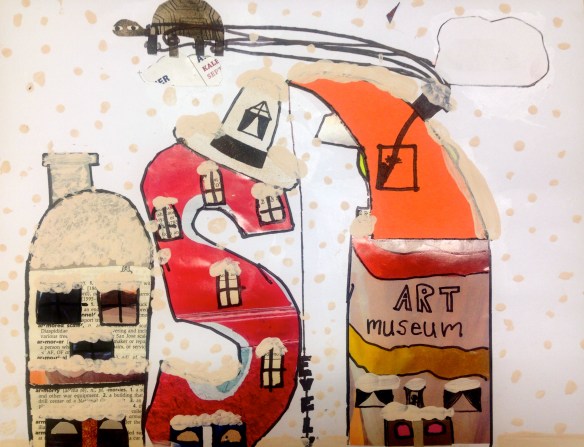
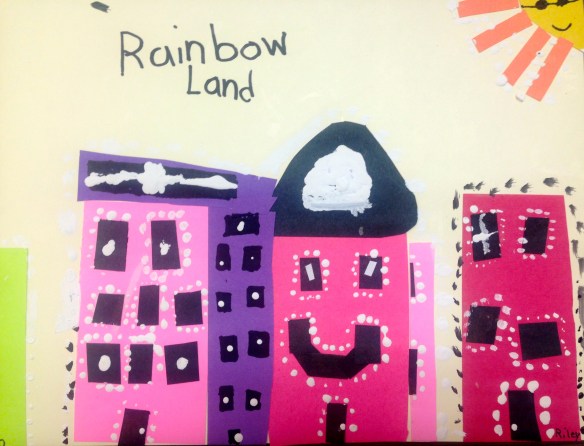
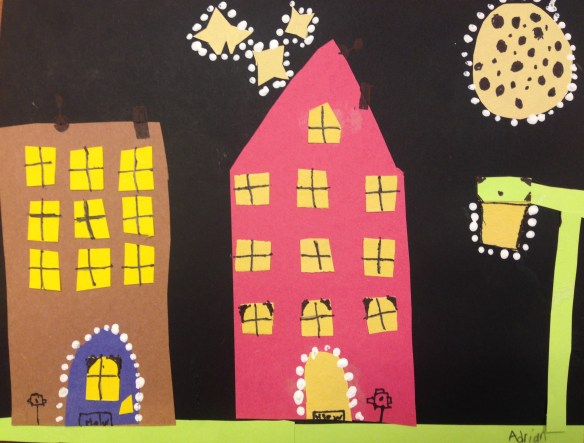
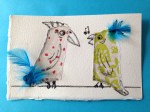
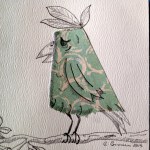
In our workshop tomorrow the children will be making their own journals from scratch. All the materials for the books are already laid out and ready to go. The focus of this year’s hand made book is decorating the cover with photographs, artwork and fancy paper. The collage should have some personal message on the cover. I’ve encouraged the boys and girls to bring in photocopies of family photos. At school I’ve have lots of papers, magazines and covers that the kids can play with. Thanks to Lynn Whipple for this fabulous idea. Here are my samples that I will share with the classes tomorrow.

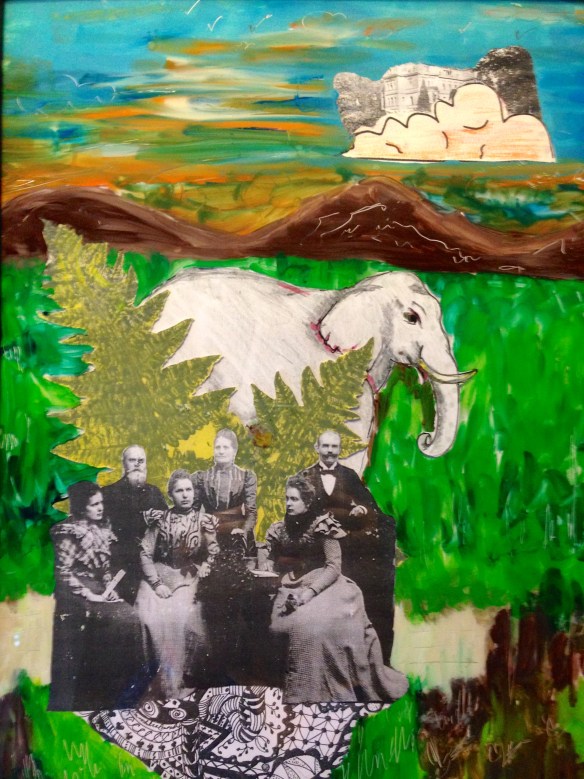
After I finished the covers I went back to a project that I started a couple of months ago but stopped mid-stream. It’s a technique where you glue photos to the back of a piece of glass or plexiglass facing the front and then you paint the background on the back of the glass. It’s called reverse painting and requires that you turn your work over periodically so that you can see how it looks on the front. I actually enjoyed the process more than I thought I would. This was also an assignment from  Lynn Whipple from Year of the Spark.

I choose a photograph of my great great grandparents and aunts and uncles. I learned that they periodically vacationed in Africa so I decided to add some large ferns from a  Geli print that I had done last year and I drew a sketch of an elephant and placed it behind the ferns. I always associate orange skies with Africa but I’m not sure what the castle in the sky signifies. Freud would probably have a hay day analyzing this piece; well to do Germans, early 1900s, vacationing in Africa, castle in the sky, elephants, etc..

IMG_4848

After finishing the books and the reverse painting I drove to three different places looking for a place to trim or buy a new mat for a painting that I’m donating to the silent auction next Saturday at the school’s Fun Fair. I have a great frame but the mat that came with it covered too much of the painting. Unfortunately I didn’t find anyone to help me. I did however get a name of a place, close to work, that I’m going to try tomorrow.

When I returned home I put the reverse painting into its frame and then I opened my art journal and decided to start this week’s assignment. I’m suppose to play with colours and come up with different palettes with five colour combinations that appeal to me. Once I’ve finished that I’m suppose to create a self portrait (very open ended) using my favourite. palette.

So far I’ve created several palettes. Most of them were done using acrylic paint and one uses pan pastels. Do you have a favourite?

Architects Do Design Cities and Curvy Buildings

…..the book, Young Frank, Architect, inspired our art lesson in Kindergarten

Two weeks ago I reminded my kindergarten class of the book we read in the library. The book was Young Frank, Architect by Frank Viva and published by MOMA.IMG_4605

The story is about a young boy named Frank and his grandfather, also named Frank. Both Franks are architects. Young Frank builds chairs, curvy buildings and models of entire cities. His grandfather tells him that architects don’t design chairs, buildings should be straight and architects design one building at a time and cities take a hundred years to develop. Young Frank is discouraged and he doesn’t want to be an architect any longer. Old Frank decides to take Young Frank to the museum, the MOMA, so that he can show his grandson the buildings that architects design. In the end it is Old Frank who learns that he was mistaken and he apologizes to Young Frank. The book ends with briefs bios about Frank Lloyd Wright and Frank Gehry.

The art lesson introduced the kindergarteners to collage and city landscapes. They were reminded  about foreground and background and were taught how to create a night sky with stars and a moon. Students were encouraged to cut out at least three high rise buildings and make windows and doors in different shapes. It was up to them whether they wanted to create straight or curvy ‘Frank’ buildings. The shapes of some of the buildings are delightful. It’s amazing how much their scissor skills have improved since last September. Enjoy!

Put a Beak on it!

…..another great art idea from Carla Sonheim that I introduced to my kindergarten art class

You may recall a post where I shared some art that I did with scraps of paper. By simply adding a beak, eyes and feet you can make fun bird shapes. I turned them into cards  and small framed gifts that I gave to friends and family.

A couple of weeks ago I introduced this concept to my kindergarten art class. They made a very simple tree shape with 5 to 6 branches and then on each branch they glued a scrap piece of paper and then drew on the details to create their birds. Here are some of their creations.

This slideshow requires JavaScript.

Happy Penguins

….tell kindergarteners that they can dress up their penguins and they instantly become ‘happy’ penguins

We started our project by painting our background with ribbons of watercolour. The only restriction was ‘no’ black or brown paint. While the paint was drying they drew and then cut out their penguin bodies, eyes, beaks and feet. This pretty much took up the entire first class.

In the second class I showed the class how to draw an ice flow so that it had some dimension and then I instructed the students on how to put everything together. When the penguin was glued into place with all parts intact the students then had the option of making hats, scarves and sweater from some scrapbook paper that I had.

The inspiration for this assignment came from Deep Space Sparkle.

Meet the Leaf Man

….in kindergarten we collected leaves and created these wonderful leaf ‘people’ and creatures

Lois Ehlert has written and illustrated a wonderful children’s book called the Leaf Man. She is a collage artist and writer and has illustrated the entire book with the use of leaves. Using her book as our inspiration the kindergarten children created their own leaf people during art class. They really enjoyed the process.

This slideshow requires JavaScript.

Lois Ehlert has illustrated and written many children’s books. This cute video is narrated by a little boy name Jonah. He’s actually reading The Leaf Man. Enjoy!

Collage as an Art Form

….personally I love collage but many people don’t consider it an art form

Yesterday I went to a workshop put on by the art consultants in our board and the topic was Collage. It wasn’t a huge class but there were about 15 teachers there from the elementary panel. We all taught different grade levels but we came with the same goal in mind and that was how to teach the art of collage to our students.

Our instructor took the group down a hallway to observe some examples of collage that had been done by the students at that school. The message that we took away was that collage is not suppose to be a bunch of pictures pasted randomly onto paper. I’m afraid that some of my grade five students are guilty of this very thing and even though we talked about foreground, middle ground and background many didn’t quite grasp how to apply that to their collage assignment.

One idea or school of thought behind collage is that the piece should tell a story. Some of my students were quite comfortable talking about their art but others couldn’t really come up with much of a story. The group at the workshop was given 2 assignments to complete in the hour and a half that we had and this included the lesson and the discussions that followed each assignment. For the first assignment we were asked to choose a post card from the table and then find ‘one’ picture that we could add to the card to create a new piece of art. The new addition was to blend in with the piece and look like it belonged there. Of course I missed the part about using only one picture but a few others did as well. Despite that the things that people came up with were very interesting and unfortunately these first pieces were scooped up very quickly and I didn’t get a chance to take photos.

The second assignment involved choosing an image that had been removed from a discarded art book. The paper is nice and heavy and works well for gluing collage papers onto it. Then we were instructed to pick 2 or 3 different colours of paper to add to the image and finally we had to find some pictures from magazines to add to the image. One of the hardest parts was deciding on which image to choose.

We only had 10 minutes to complete the first assignment and for the second assignment we were given about 40 minutes. It was a lot of fun and we were given some useful tips along the way that we can pass on to our students. One tip is ‘don’t let students glue anything down until they’ve conferenced with the teacher’. Good advice.

When all the pieces were done or at least close to being finished we had an opportunity to tell ‘our story’. I won’t discuss the stories here but maybe you can figure out for yourself what some of these stories are. My contribution is the last piece in the gallery with the netting across the woman’s face.