….it’s a little late

….it’s a little late
Anticipation
Cheeks glowing brightly
From copious sips of wine
Eyes bright and searching
 I posted this yesterday but it went back into my draft file. Frustrating!
…I learned that the hard way tonight
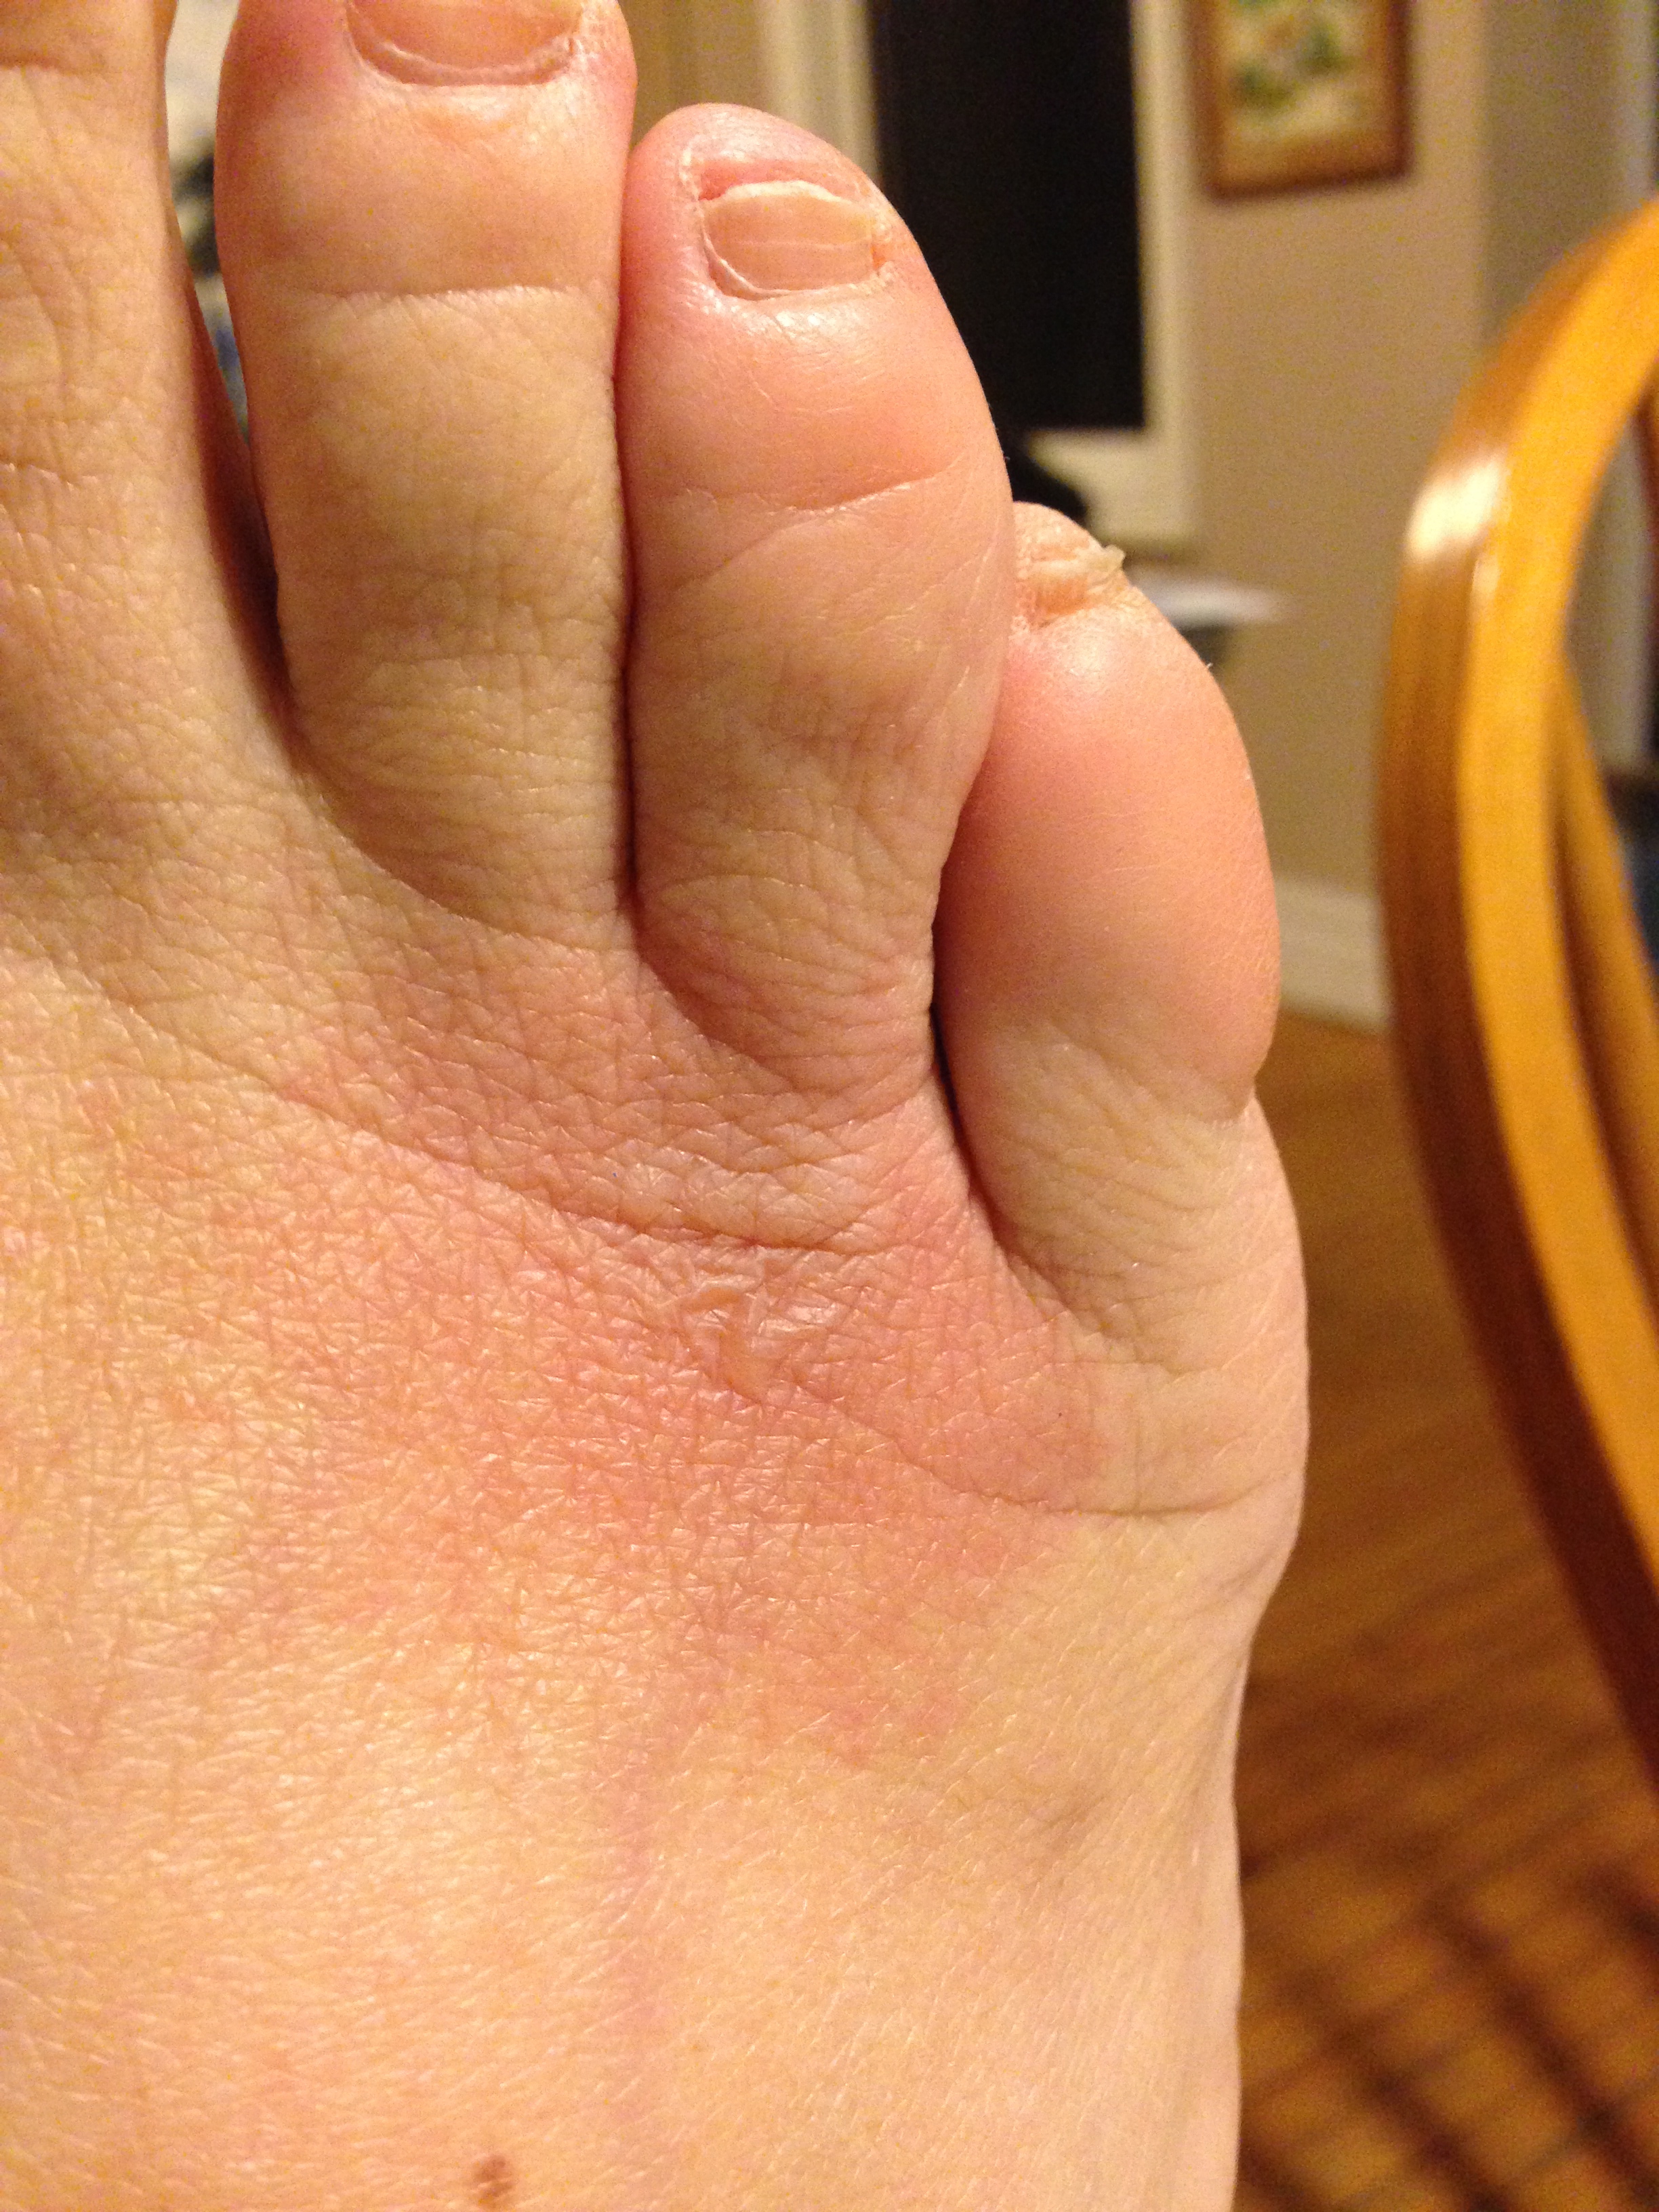
I love to cook and since my husband does most of it, I’ve been a bit out of practice. Tonight I was draining the boiling water from the pasta when a large portion splashed out of the pan and onto the floor. Unfortunately my foot was in the way and I wasn’t wearing any footwear other than socks. Ouch!
I sat at the dinner table with a baggie of ice on top of my foot but I probably waited a little too long before I administered first aid to myself. The foot has already started to blister and at the moment it is stinging like crazy.
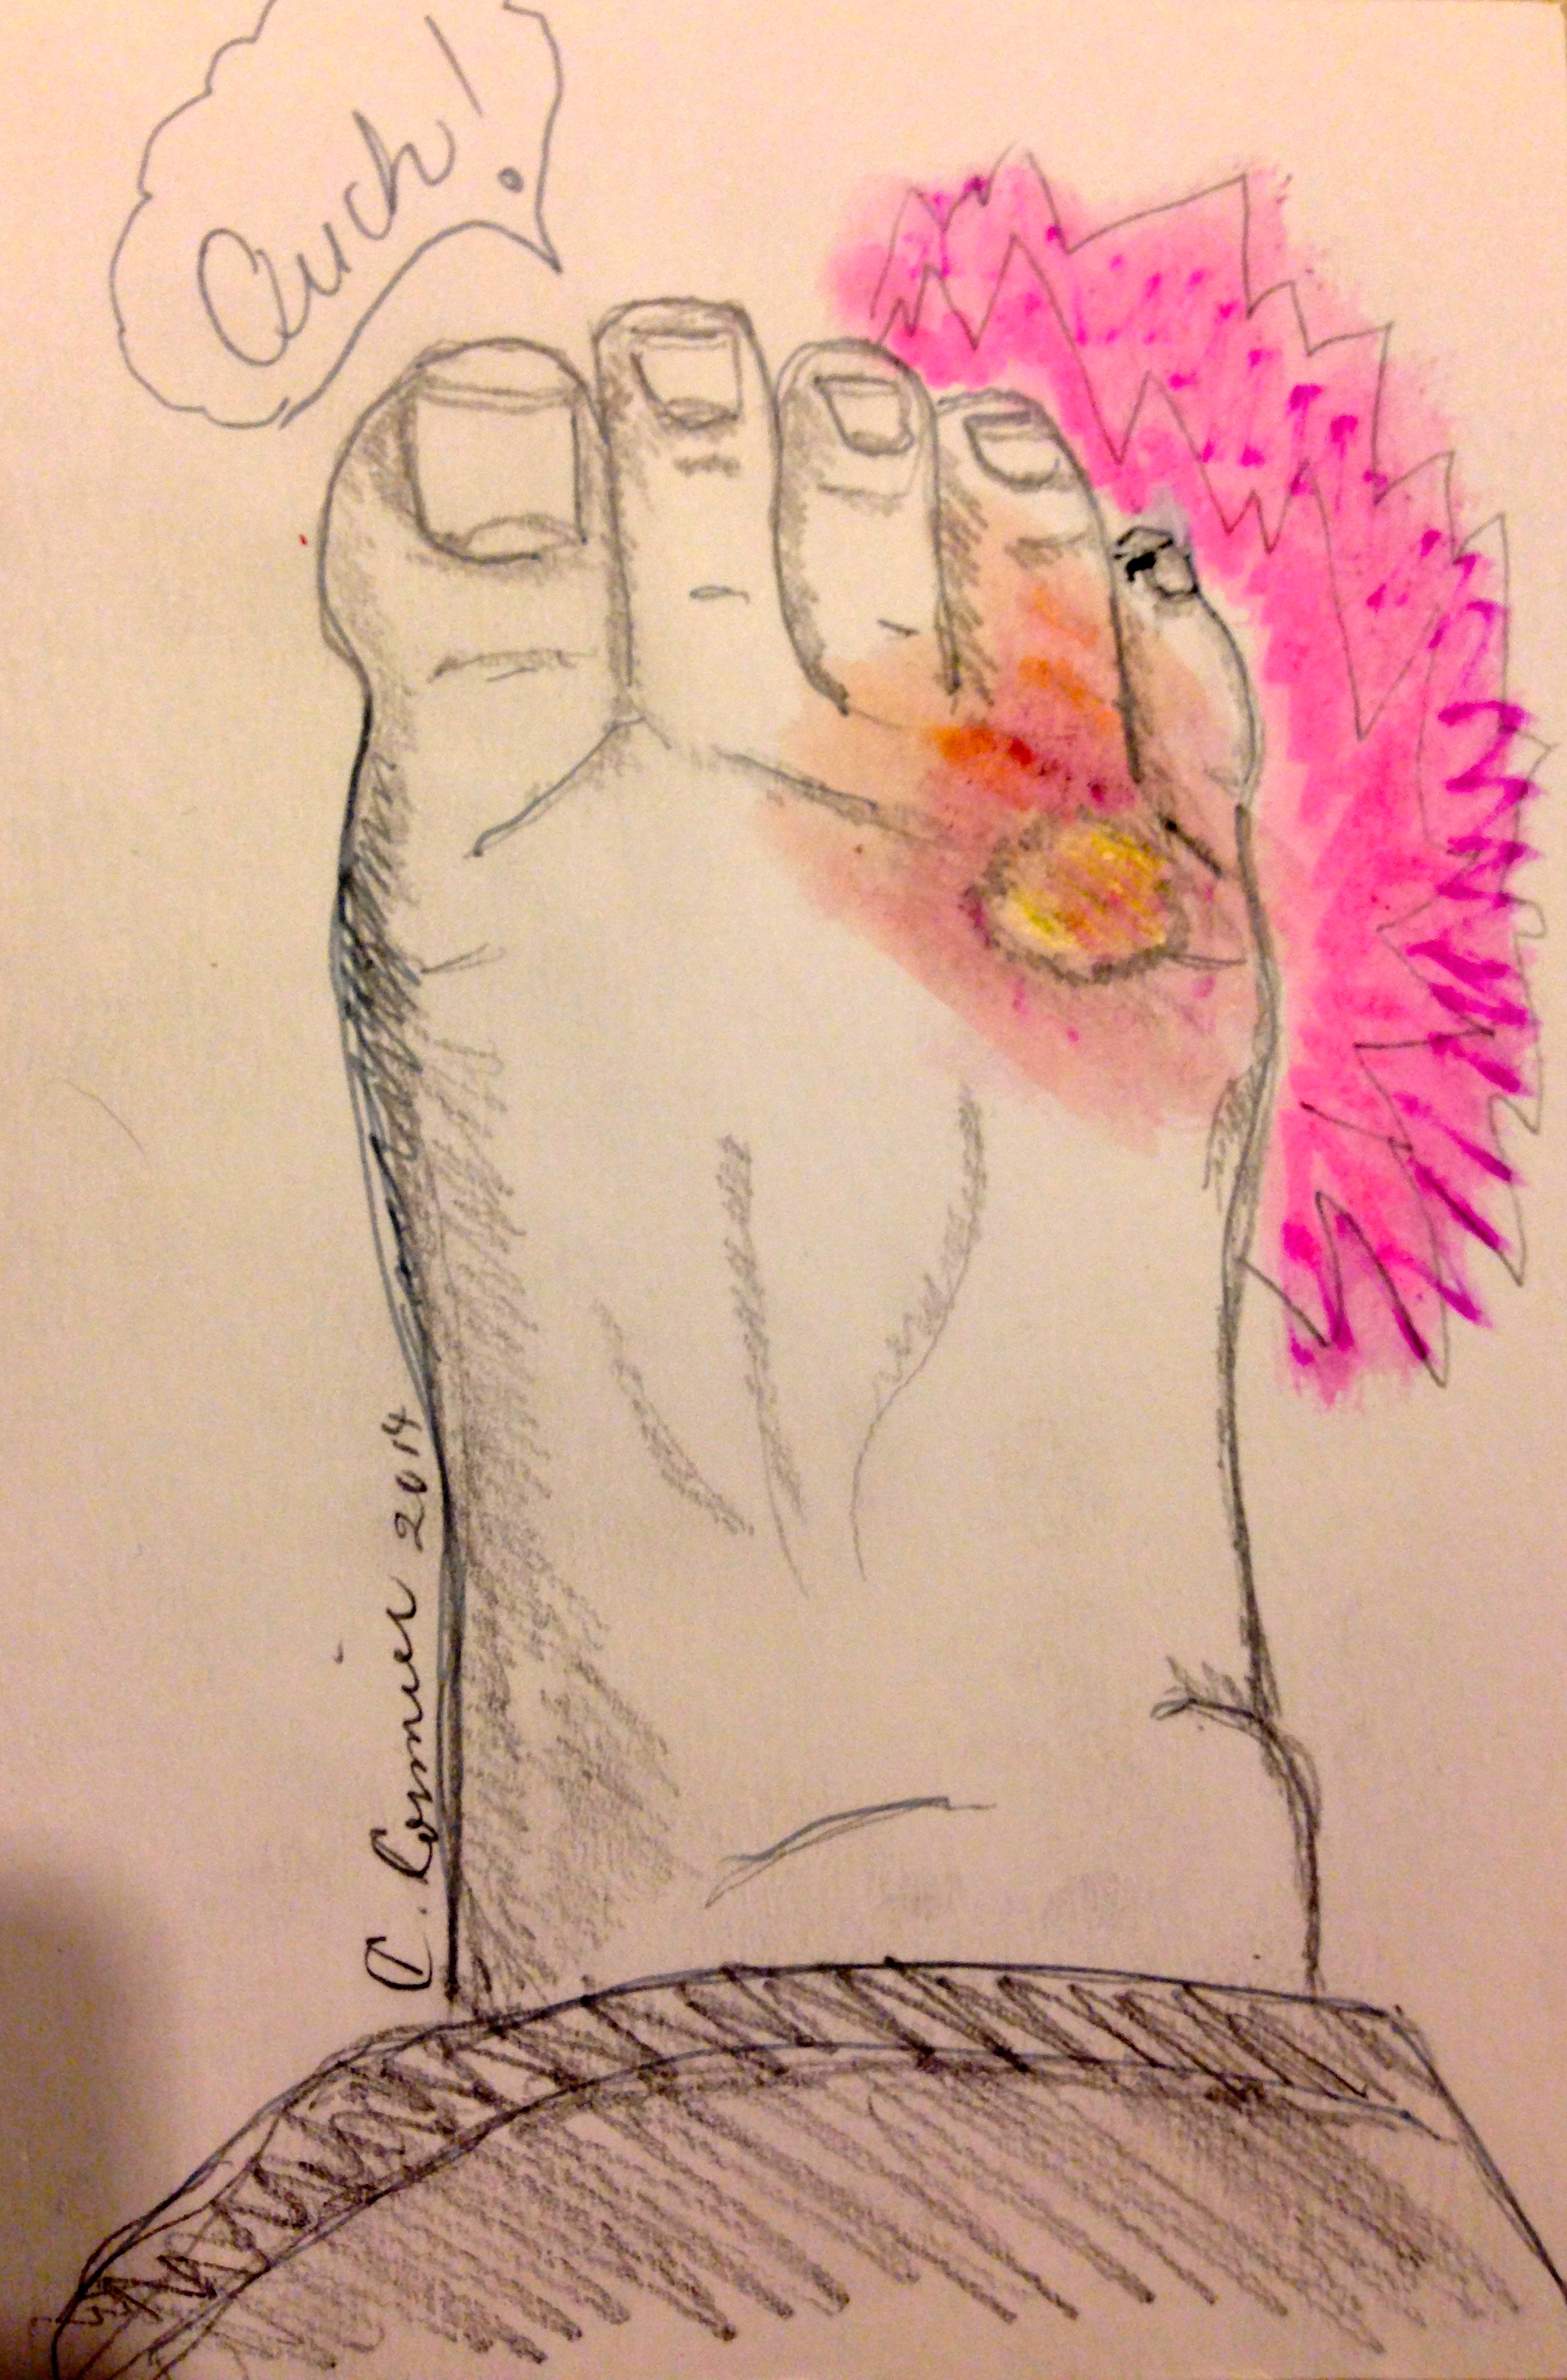
Maybe I’m taking this drawing thing a bit too far but I really didn’t think that the photograph did justice for the the pain I am feeling.
After reading about burns in restaurants I discovered that major burns are a frequent occurrence, particularly scald injuries (hot water from pasta pots). So to all my friends who work in kitchens and cook at home take this piece of advice…..wear shoes on your feet when working around hot water.
Cheers!
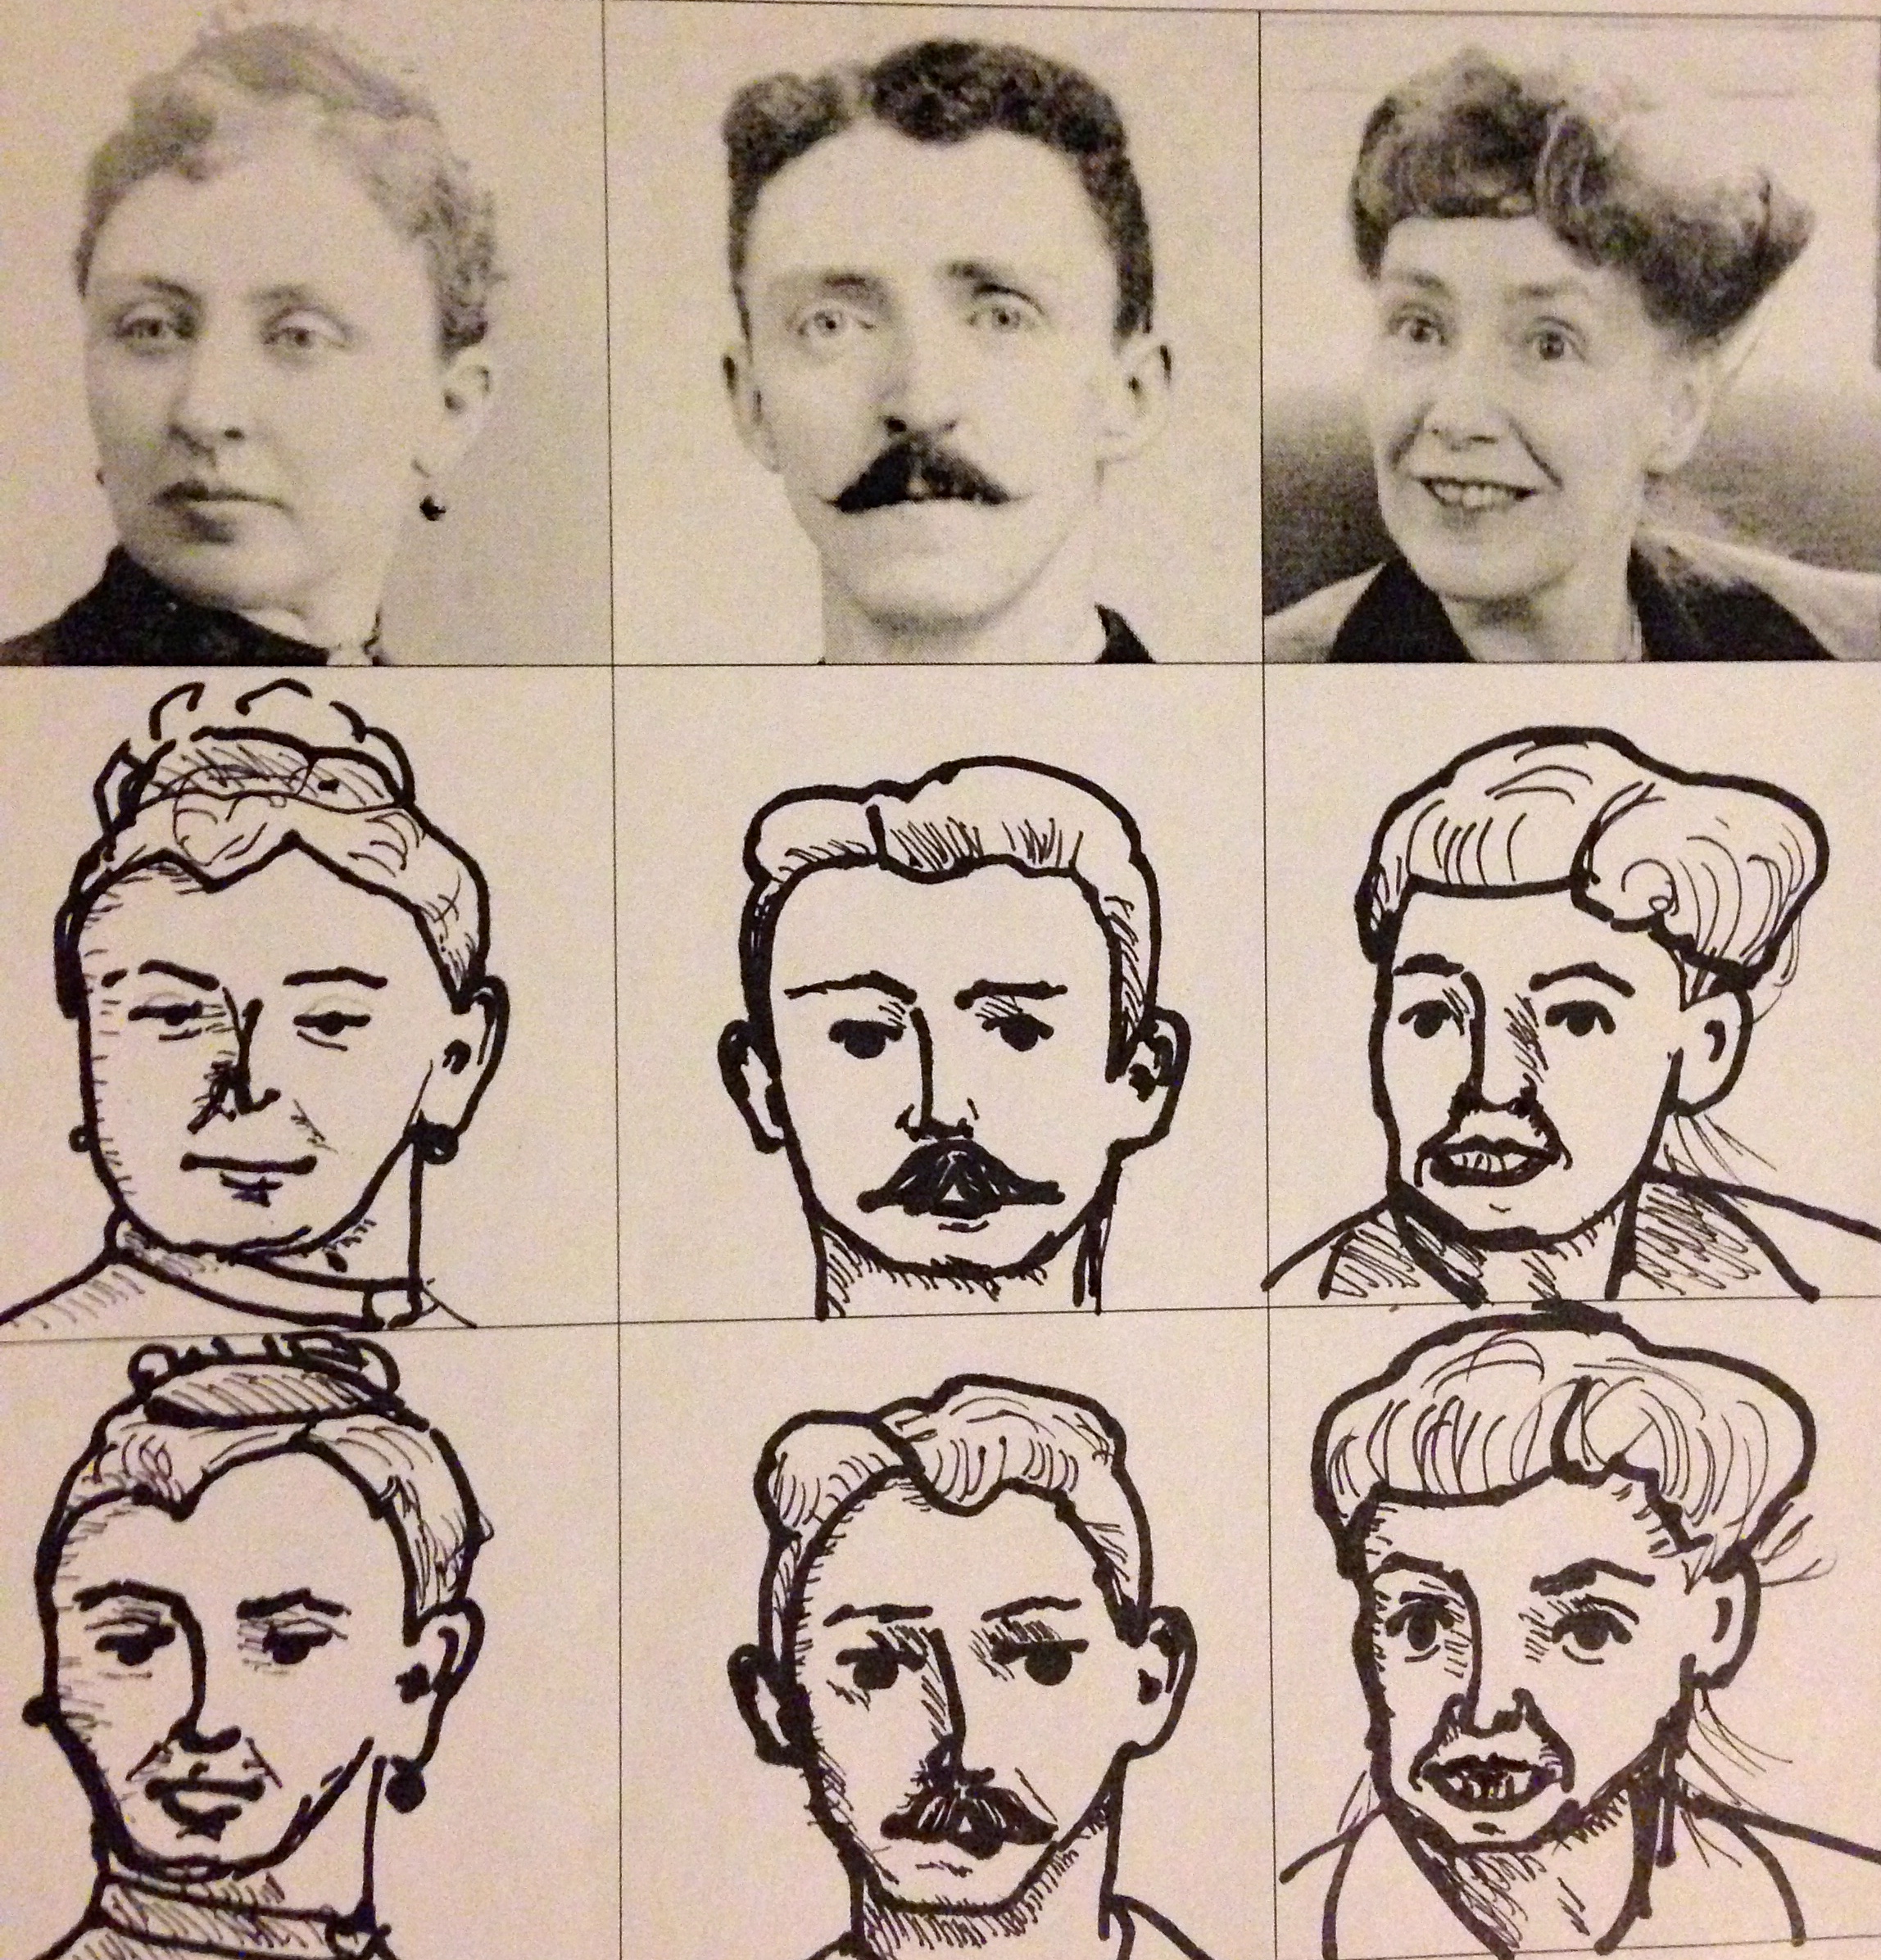
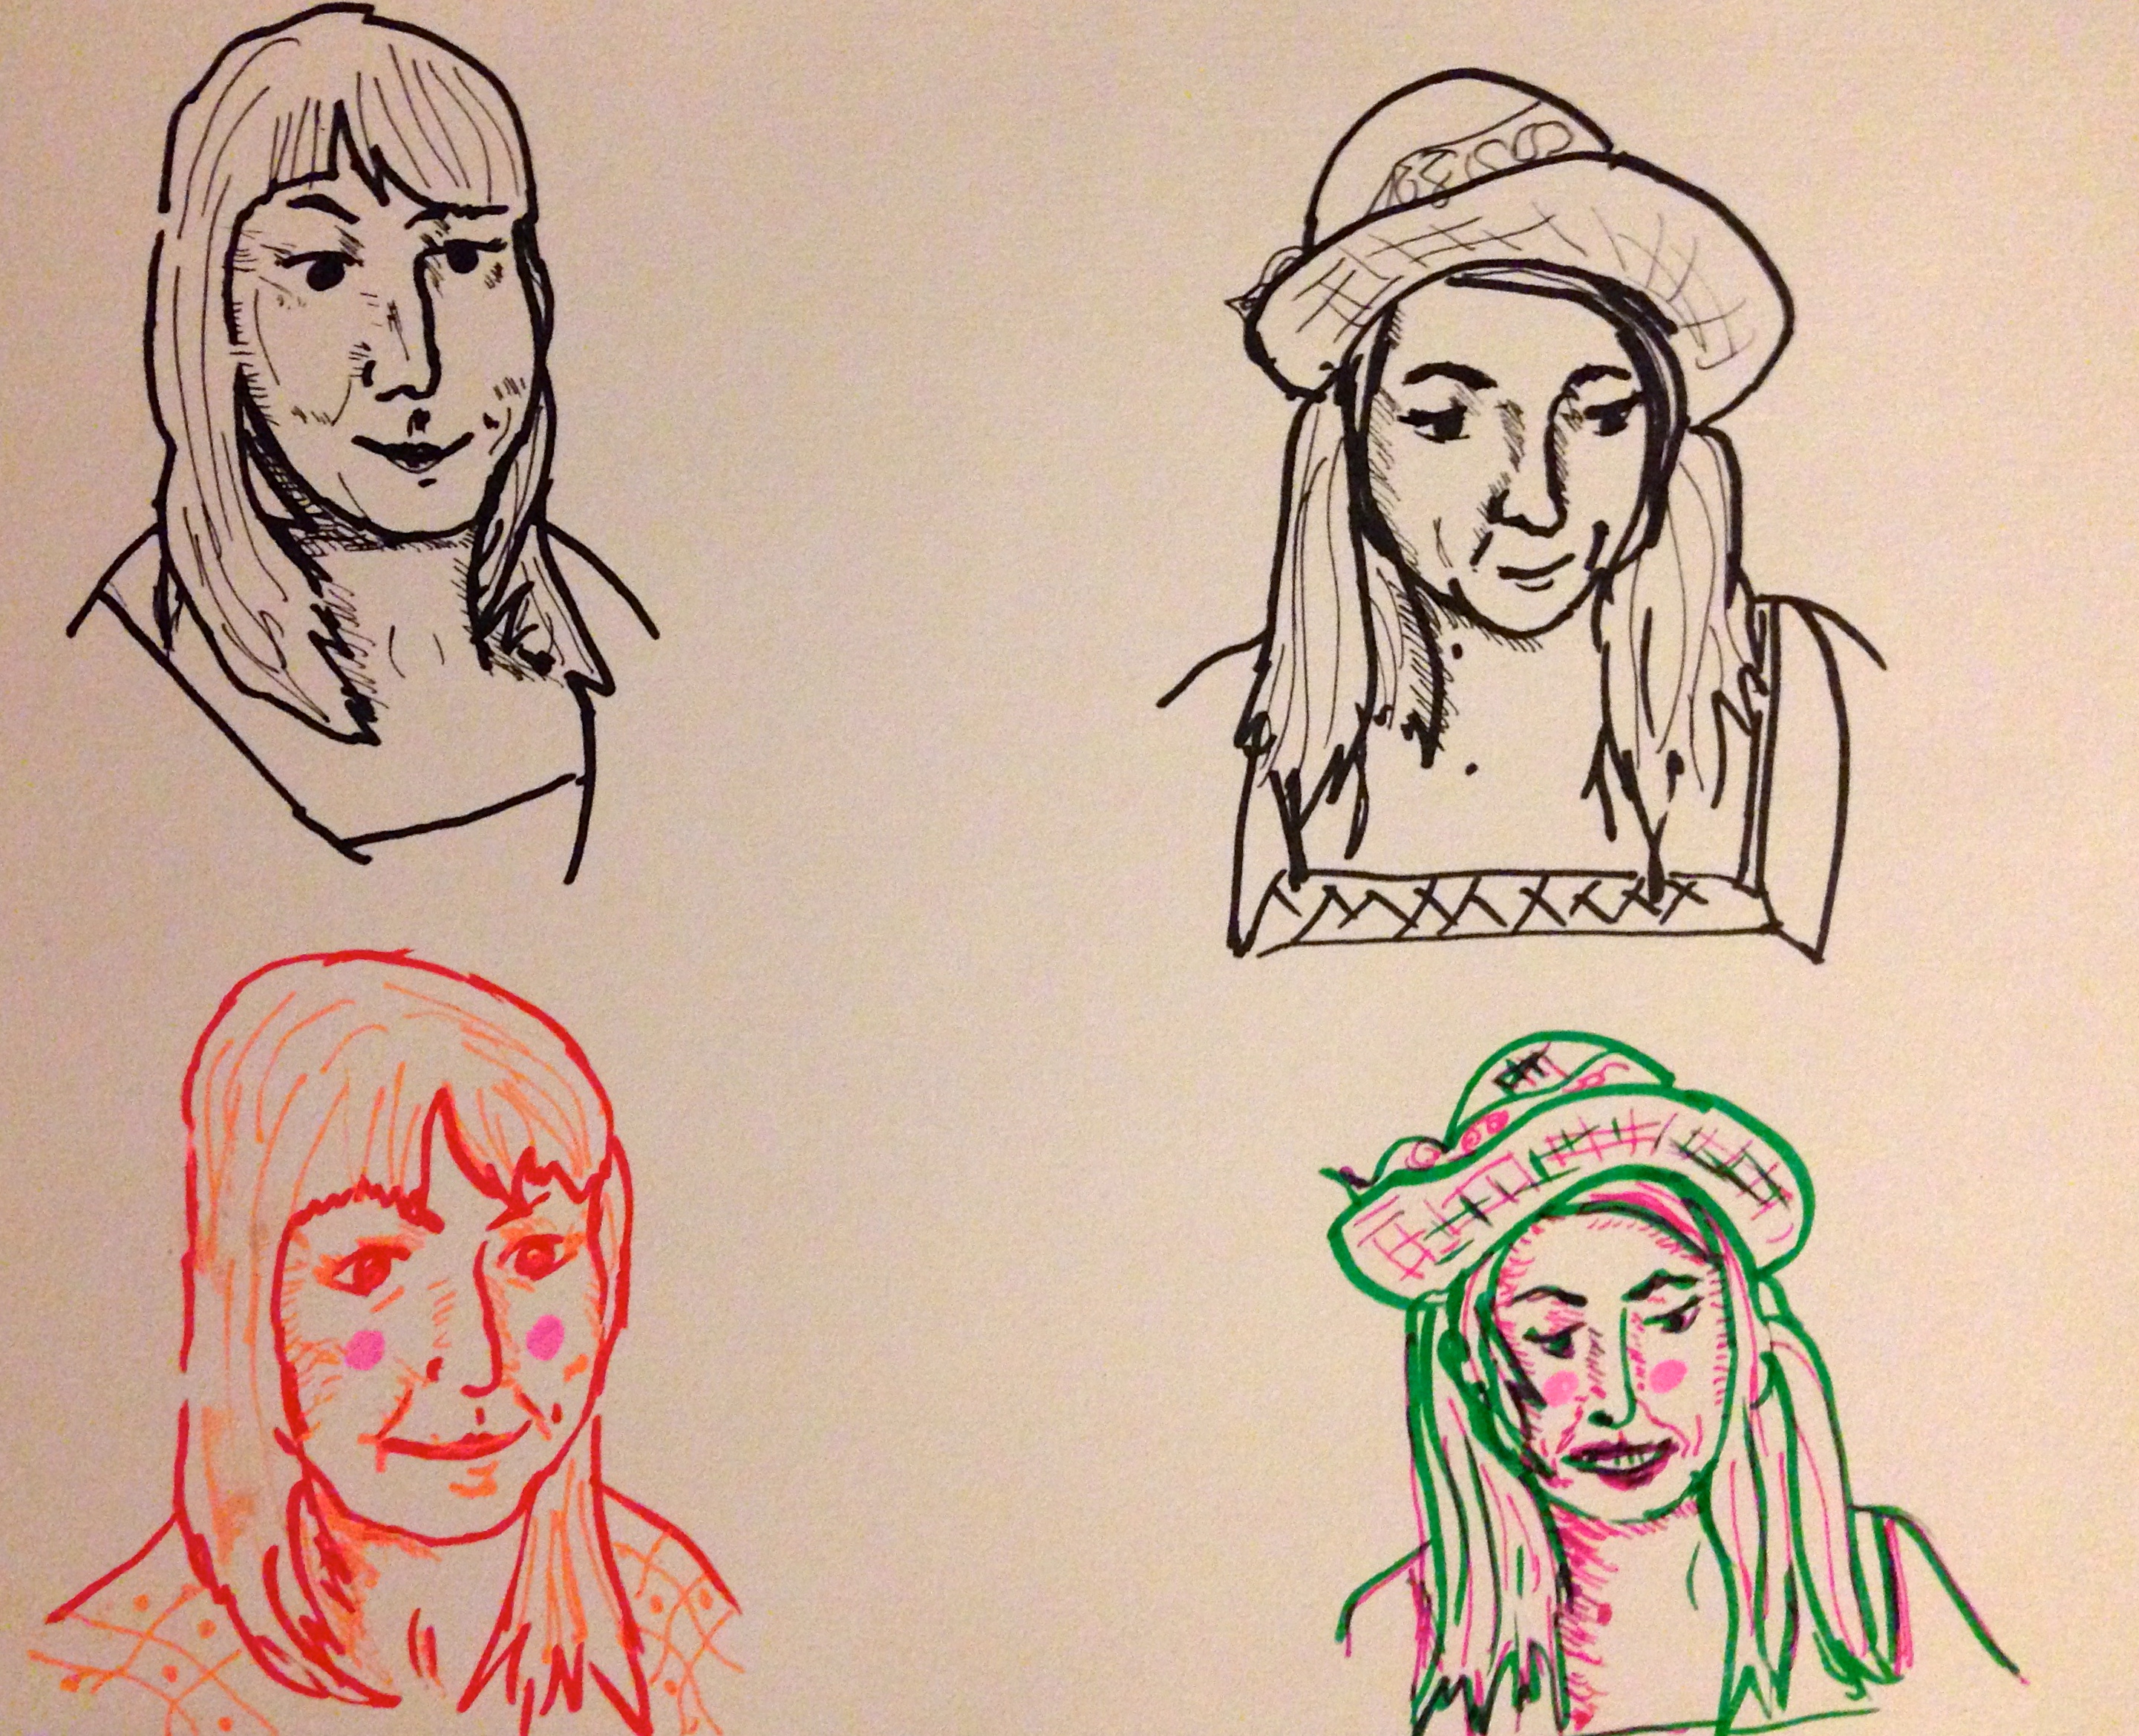
…..every day in the month of February I will post a new face that I have drawn
Now that my on-line course is finished I need to practise what I’ve learned and experiment with new techniques. I discovered a challenge over at 29 Faces Challenge and I’m hoping tp post one new drawing every day for the next 28 days. It’s called the 29 Faces Challenge because is was started in a Leap Year when February has 29 days.
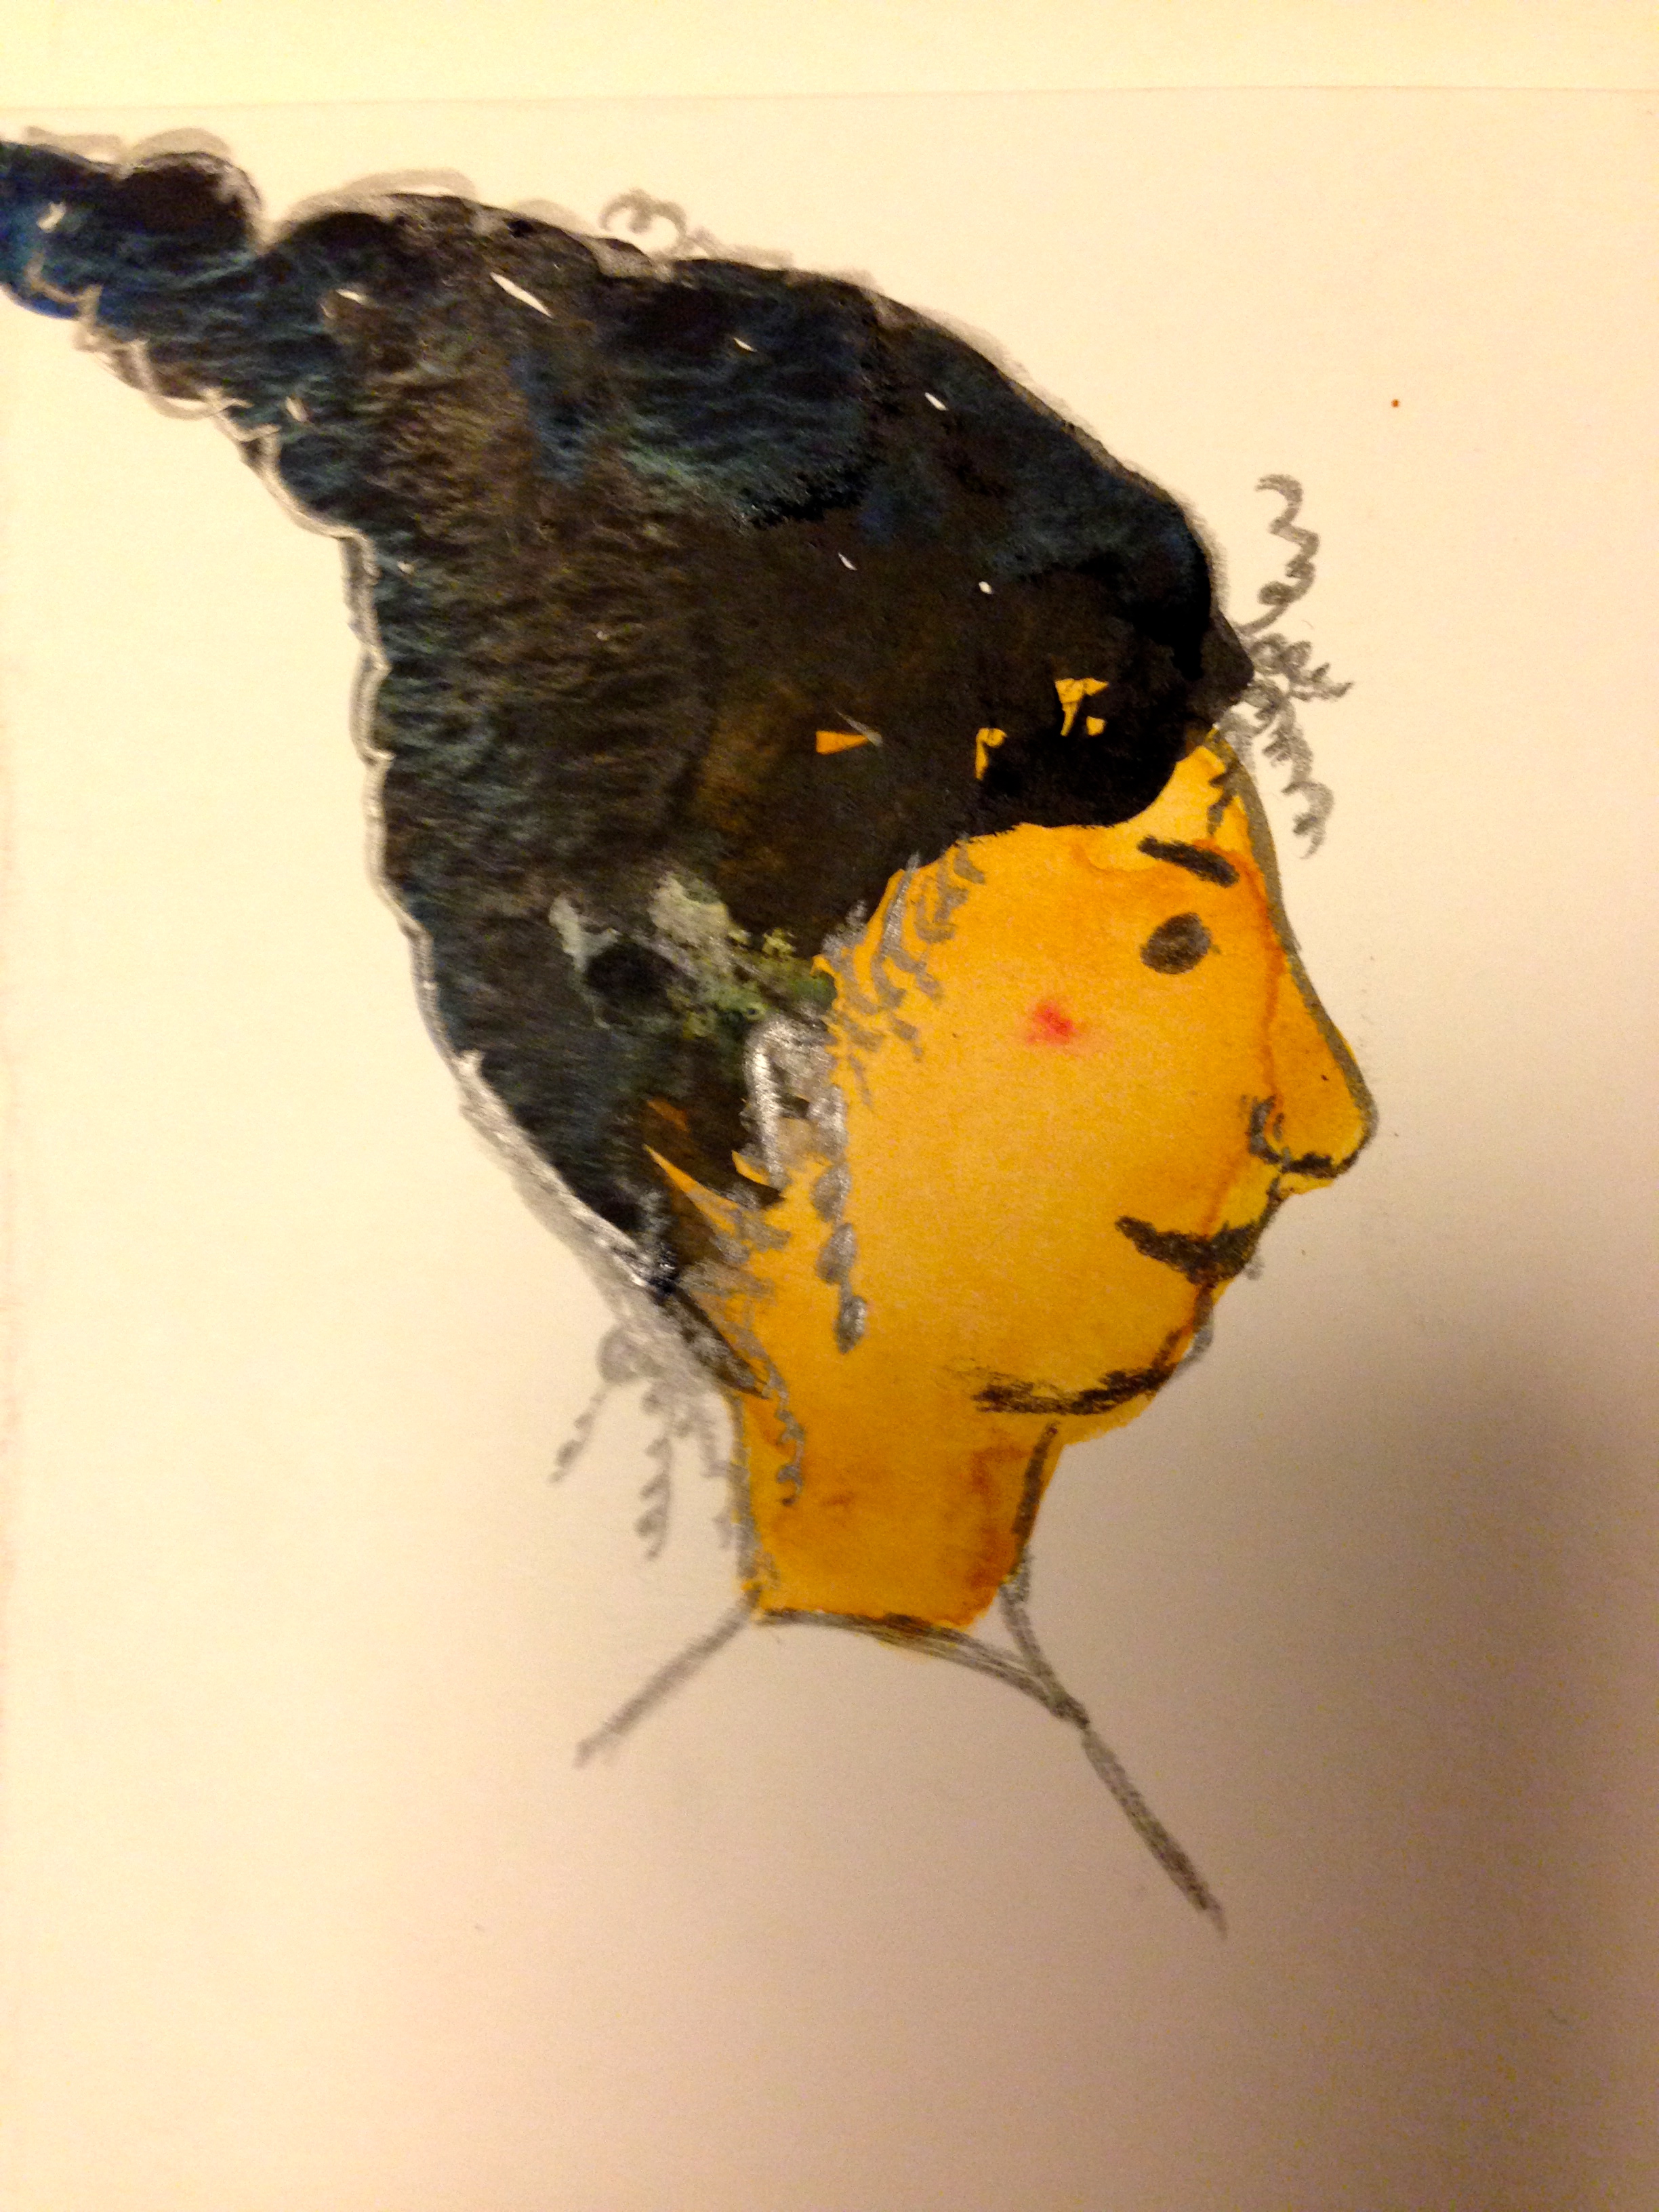
After posting the line drawing of my friend L, I got a lot of positive comments. Even my friend L liked it but our friend M thought it made her look too old. I have to agree so I’ve done a new drawing from the same photograph. I think it’s much more flattering and I see the value of doing the assignments a couple of times.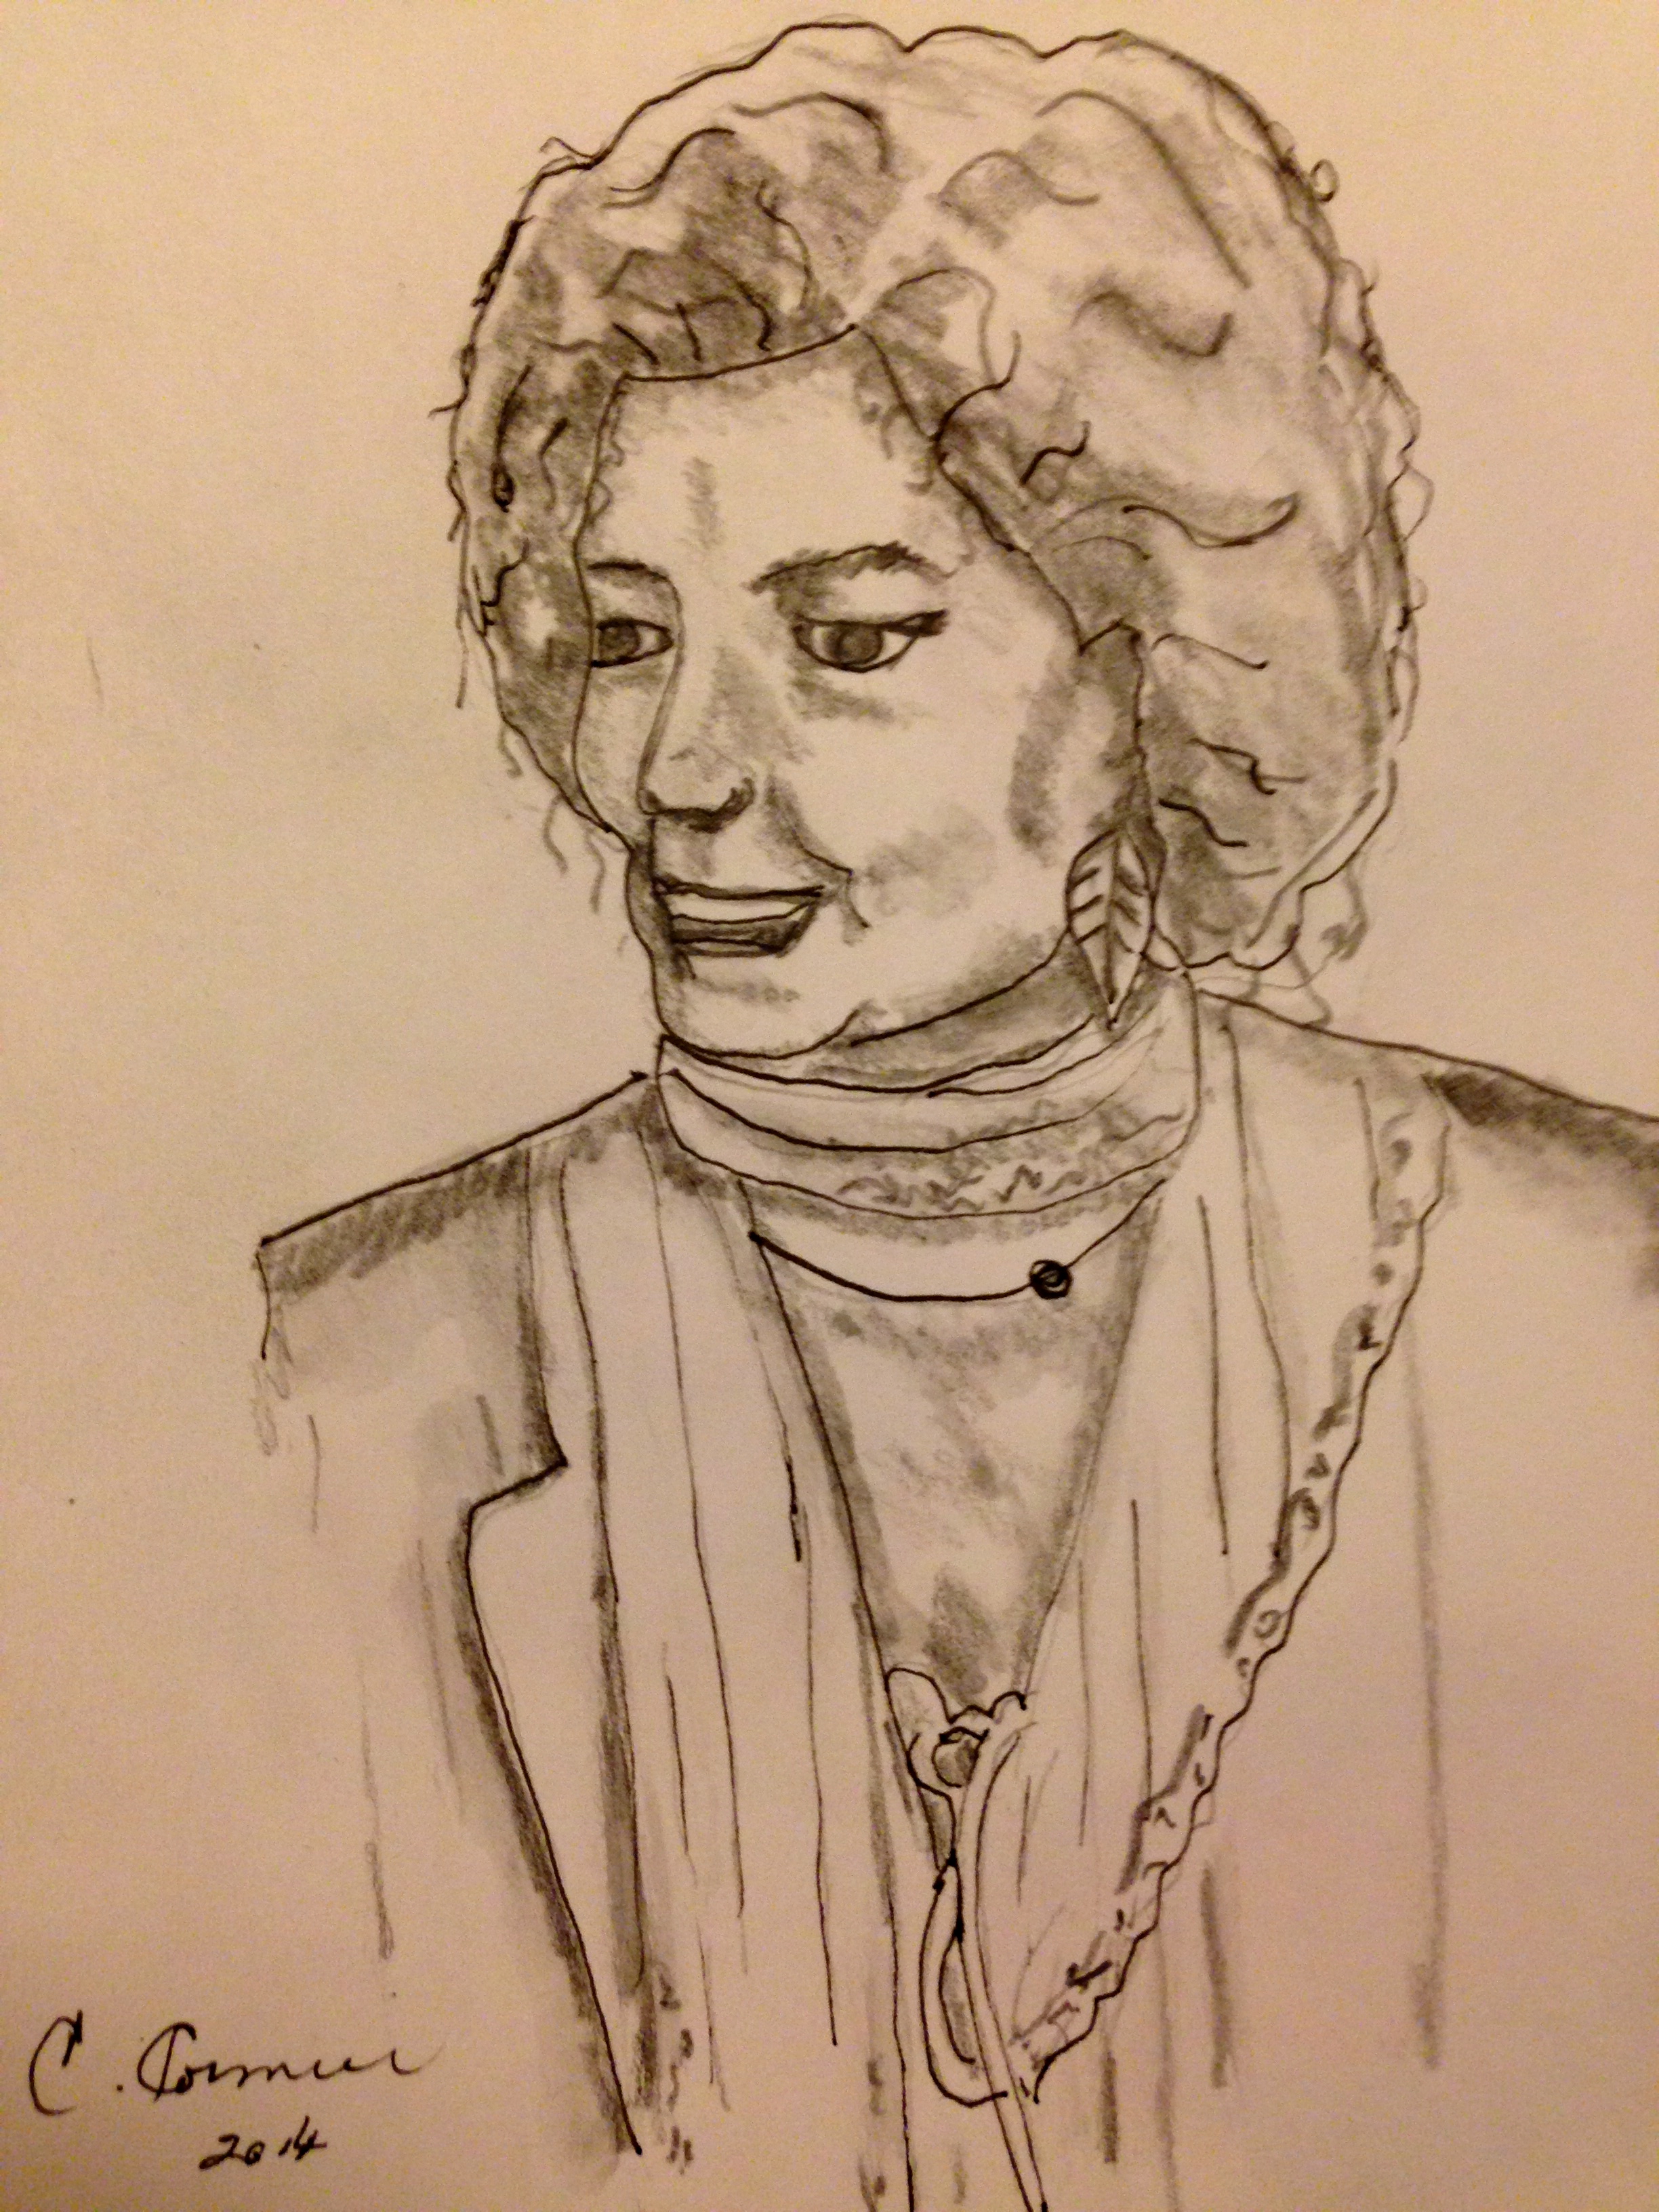
Original drawing.
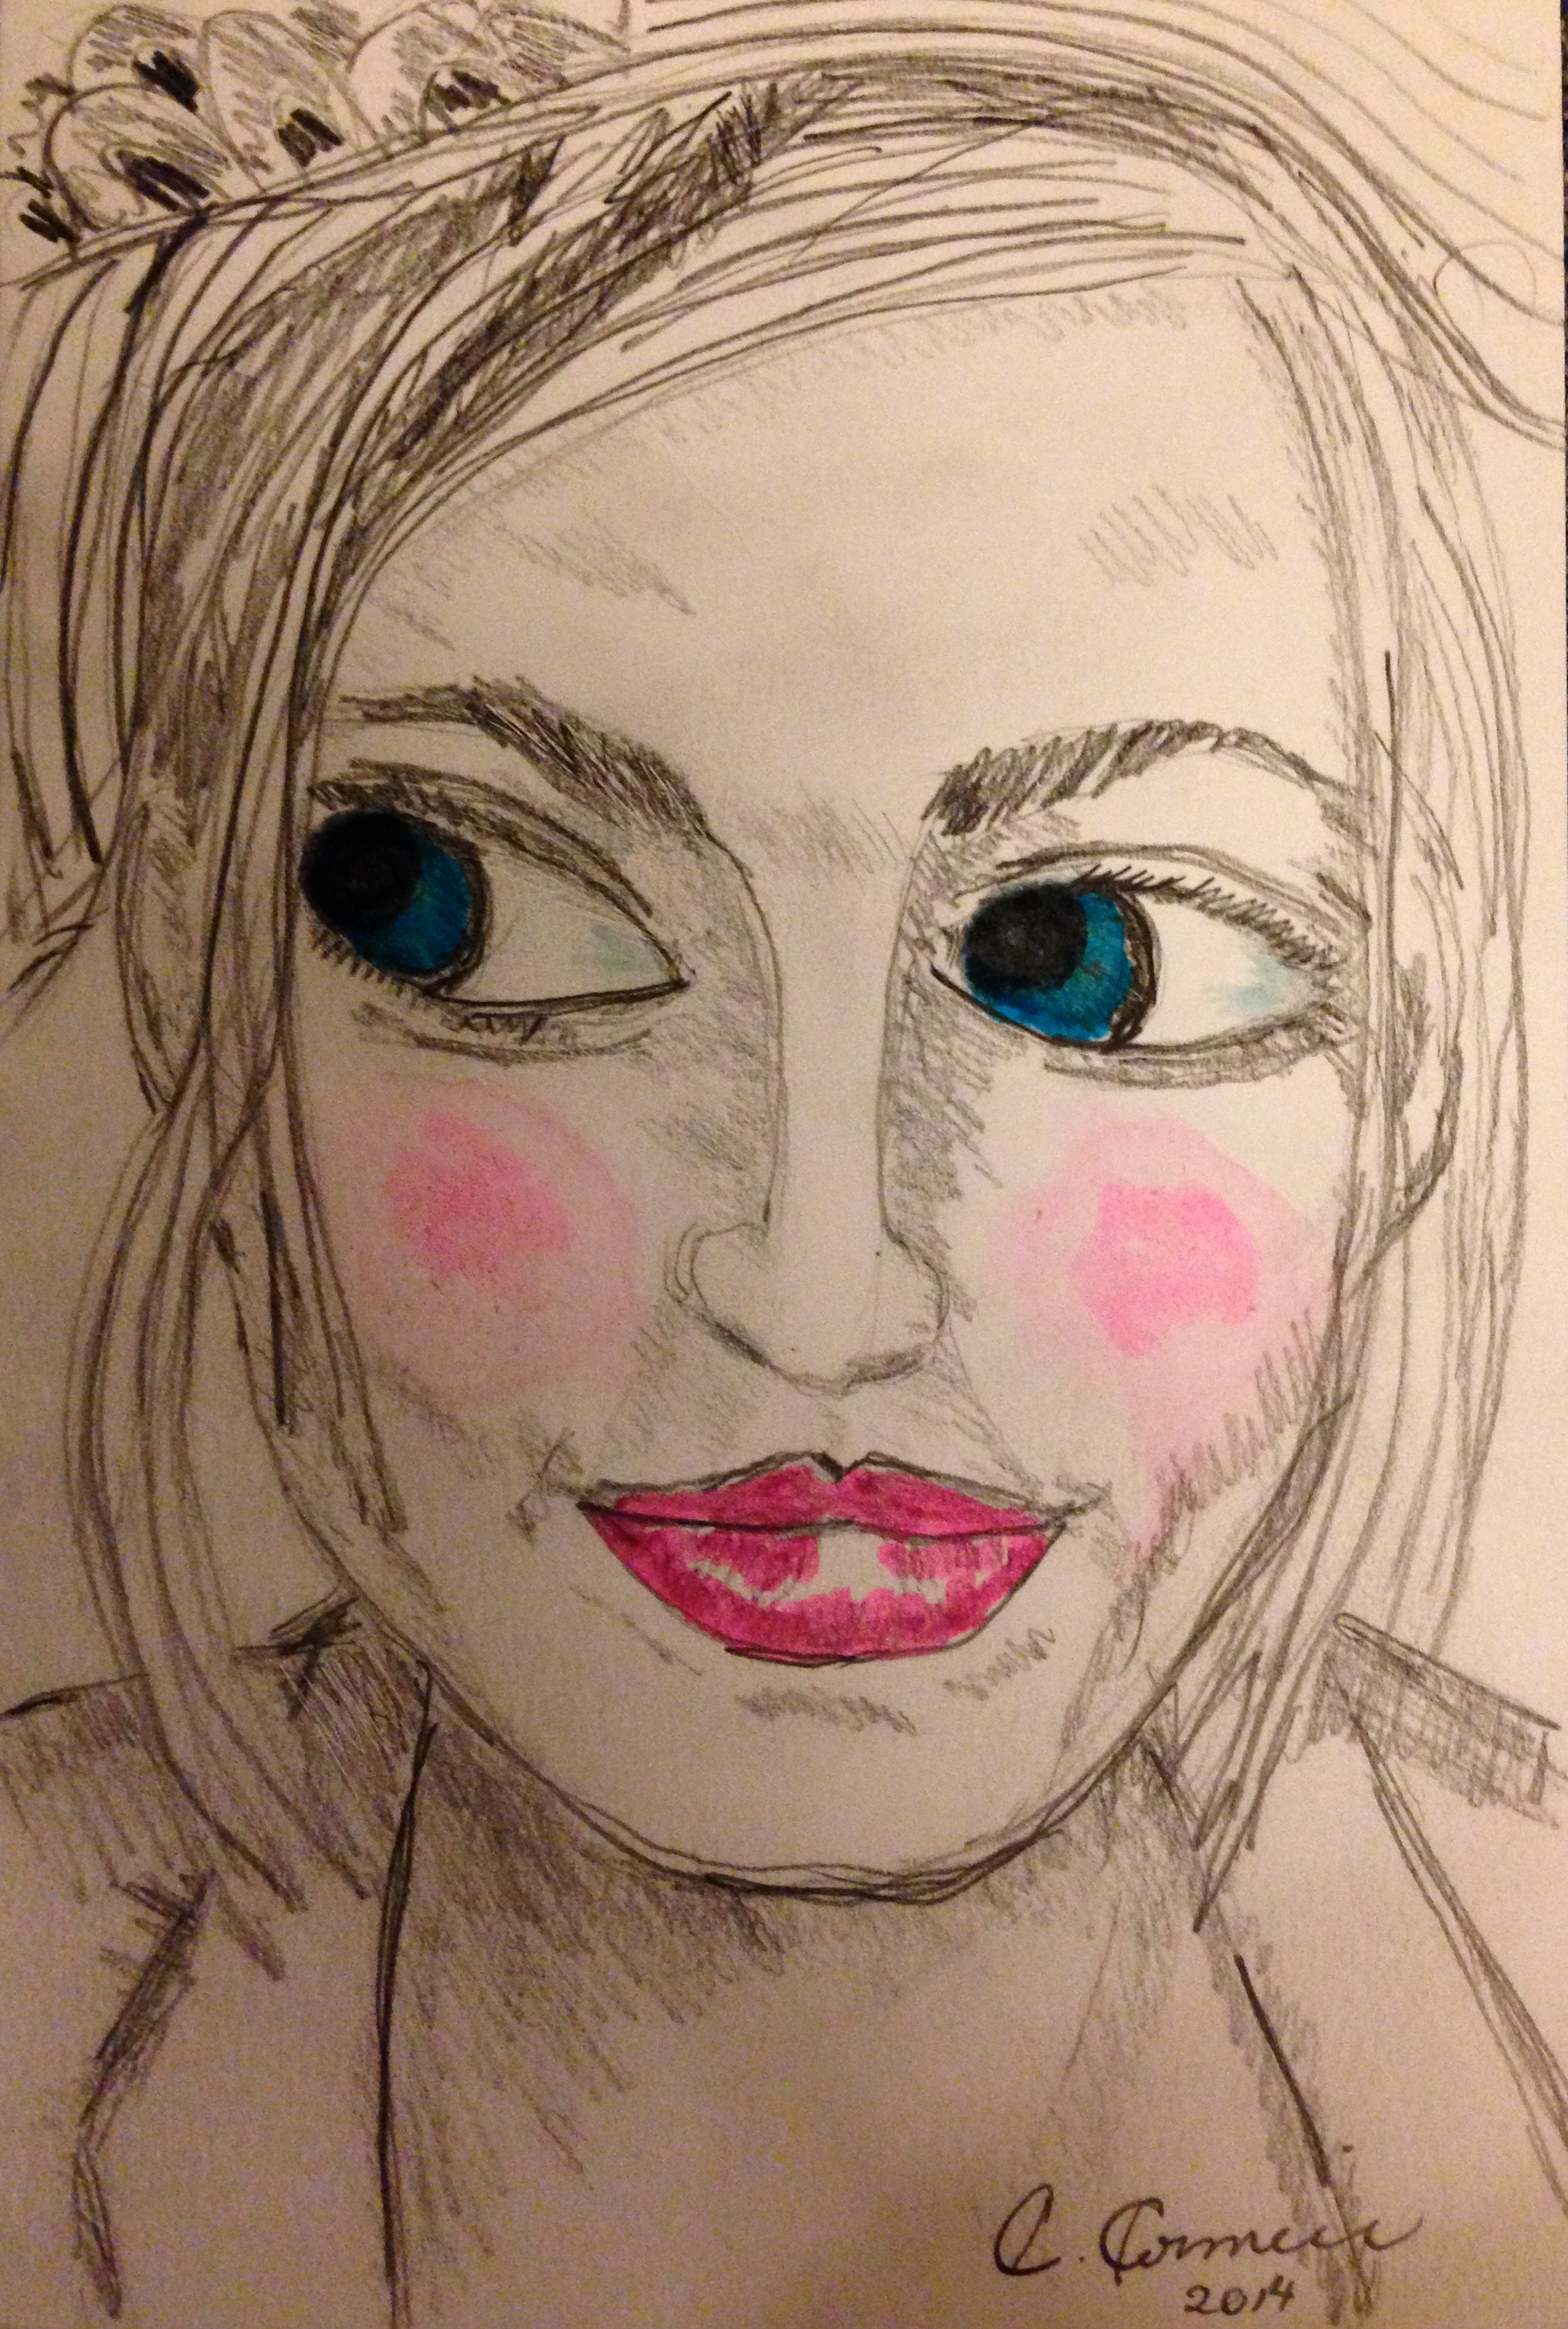
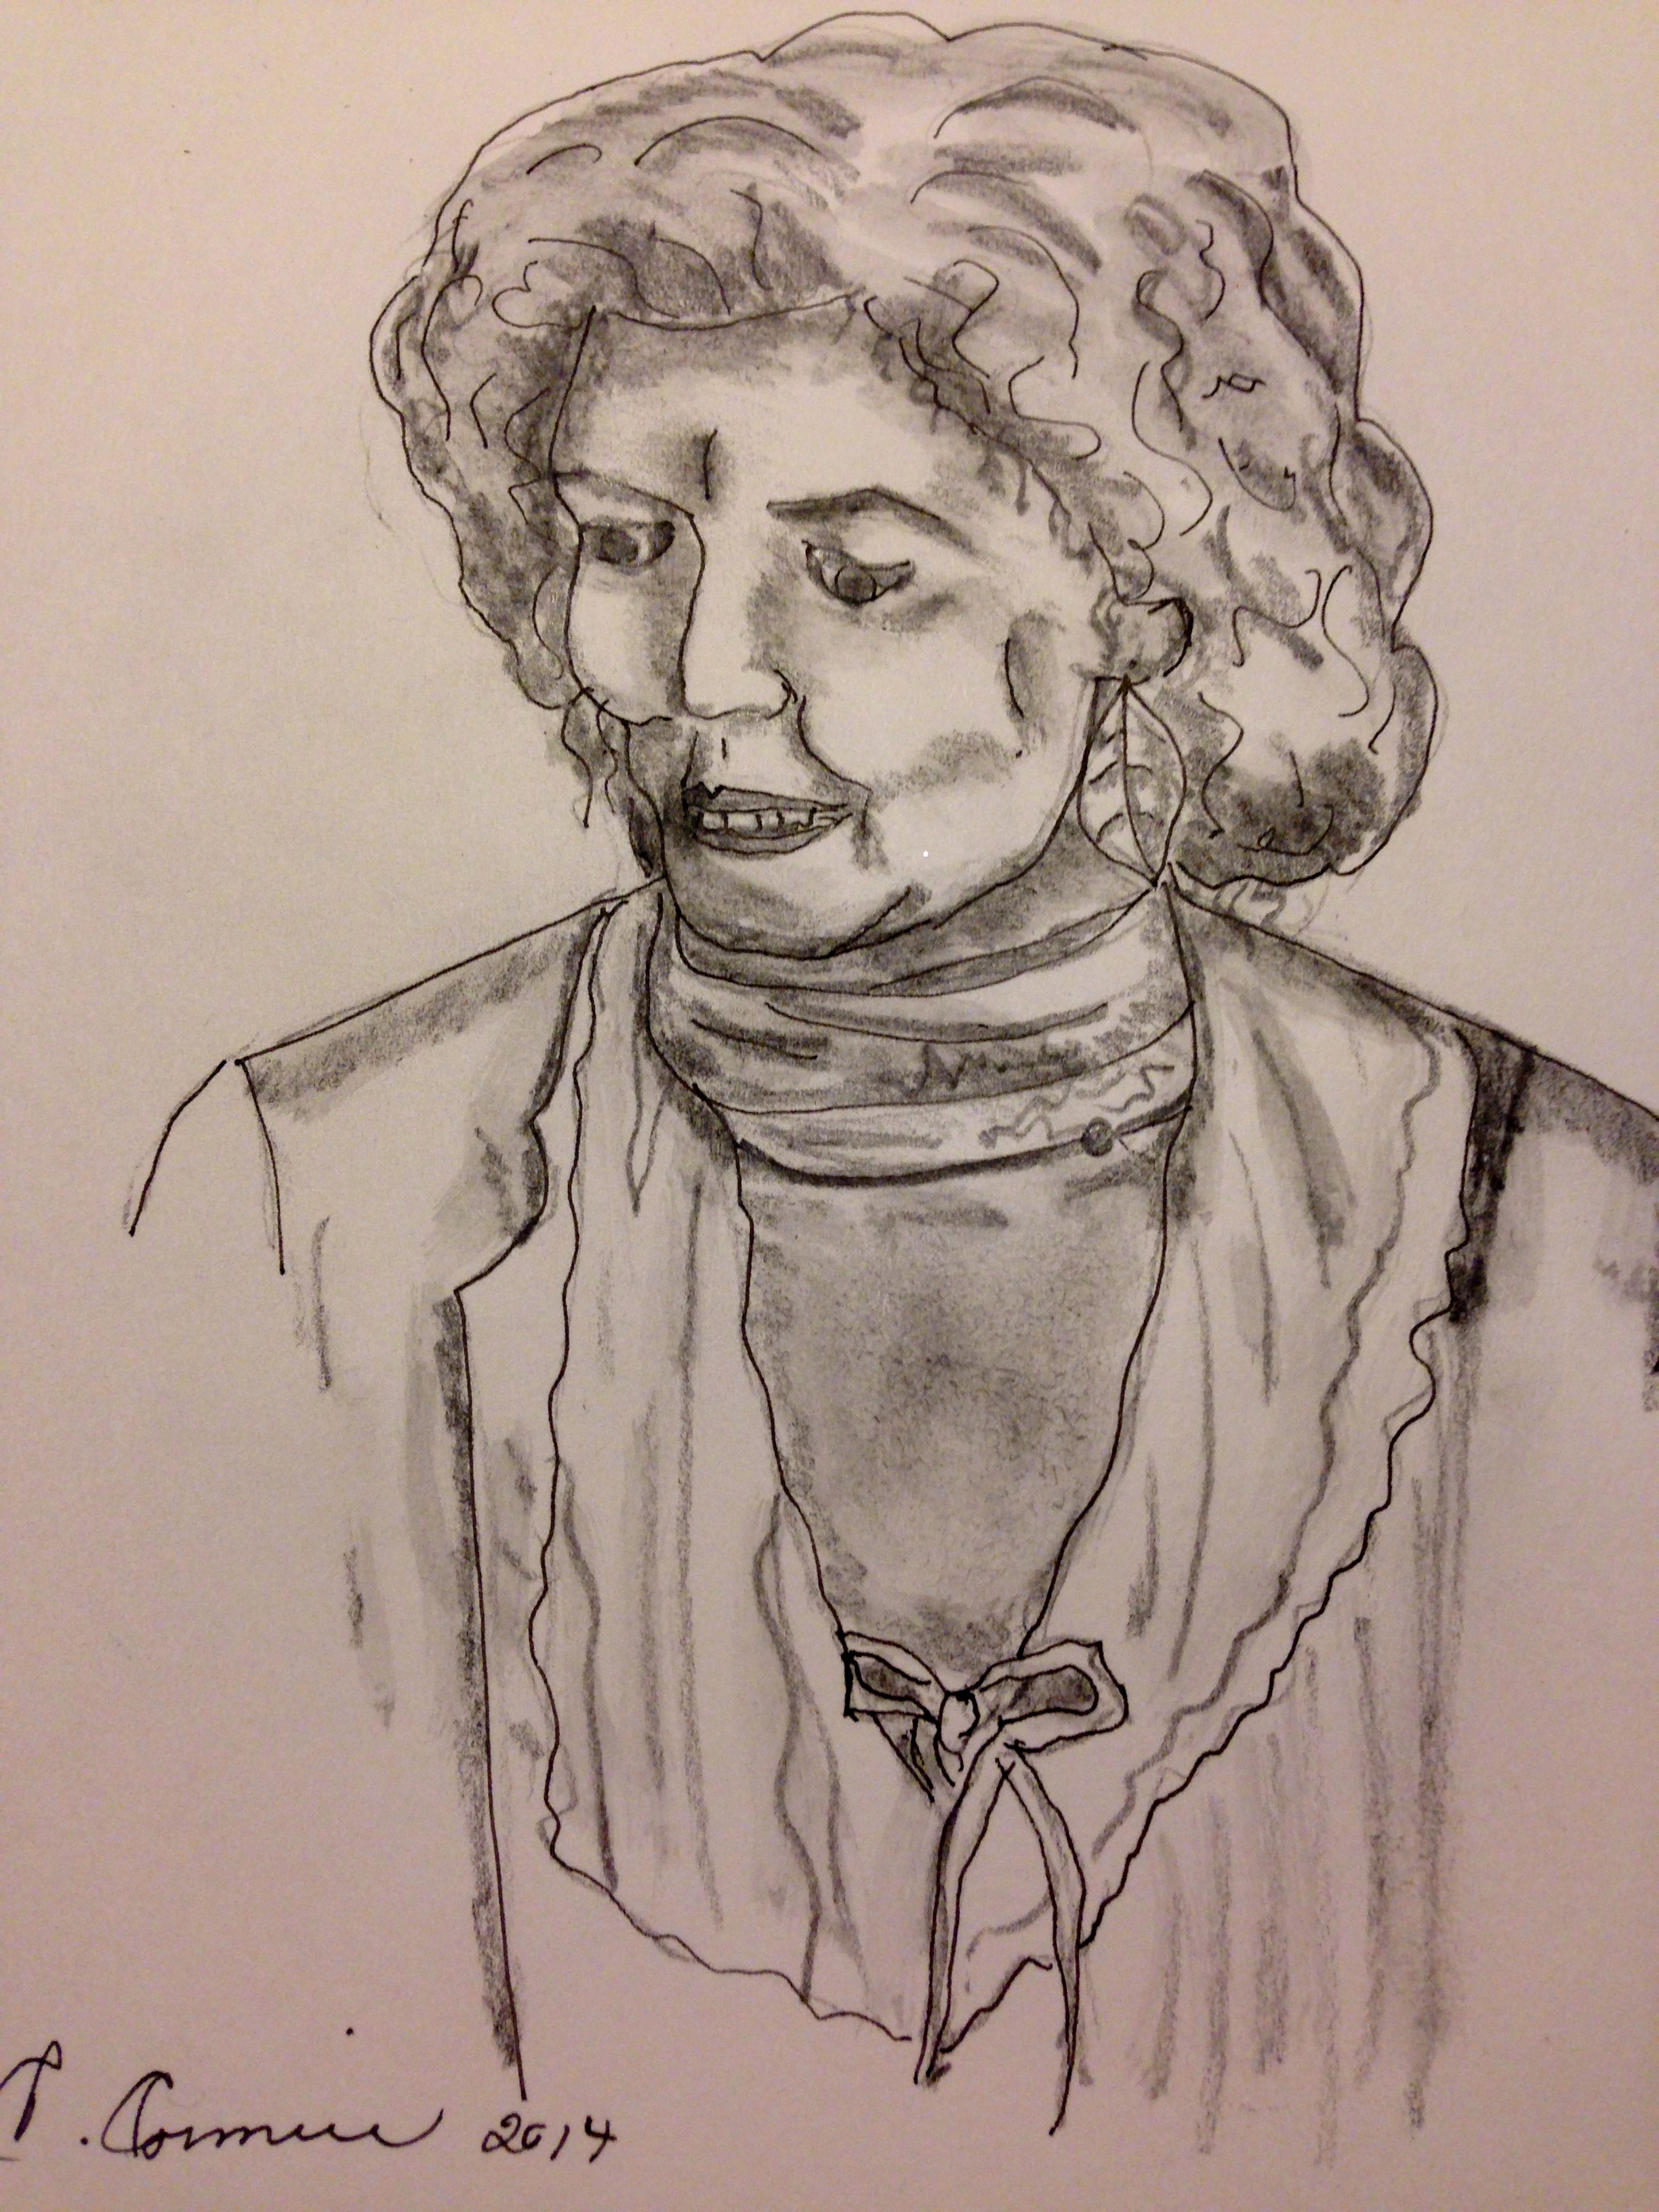
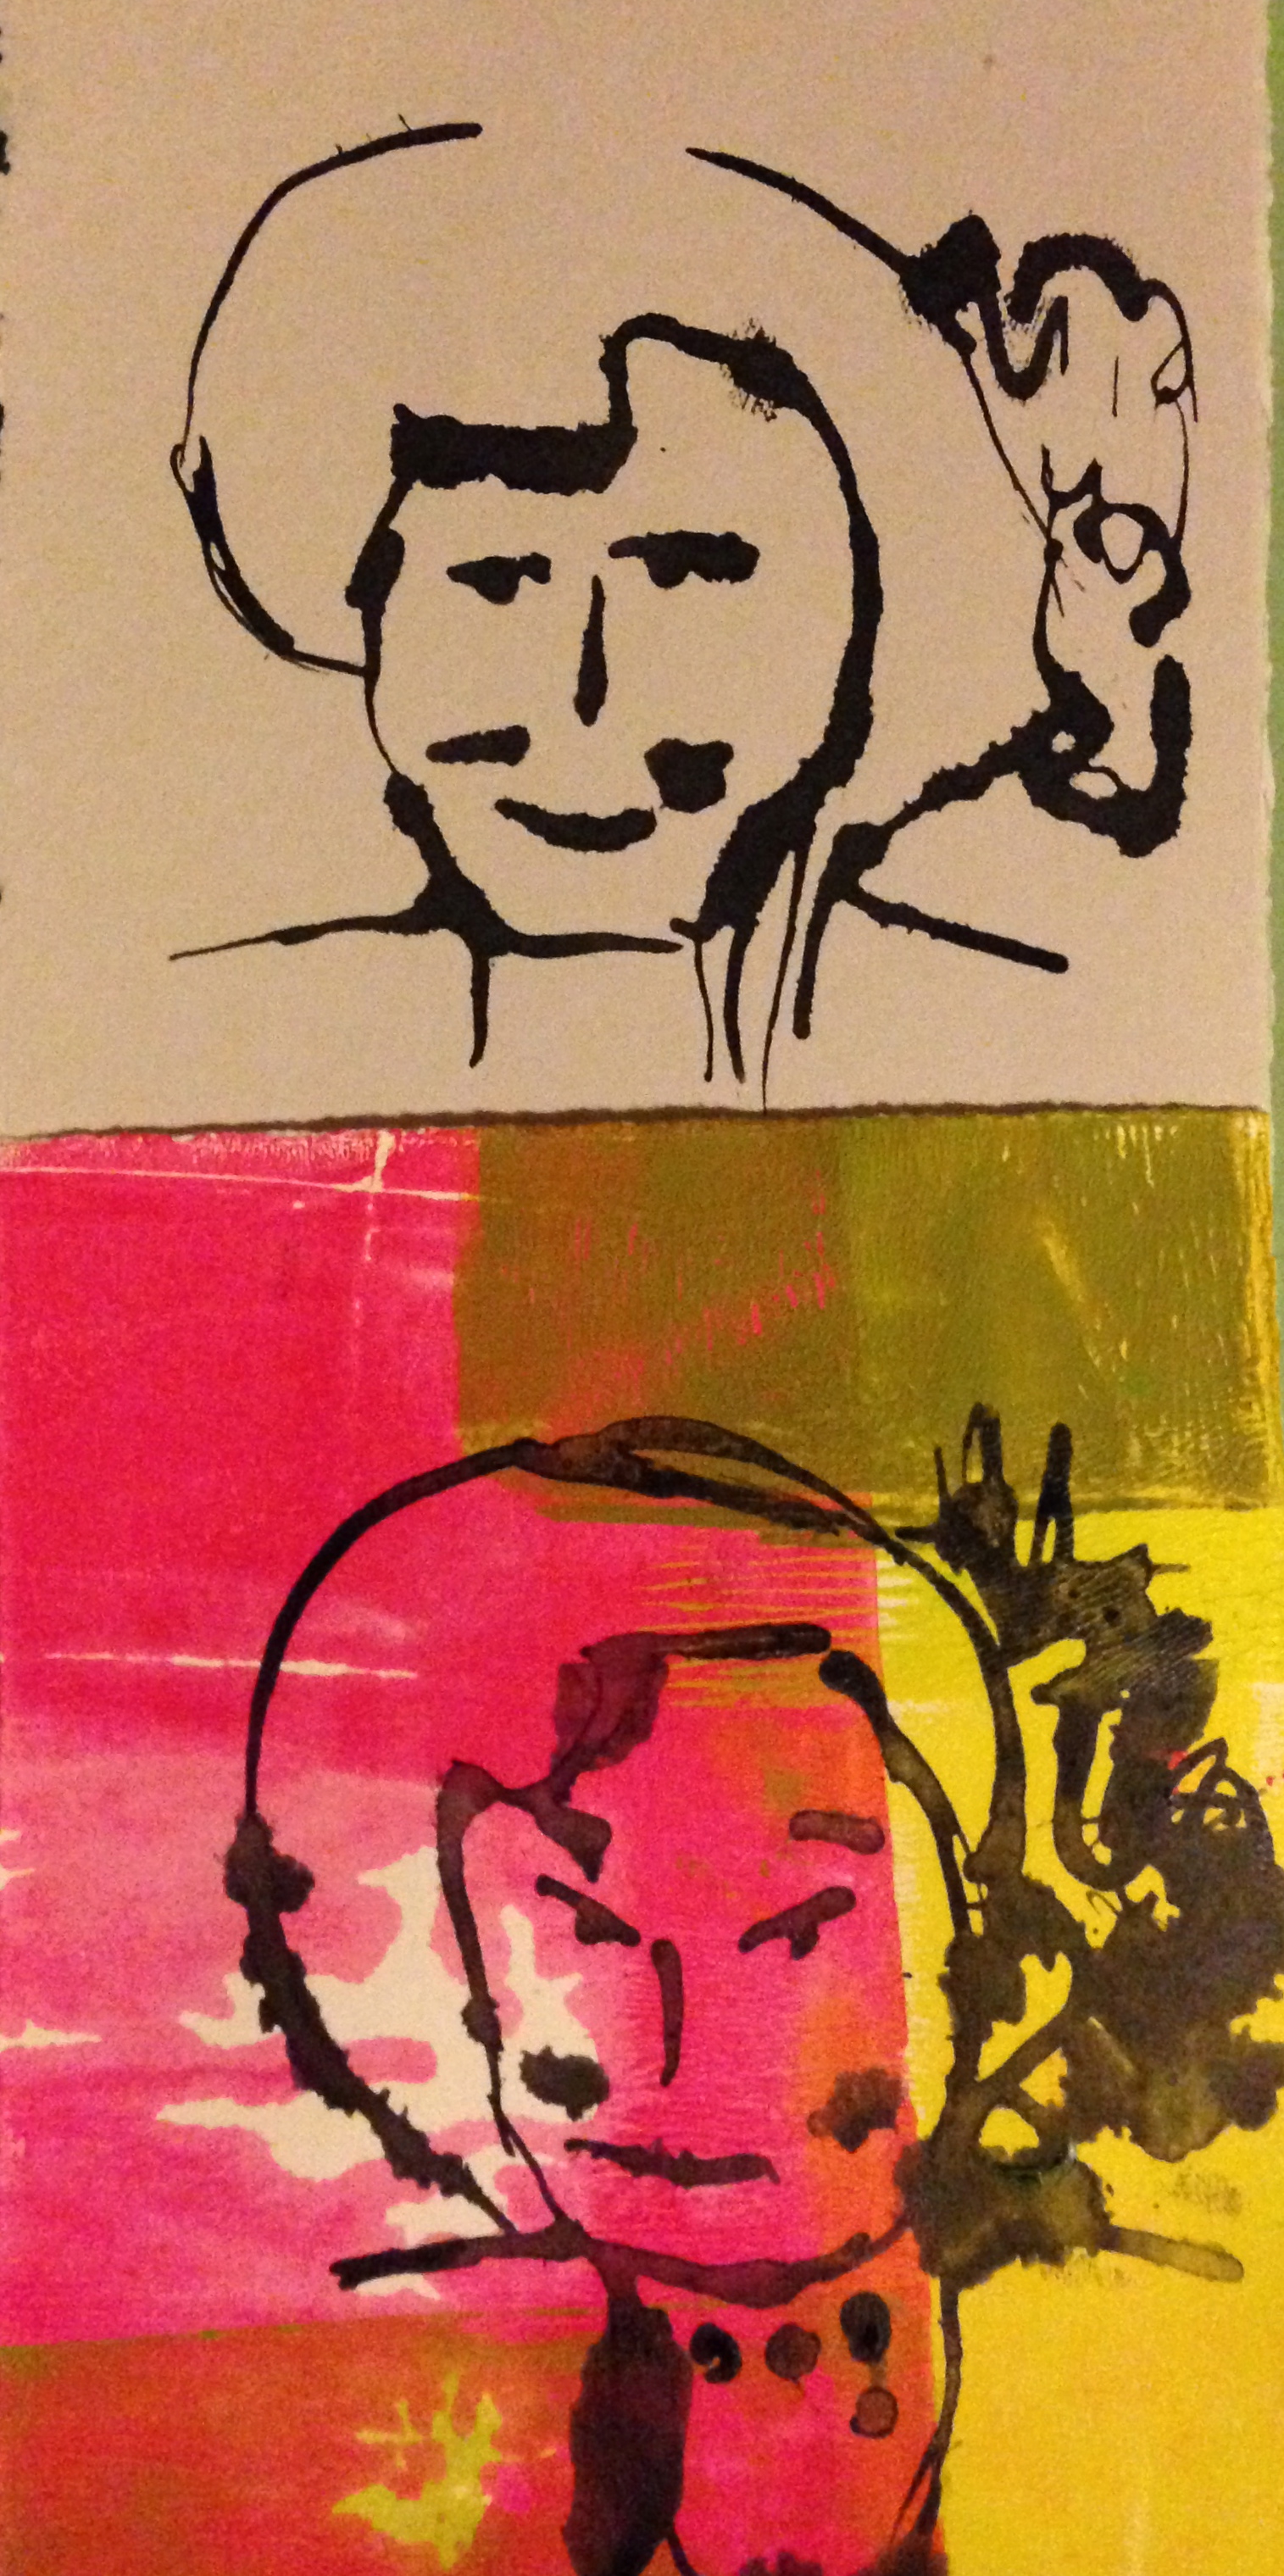
….I chose to draw the portrait of a good friend….the image came from a photograph
One of the assignments, yesterday, was to draw a realistic image from a photograph. I had a great shot of my friend L taken at my daughter’s shower a couple of years ago. It’s not a perfect likeness but it’s pretty close.
The assignment required that I add water to the pencil to shade the picture. Parts of it turned out darker than I would have liked so I think it ages my friend a bit. Other than that I’m pretty happy with it. Makes me want to experiment with my watercolours.
Cheers!
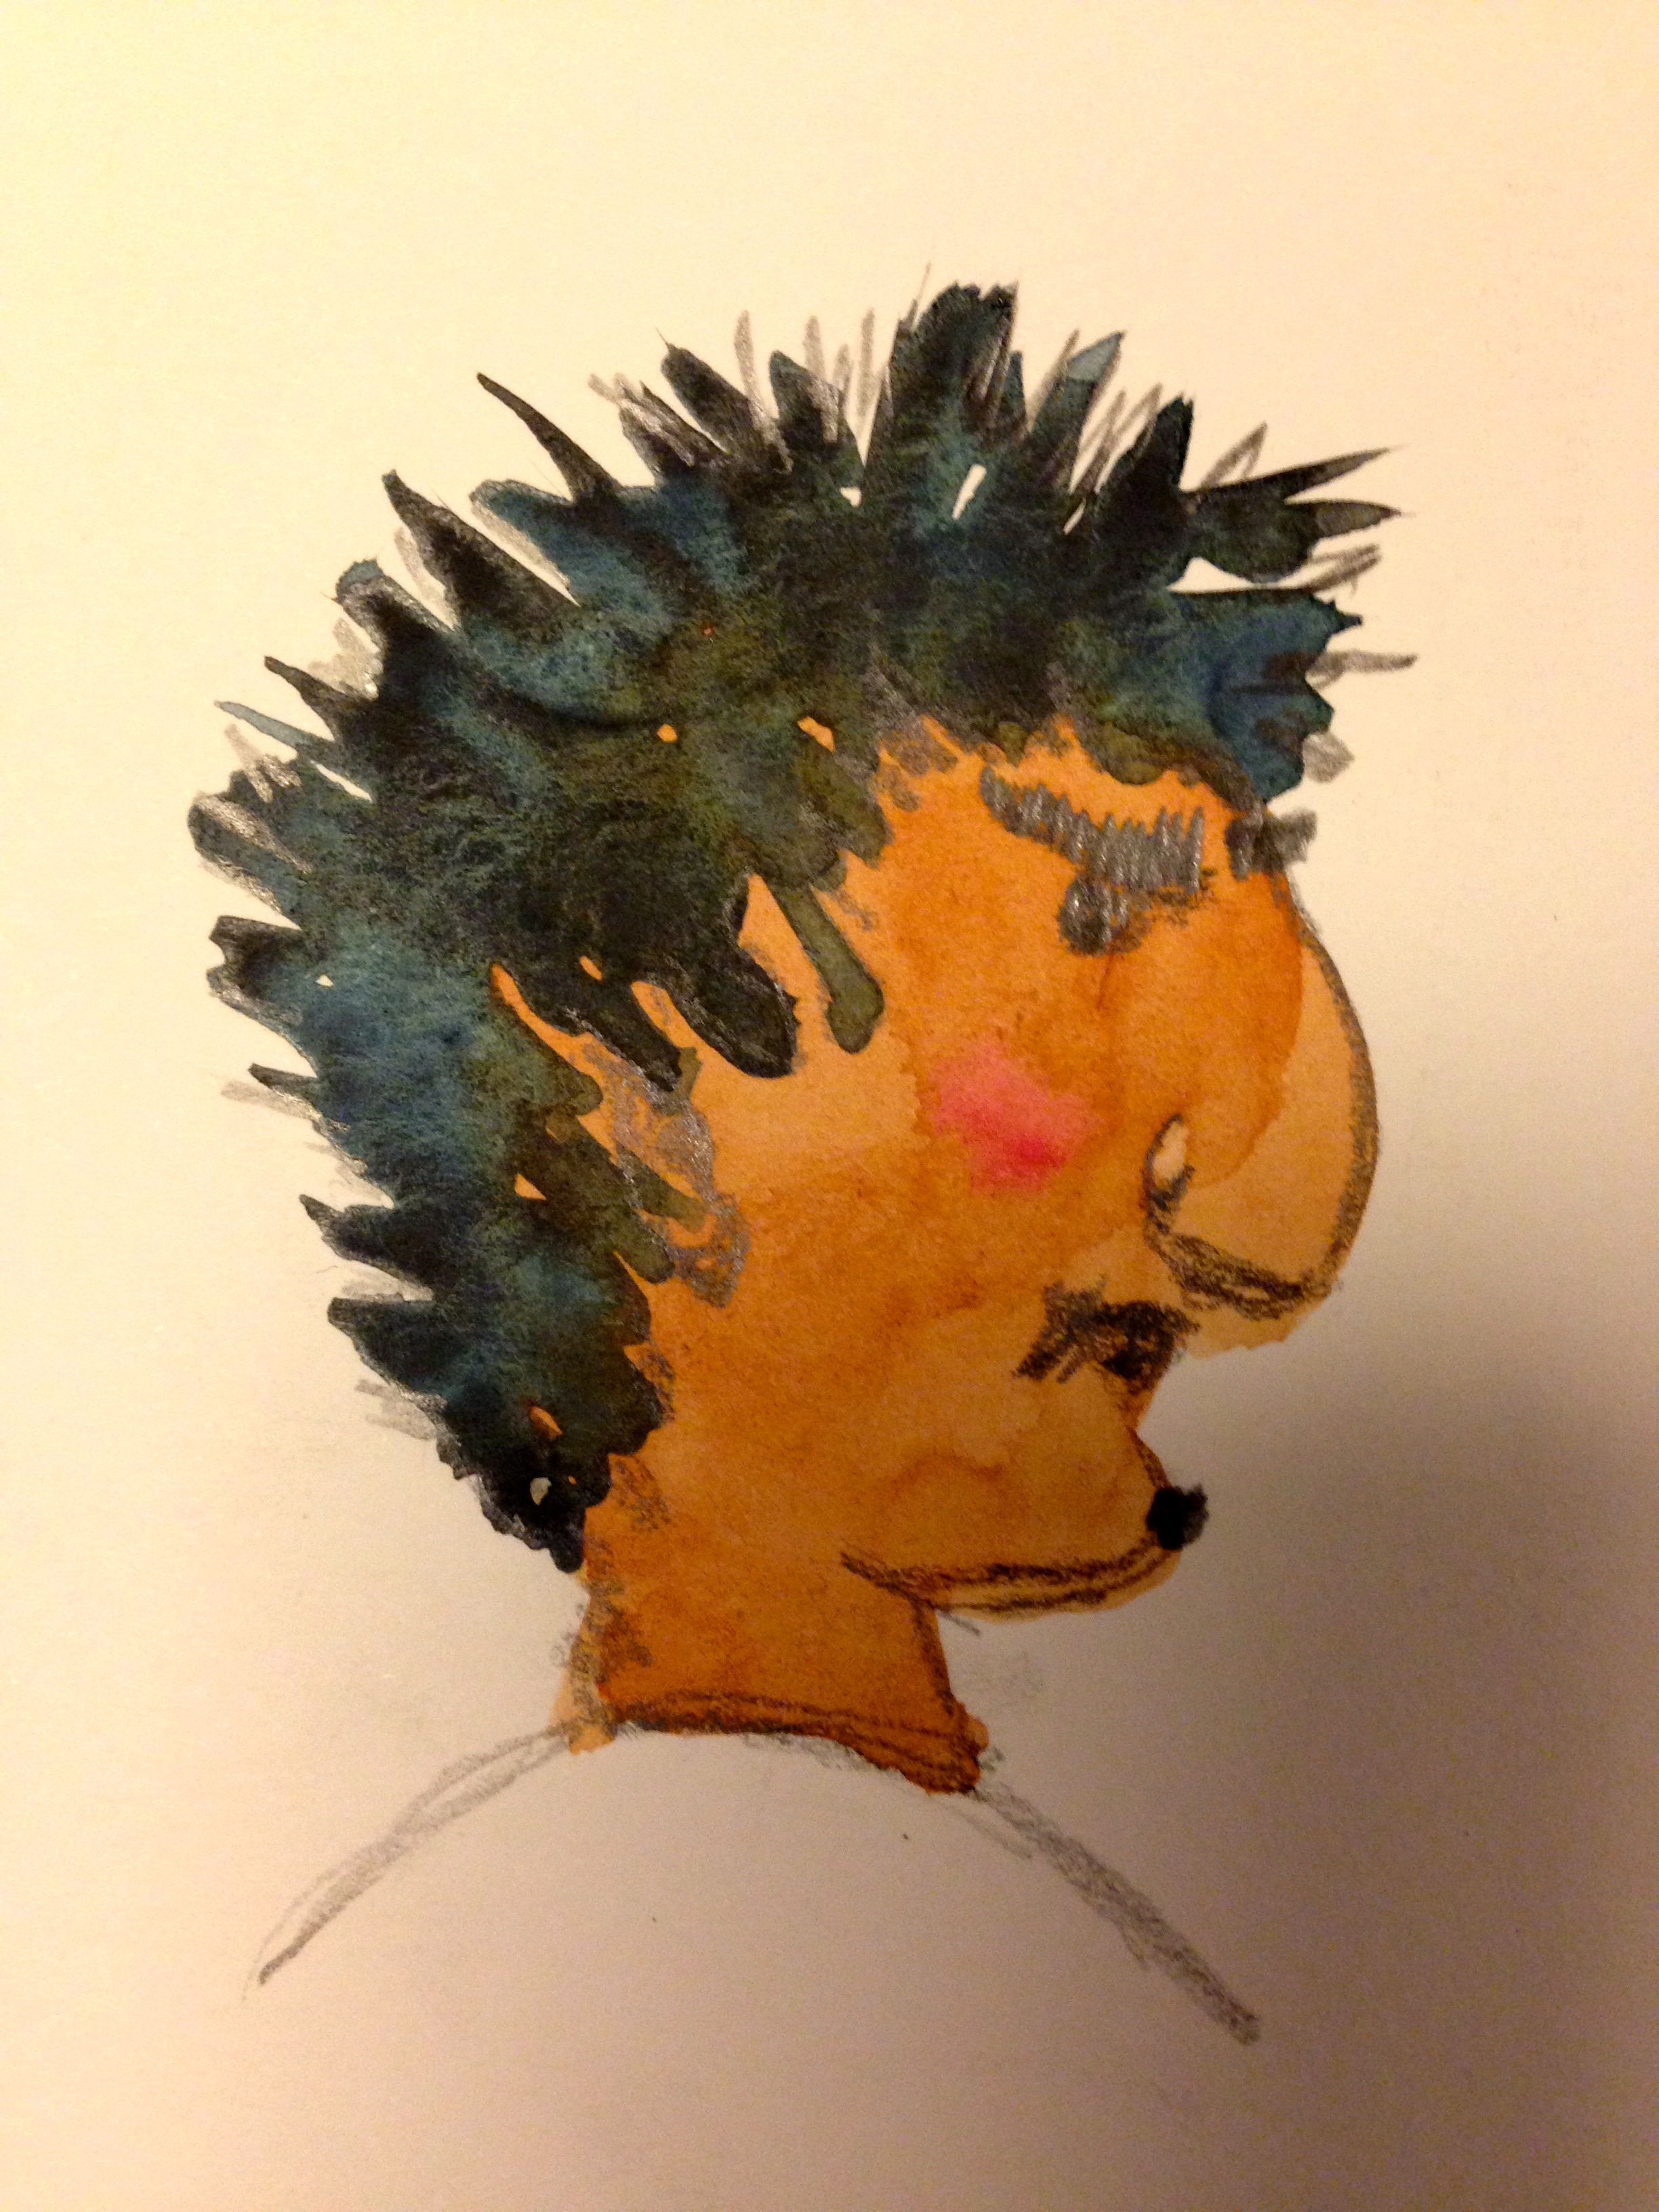
….3 days into a new online course
I recently signed up for another on-line course with Carla Sonheim. It’s called Faces 101 because by the end of the five day course I should have drawn and painted 101 faces. I’m already one day behind on my assignments but the good thing with this course is that once you purchase the program the assignments and videos are always available to you. I can post up to six of my best pieces onto a group page on Flickr daily and Carla will comment on my progress.
Here are a few of my faces so far:

….here are the results of the lesson I started a couple of weeks ago
It was a bit of a struggle but with a little bit of encouragement to keep going and add more detail the first few tissue landscapes are finished.

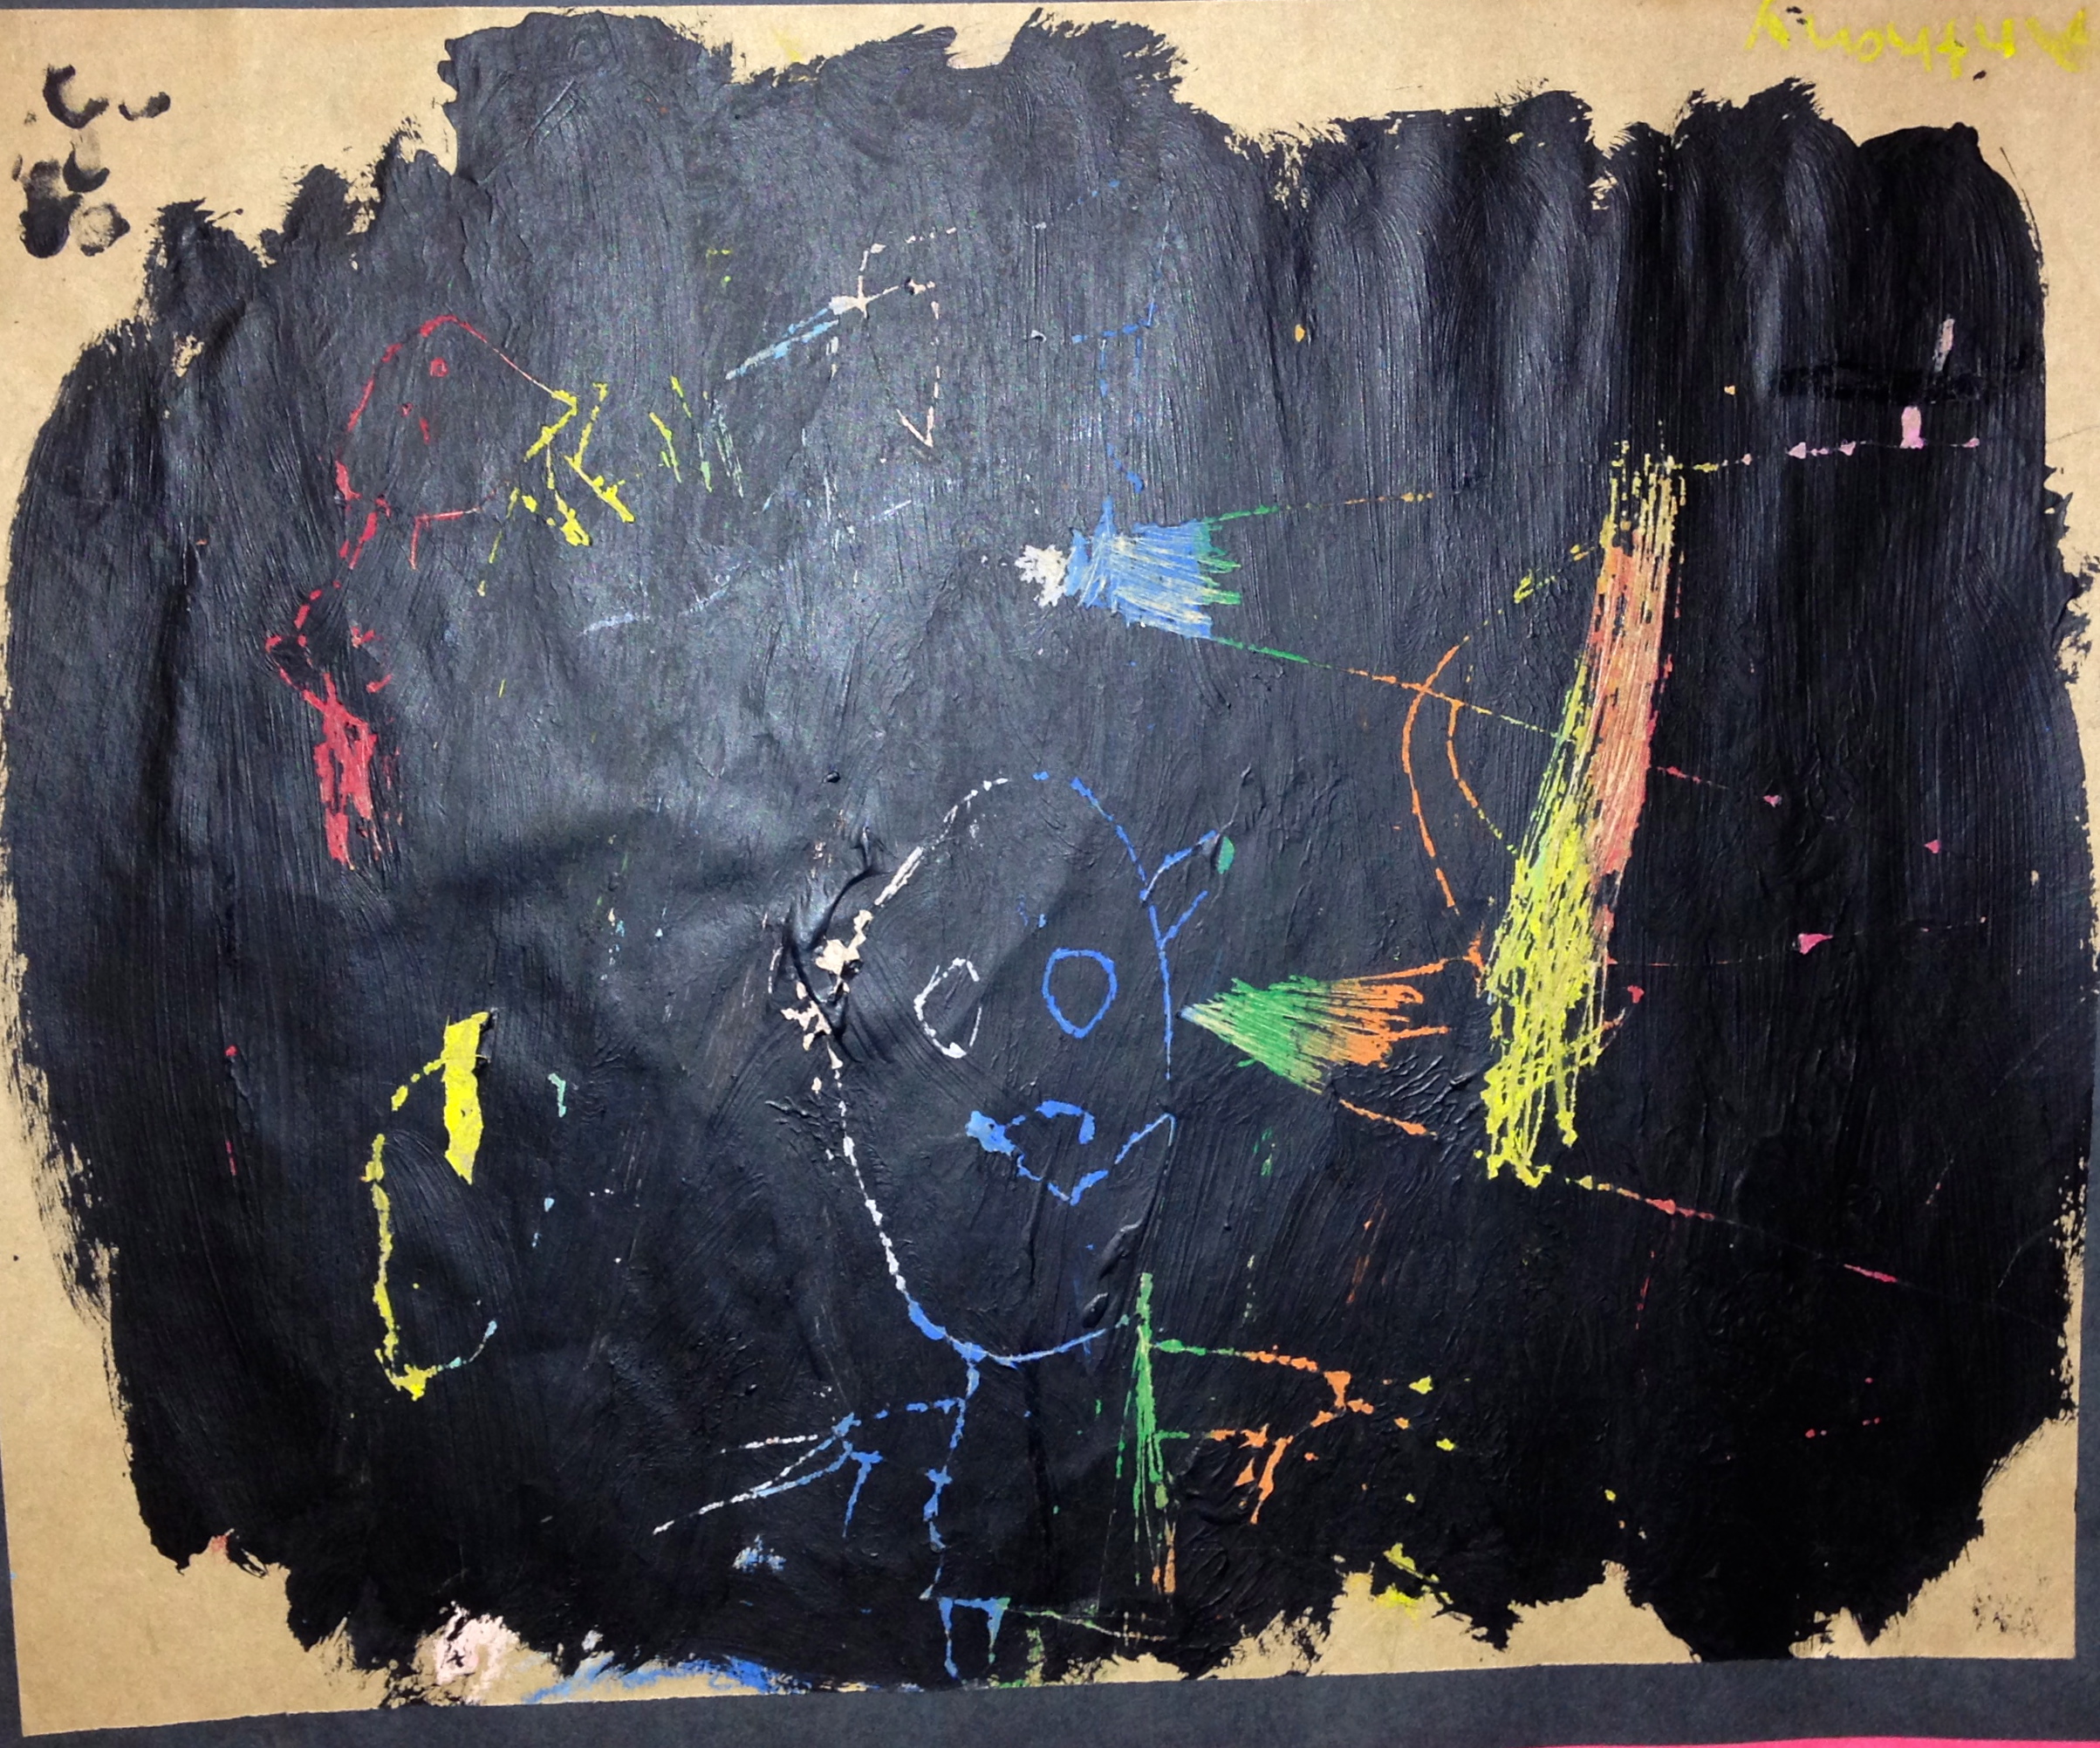
….brown craft paper, oil pastels, and black acrylic paint
Last week I discovered that I was running out of some basic materials, like glue sticks and my supply order that I made weeks before the holidays still hadn’t arrived. After rummaging through the supply cupboard I found enough brown paper for two classes. I had plenty of oil pastels and 2 jars of black acrylic paint.
Some of the students were still finishing their Hundertwasser style landscapes using chalk pastel, so it was interesting for them to experience a new medium, oil pastels. Everyone was busy, either finishing projects or starting a new one. I set up one table for painting to limit the mess and thank goodness for my new drying rack.
Scratch Art from Scratch
I’ve never attempted to do scratch art projects because I’ve only ever seen them done using pre-made scratch boards. As I was going through one of my many art book for children I discovered a simple way to make our own black scratch papers. I have to say that making our own papers was very satisfying and gave the children some experience using oil pastels. I loved using the brown paper and the students were encouraged to leave some of the brown edges exposed.

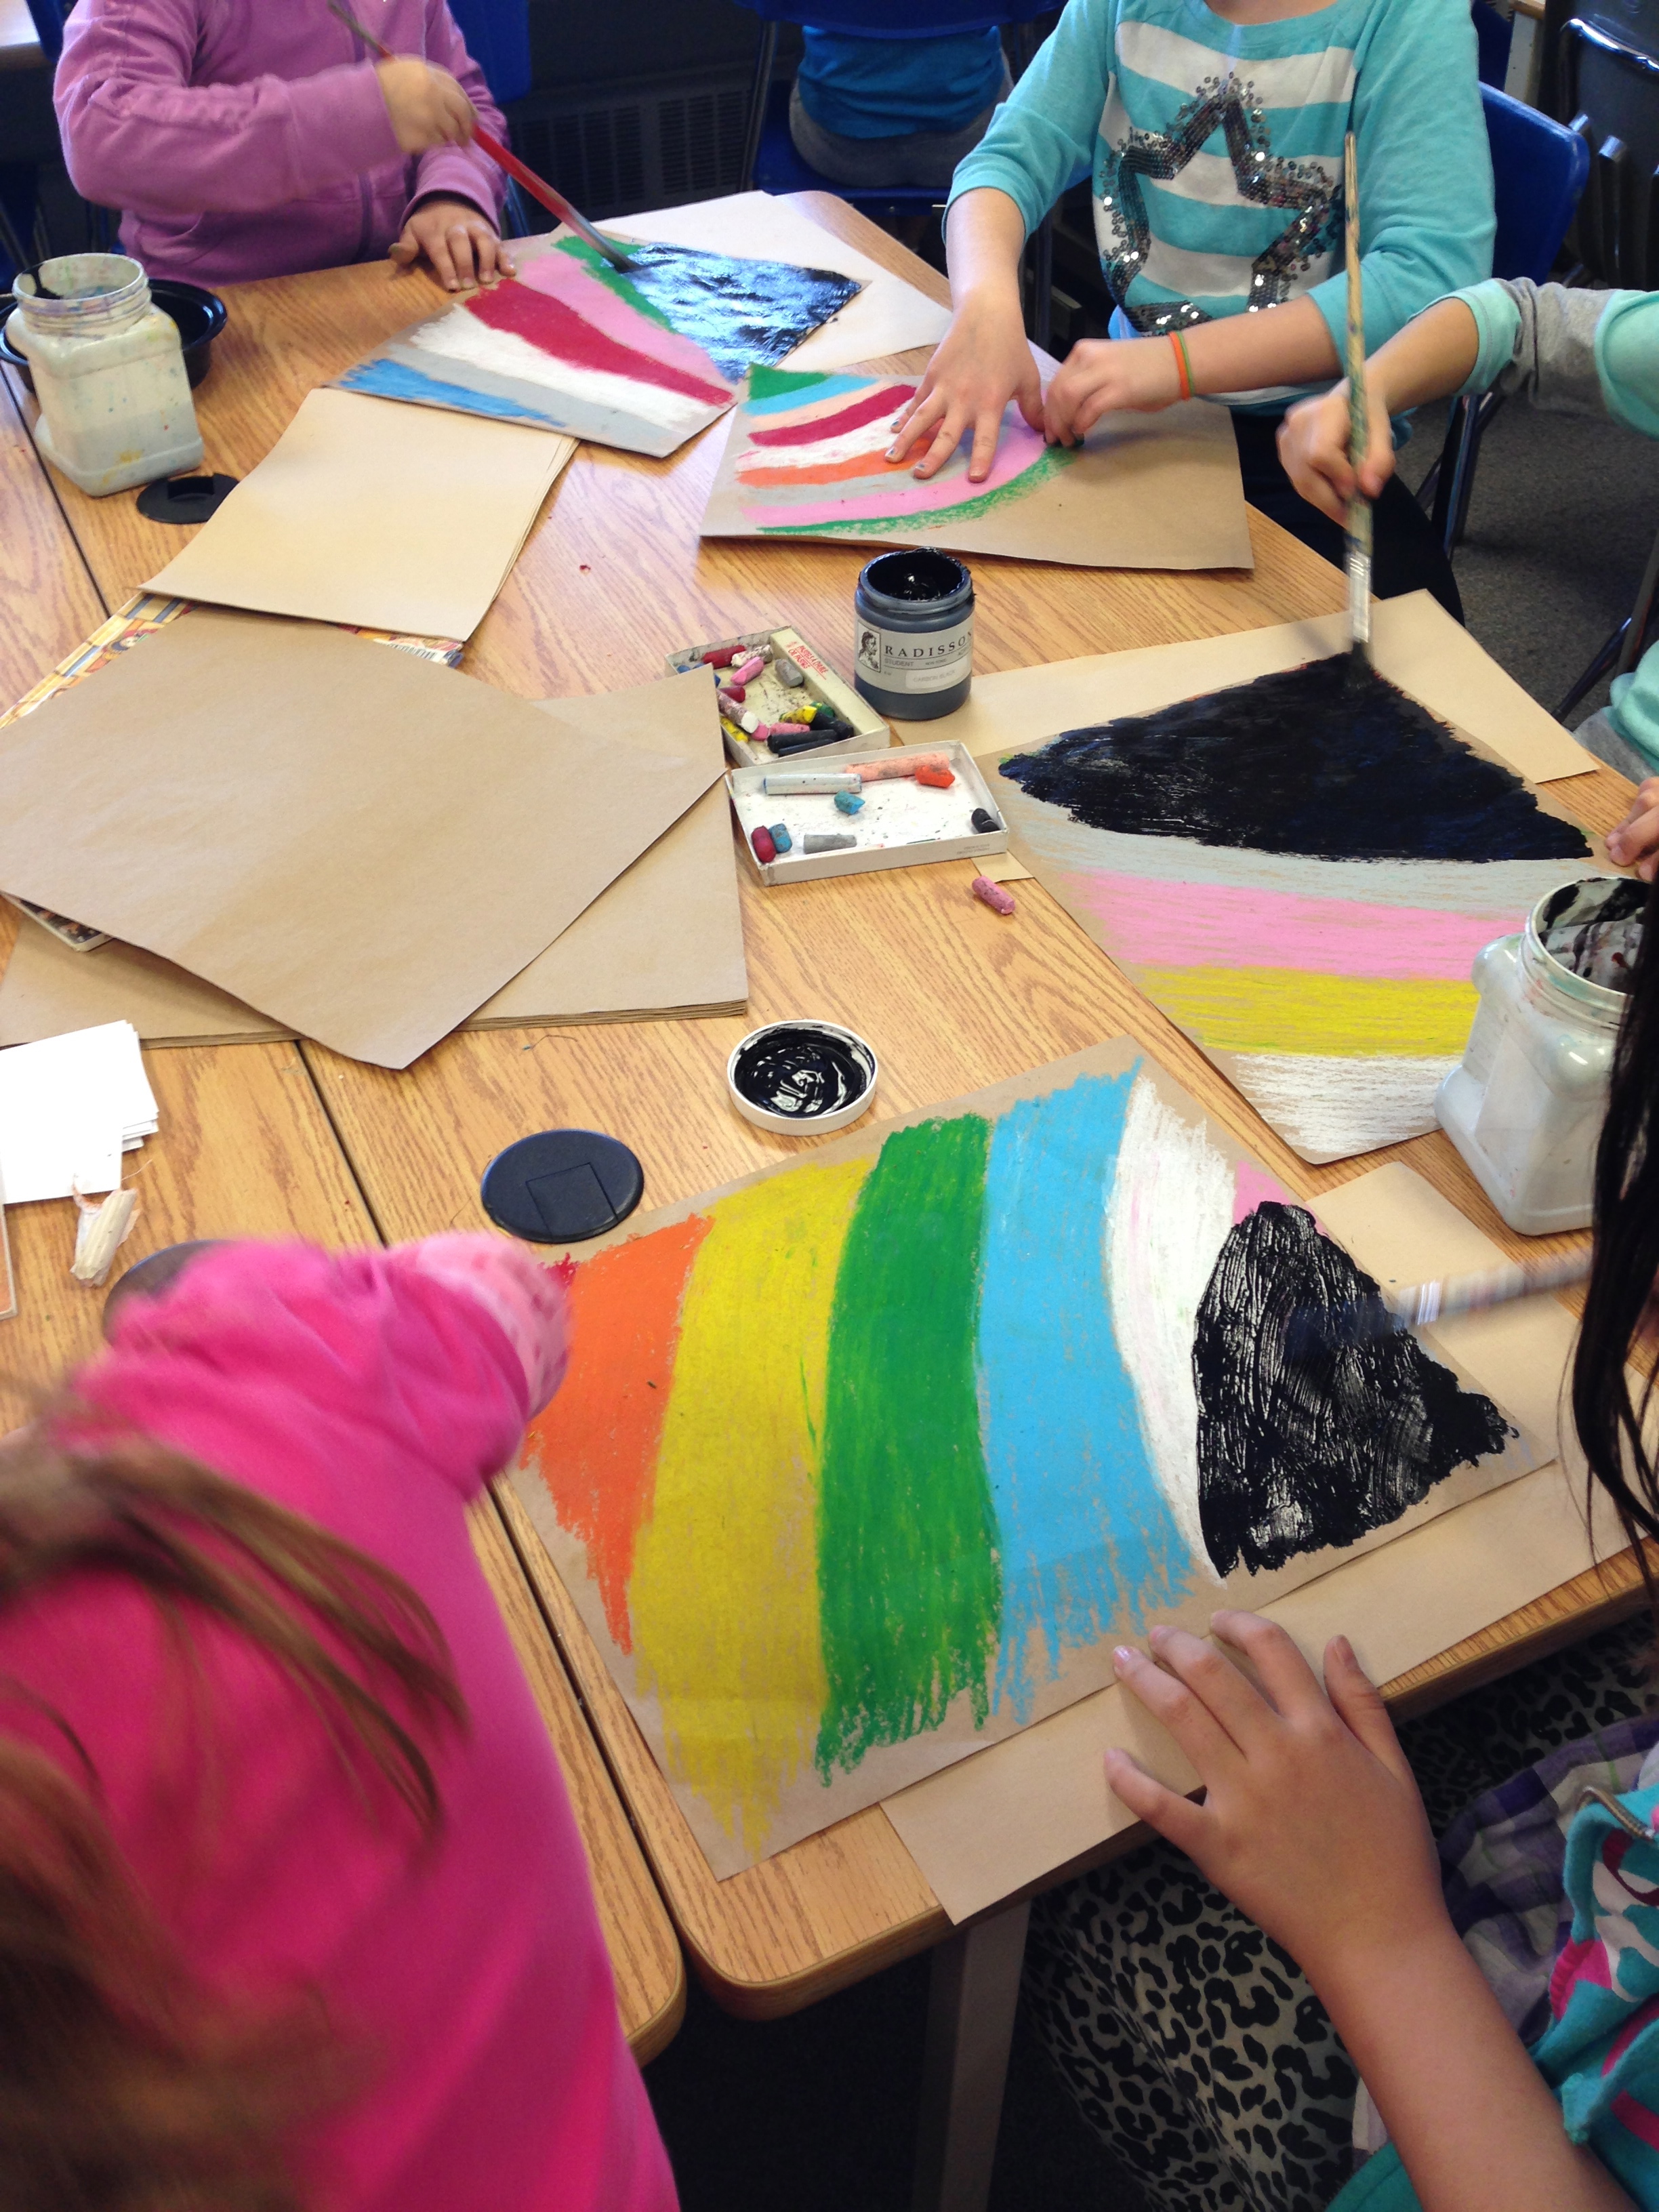
Students are encouraged to lay down a thick layer of pastels. No background paper should show through. Once we were satisfied with the amount of pastel on the paper we painted a thick layer of black acrylic paint. Before you do this make sure that each student has written their name on the back of their paper or you will have quite a time trying to determine who belongs to the blackened sheets when they come back a week later.
As soon as students finished painting over the the pastels they placed their papers on the drying rack. (This is not a one day project). In the remaining time students can start sketching on copy paper a rough copy of what they would like to draw. I have numerous drawing books available for them to look through and be inspired.
In the following class each student was given a paper clip that I bent open and that was their scratching tool. It works fairly well, especially if you hold it like a pencil and gently rub away the black paint. The assignment was to draw some animals but some of them chose to create a landscape or they did a combination of both. I mounted the finished pieces on two pieces of different coloured construction paper so that it looked like it was matted. Again I think that the grade 2/3 class did a great job.


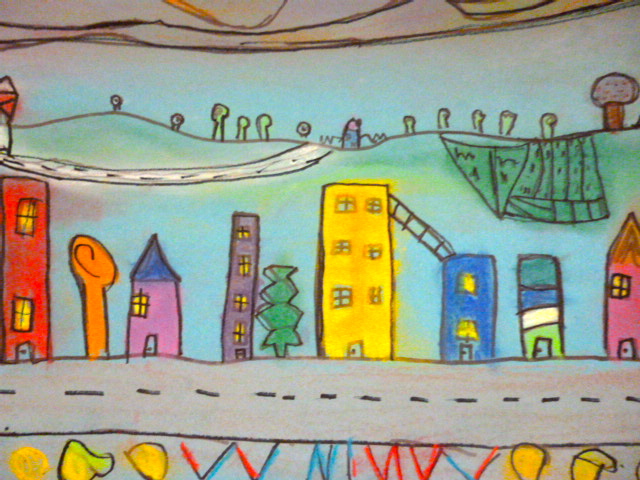
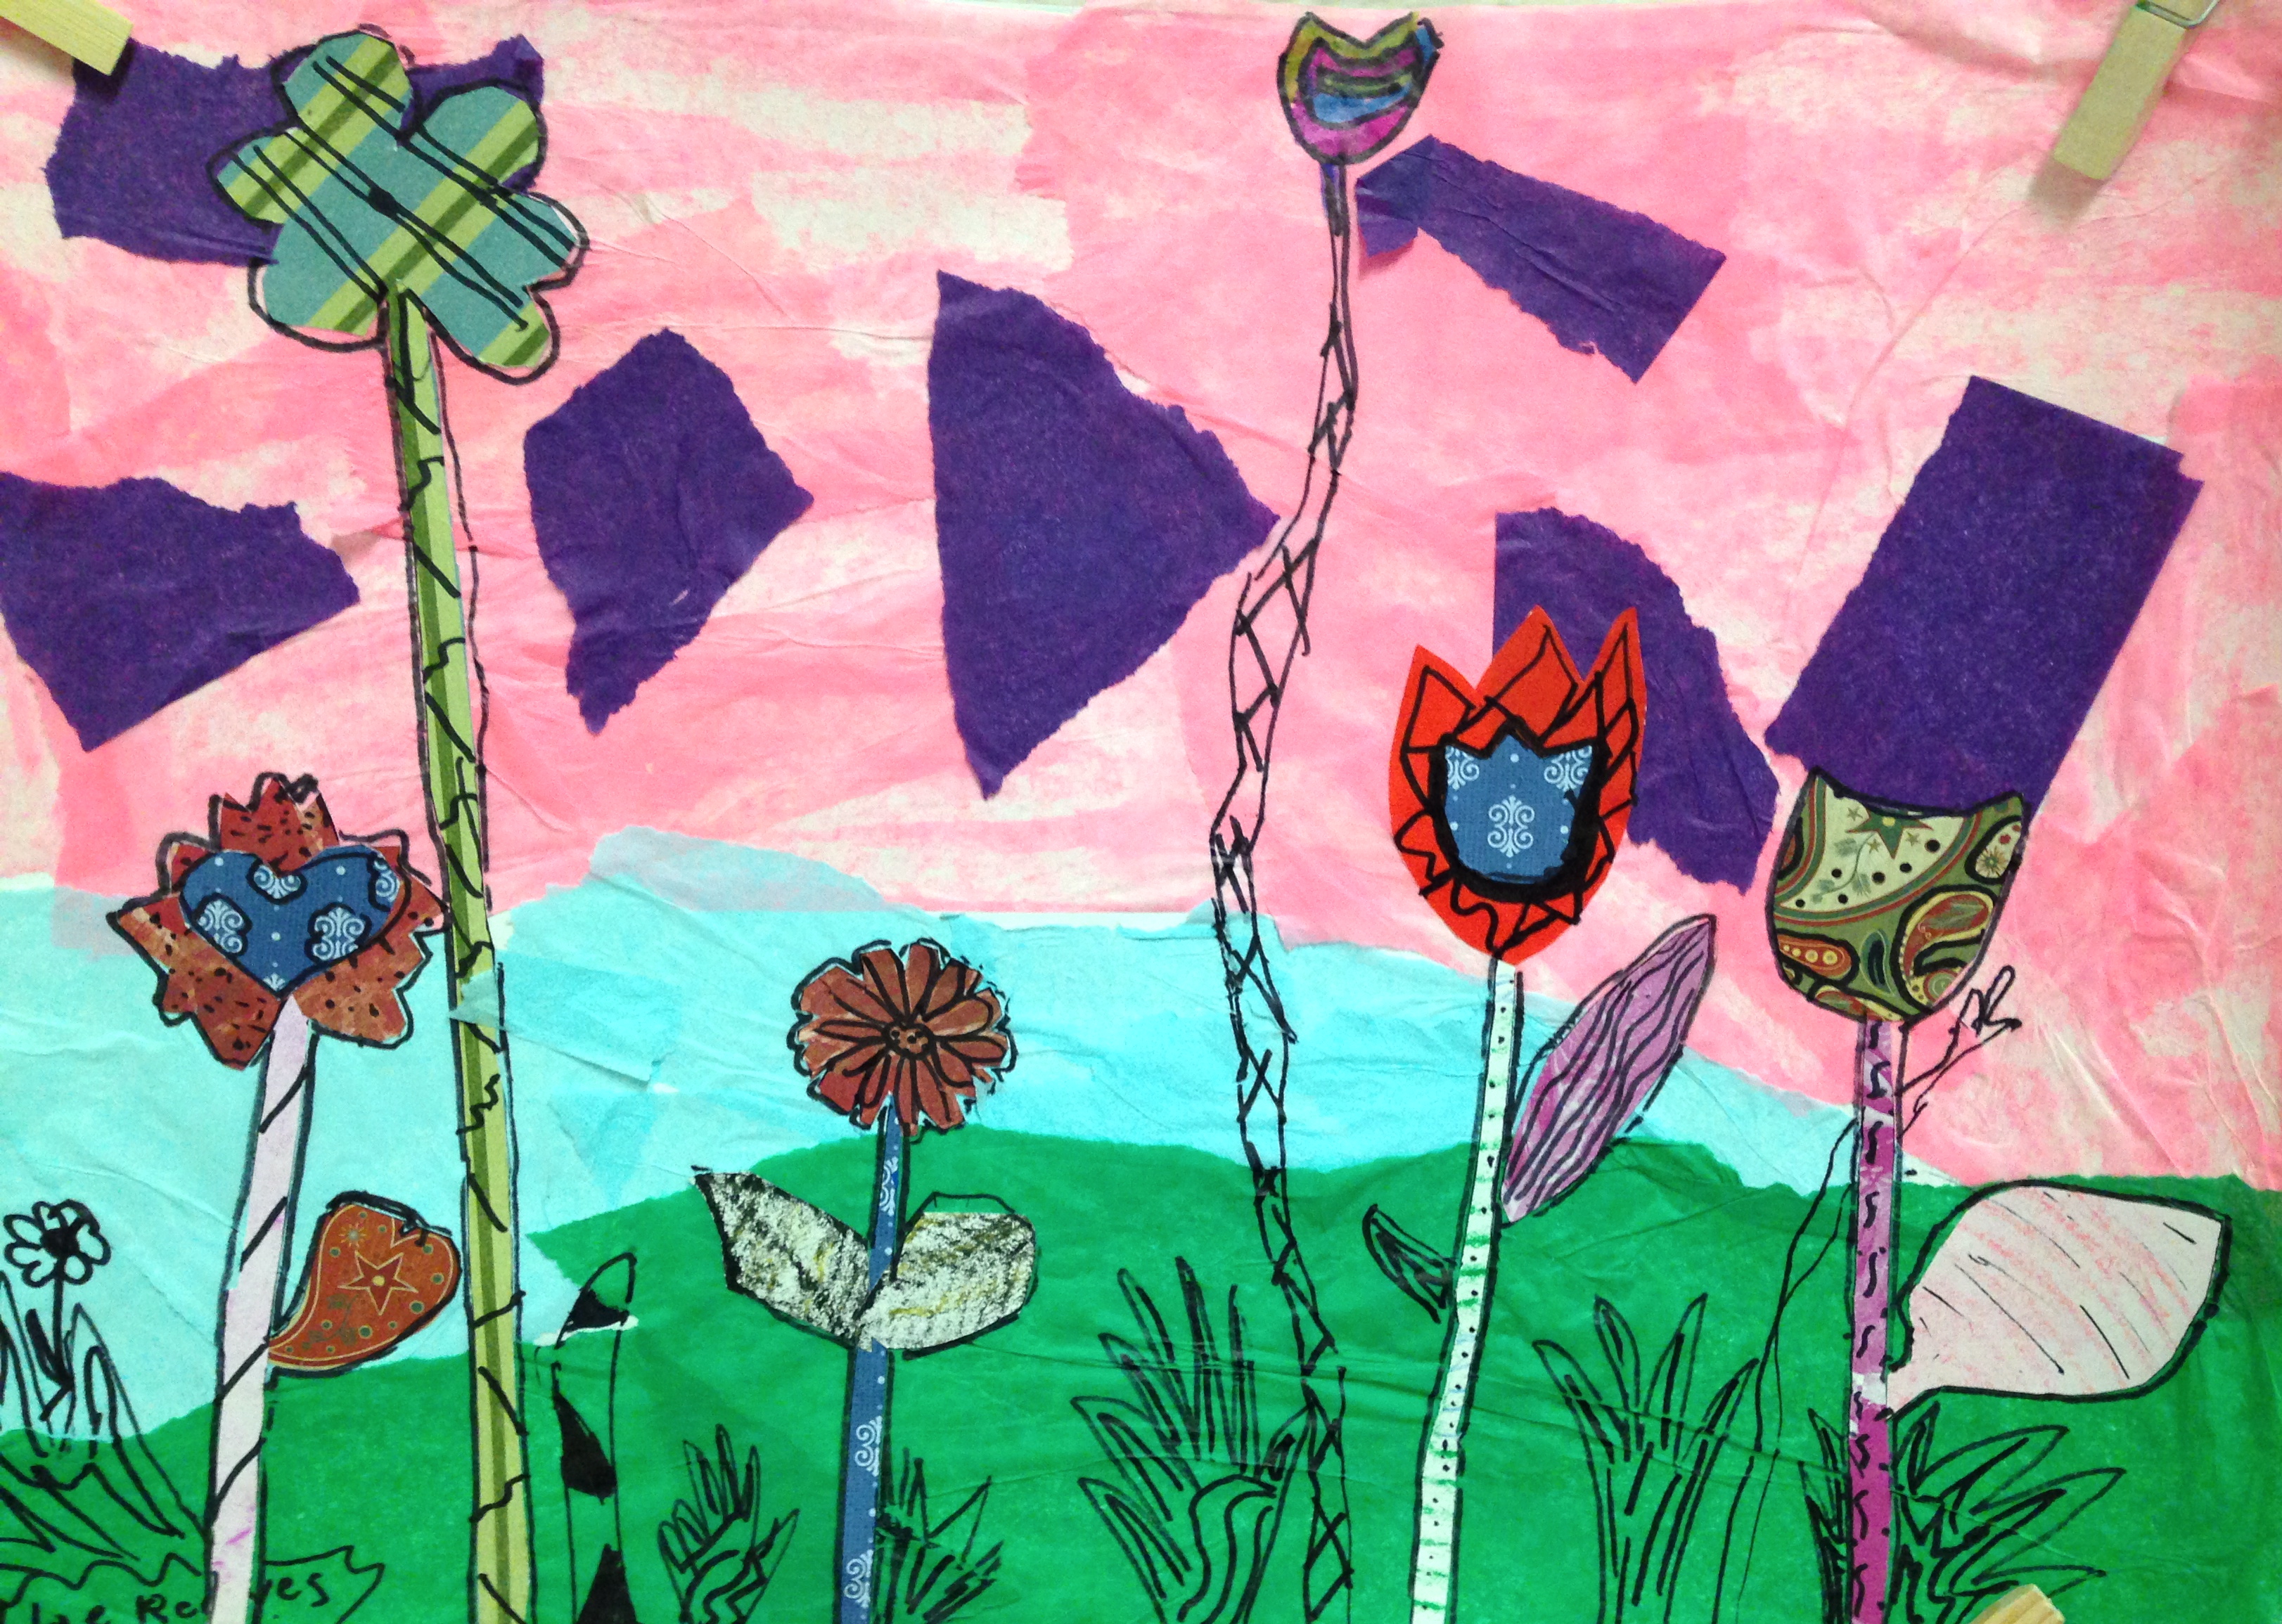
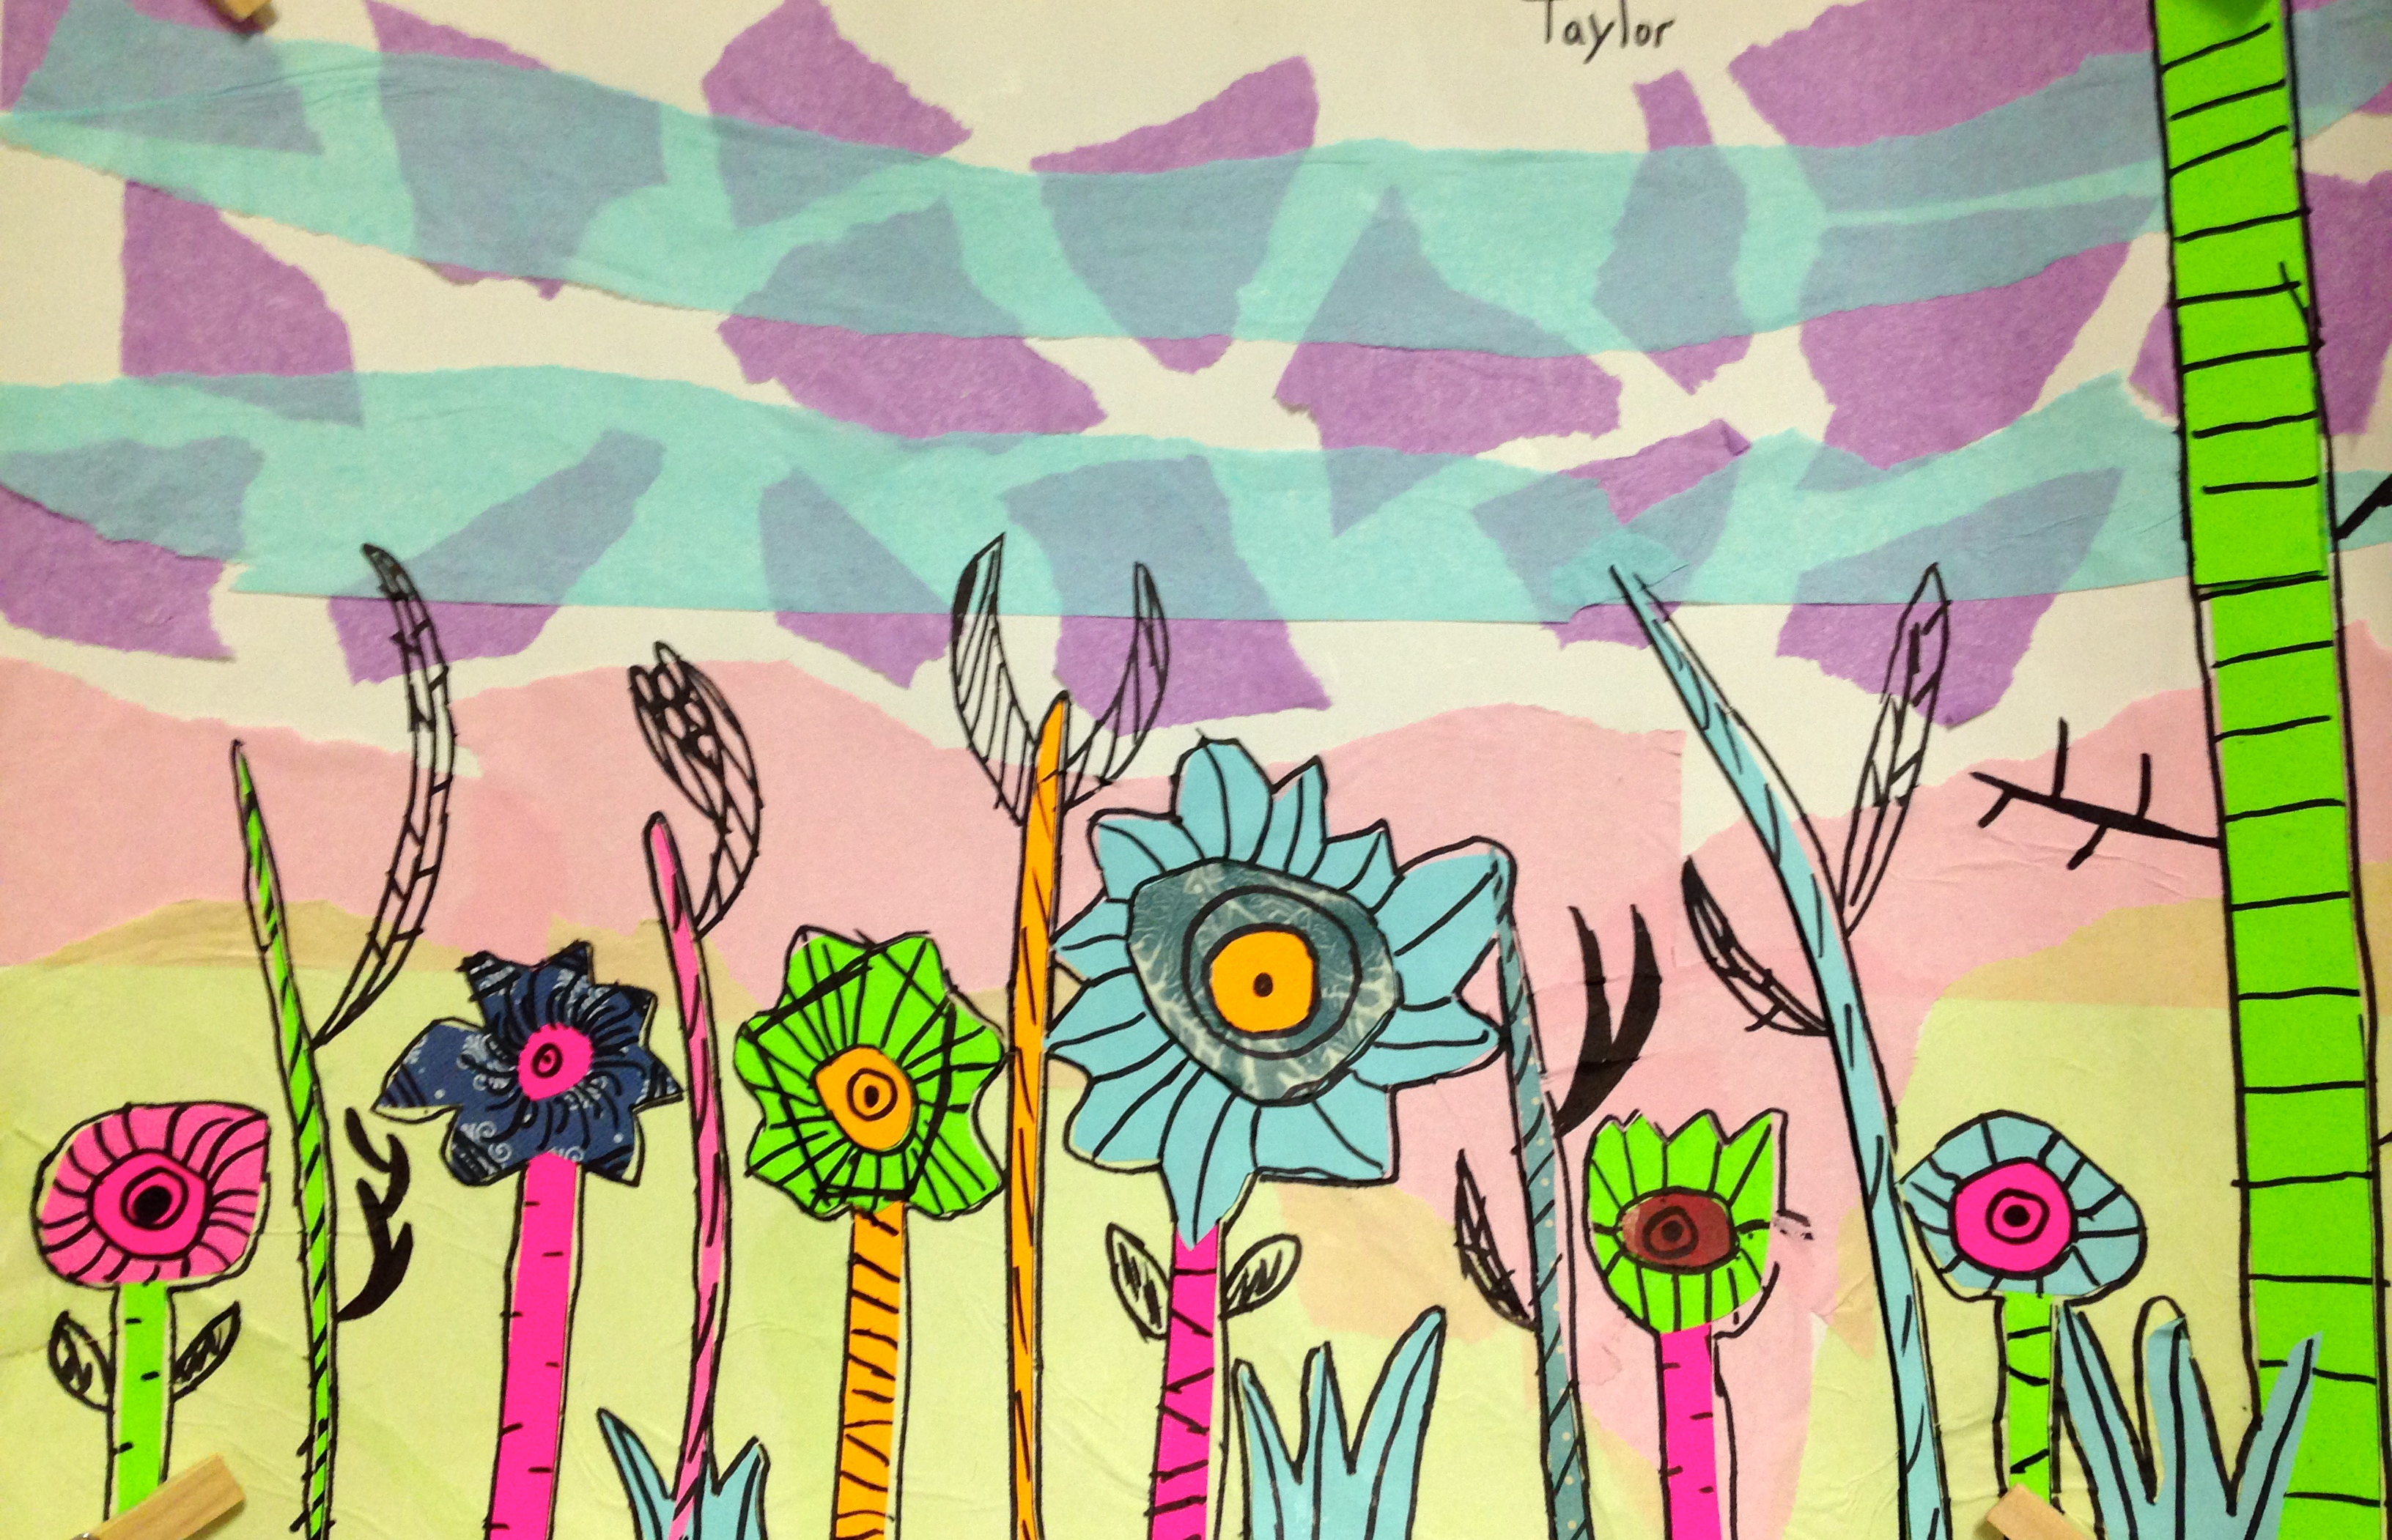
….I introduced four different art projects this week
I had to think quickly this week as to what I was going to teach in art. I ordered some supplies before Christmas and they hadn’t come in yet so I scrambled to find a project(s) that required the materials I had on hand. Of all the projects that I assigned I think the one I introduced to my grade 3 class is my favourite so far.
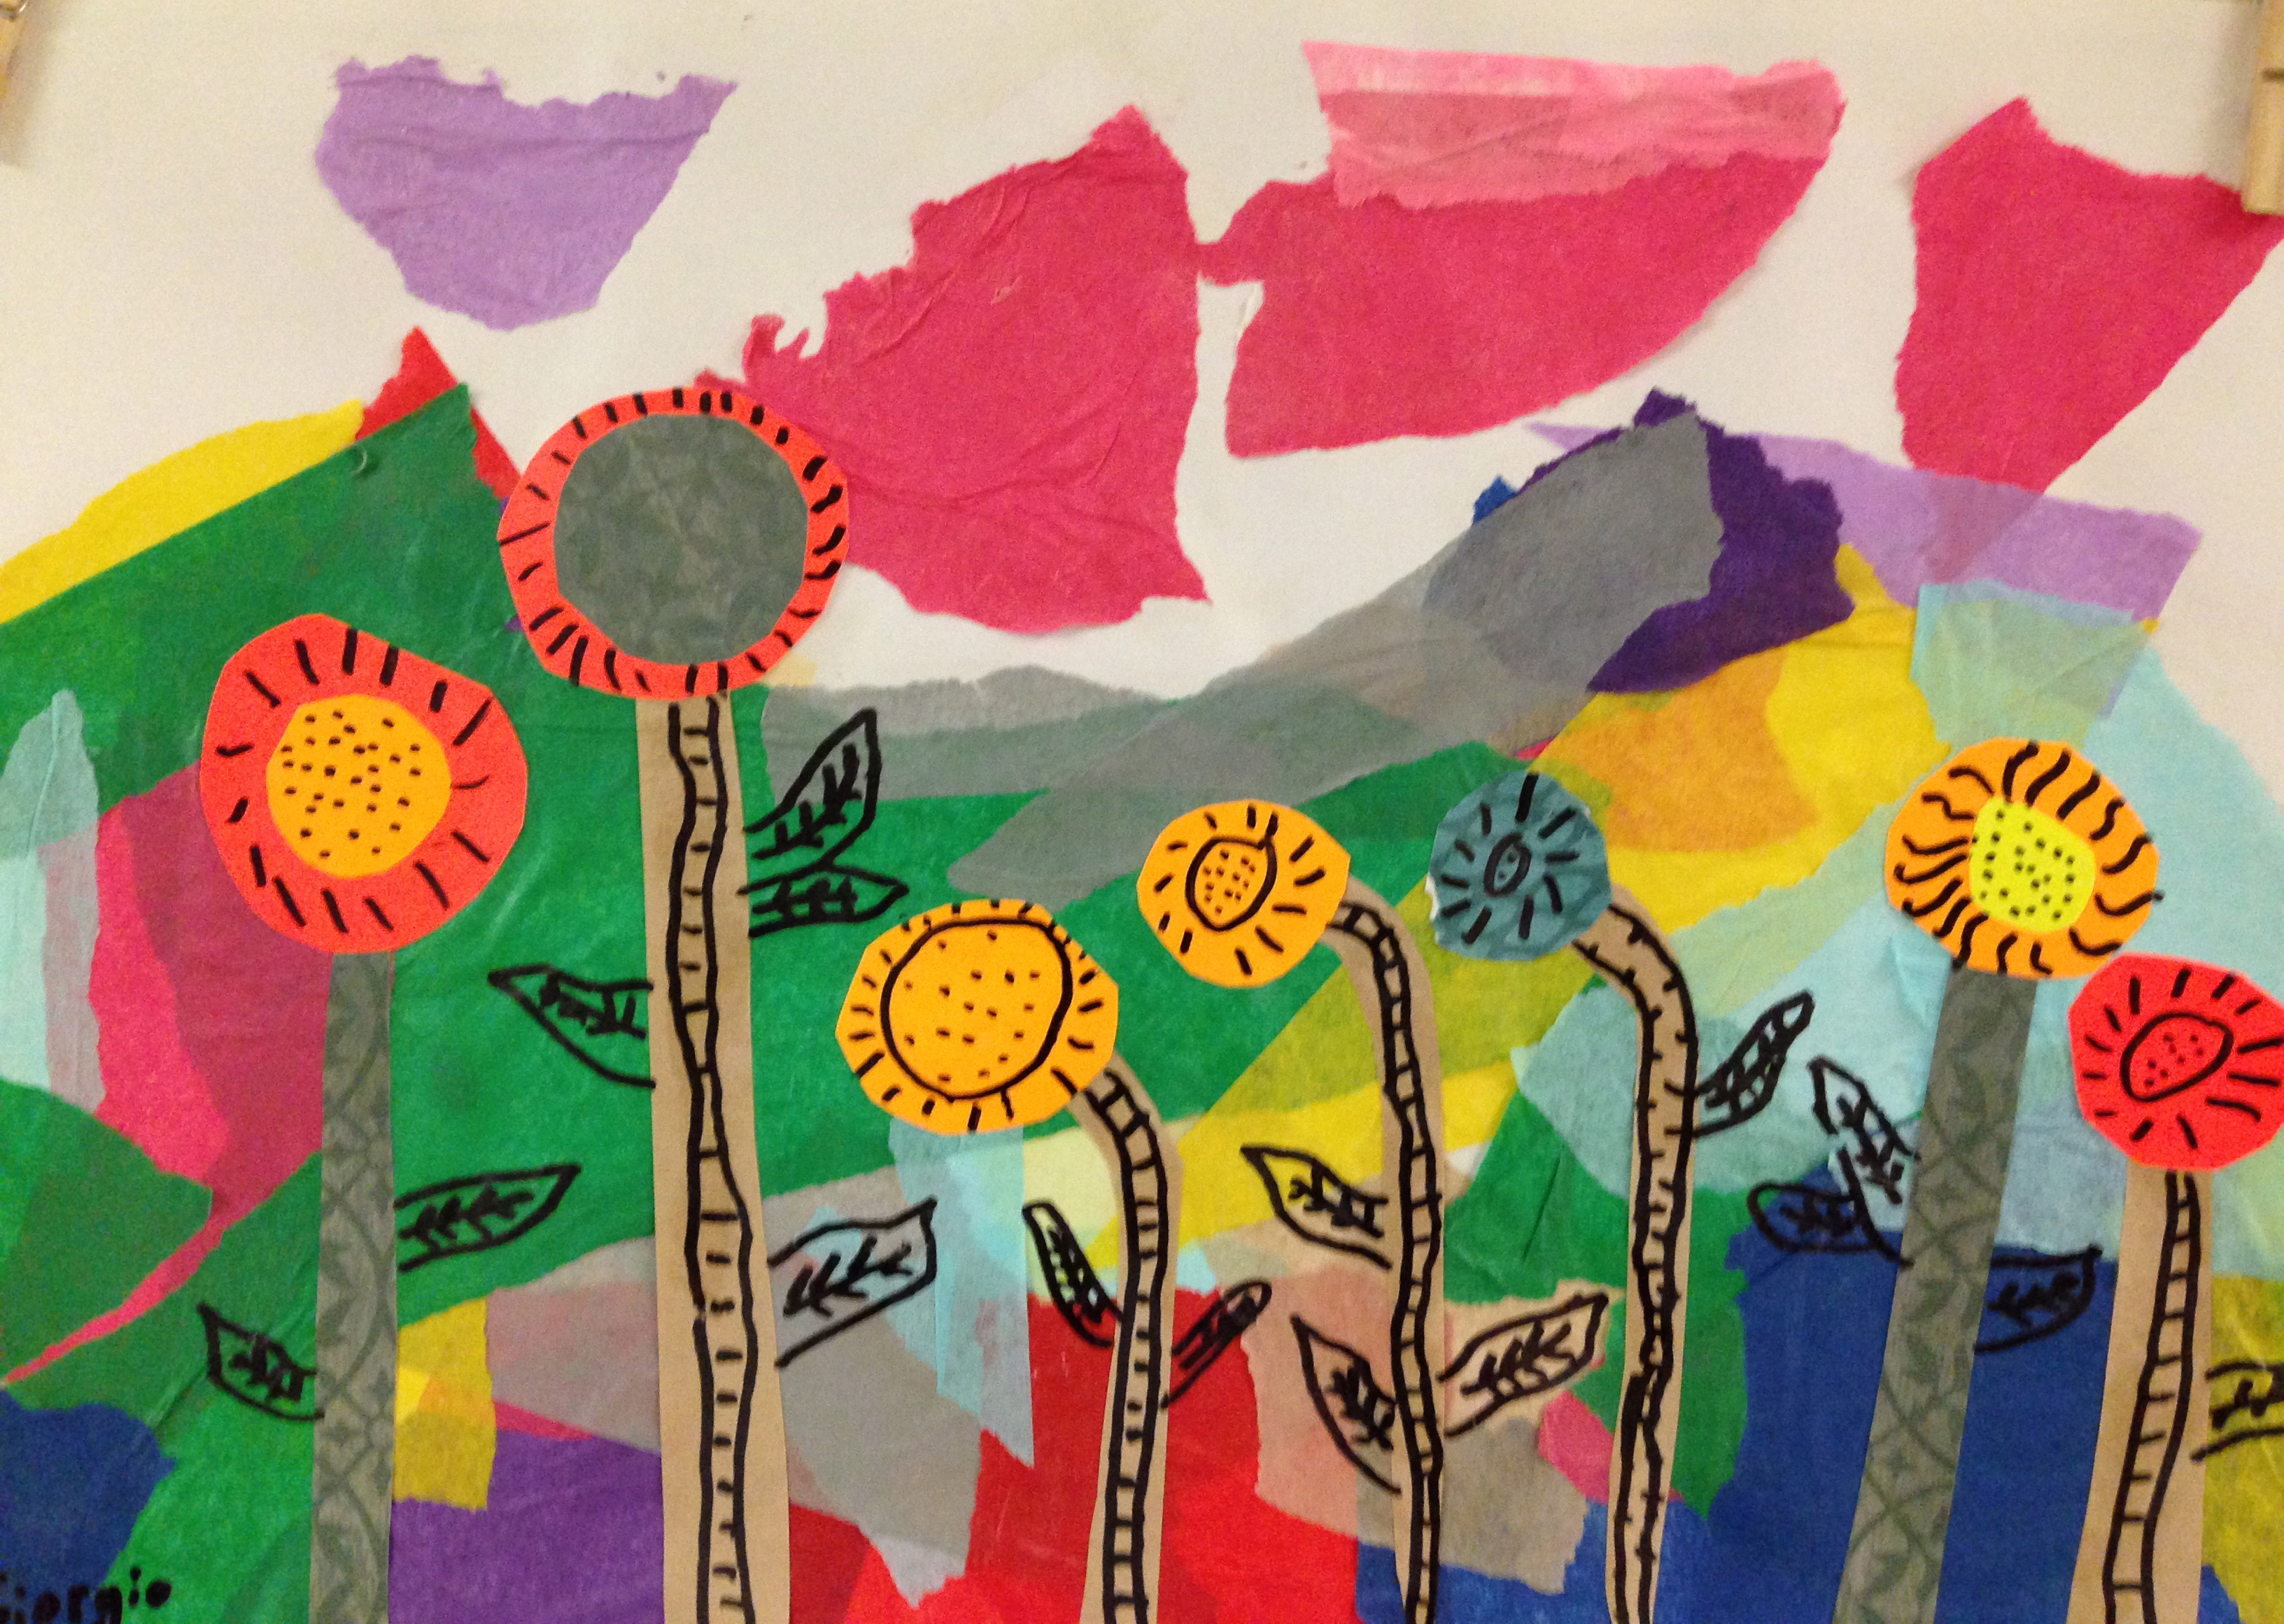
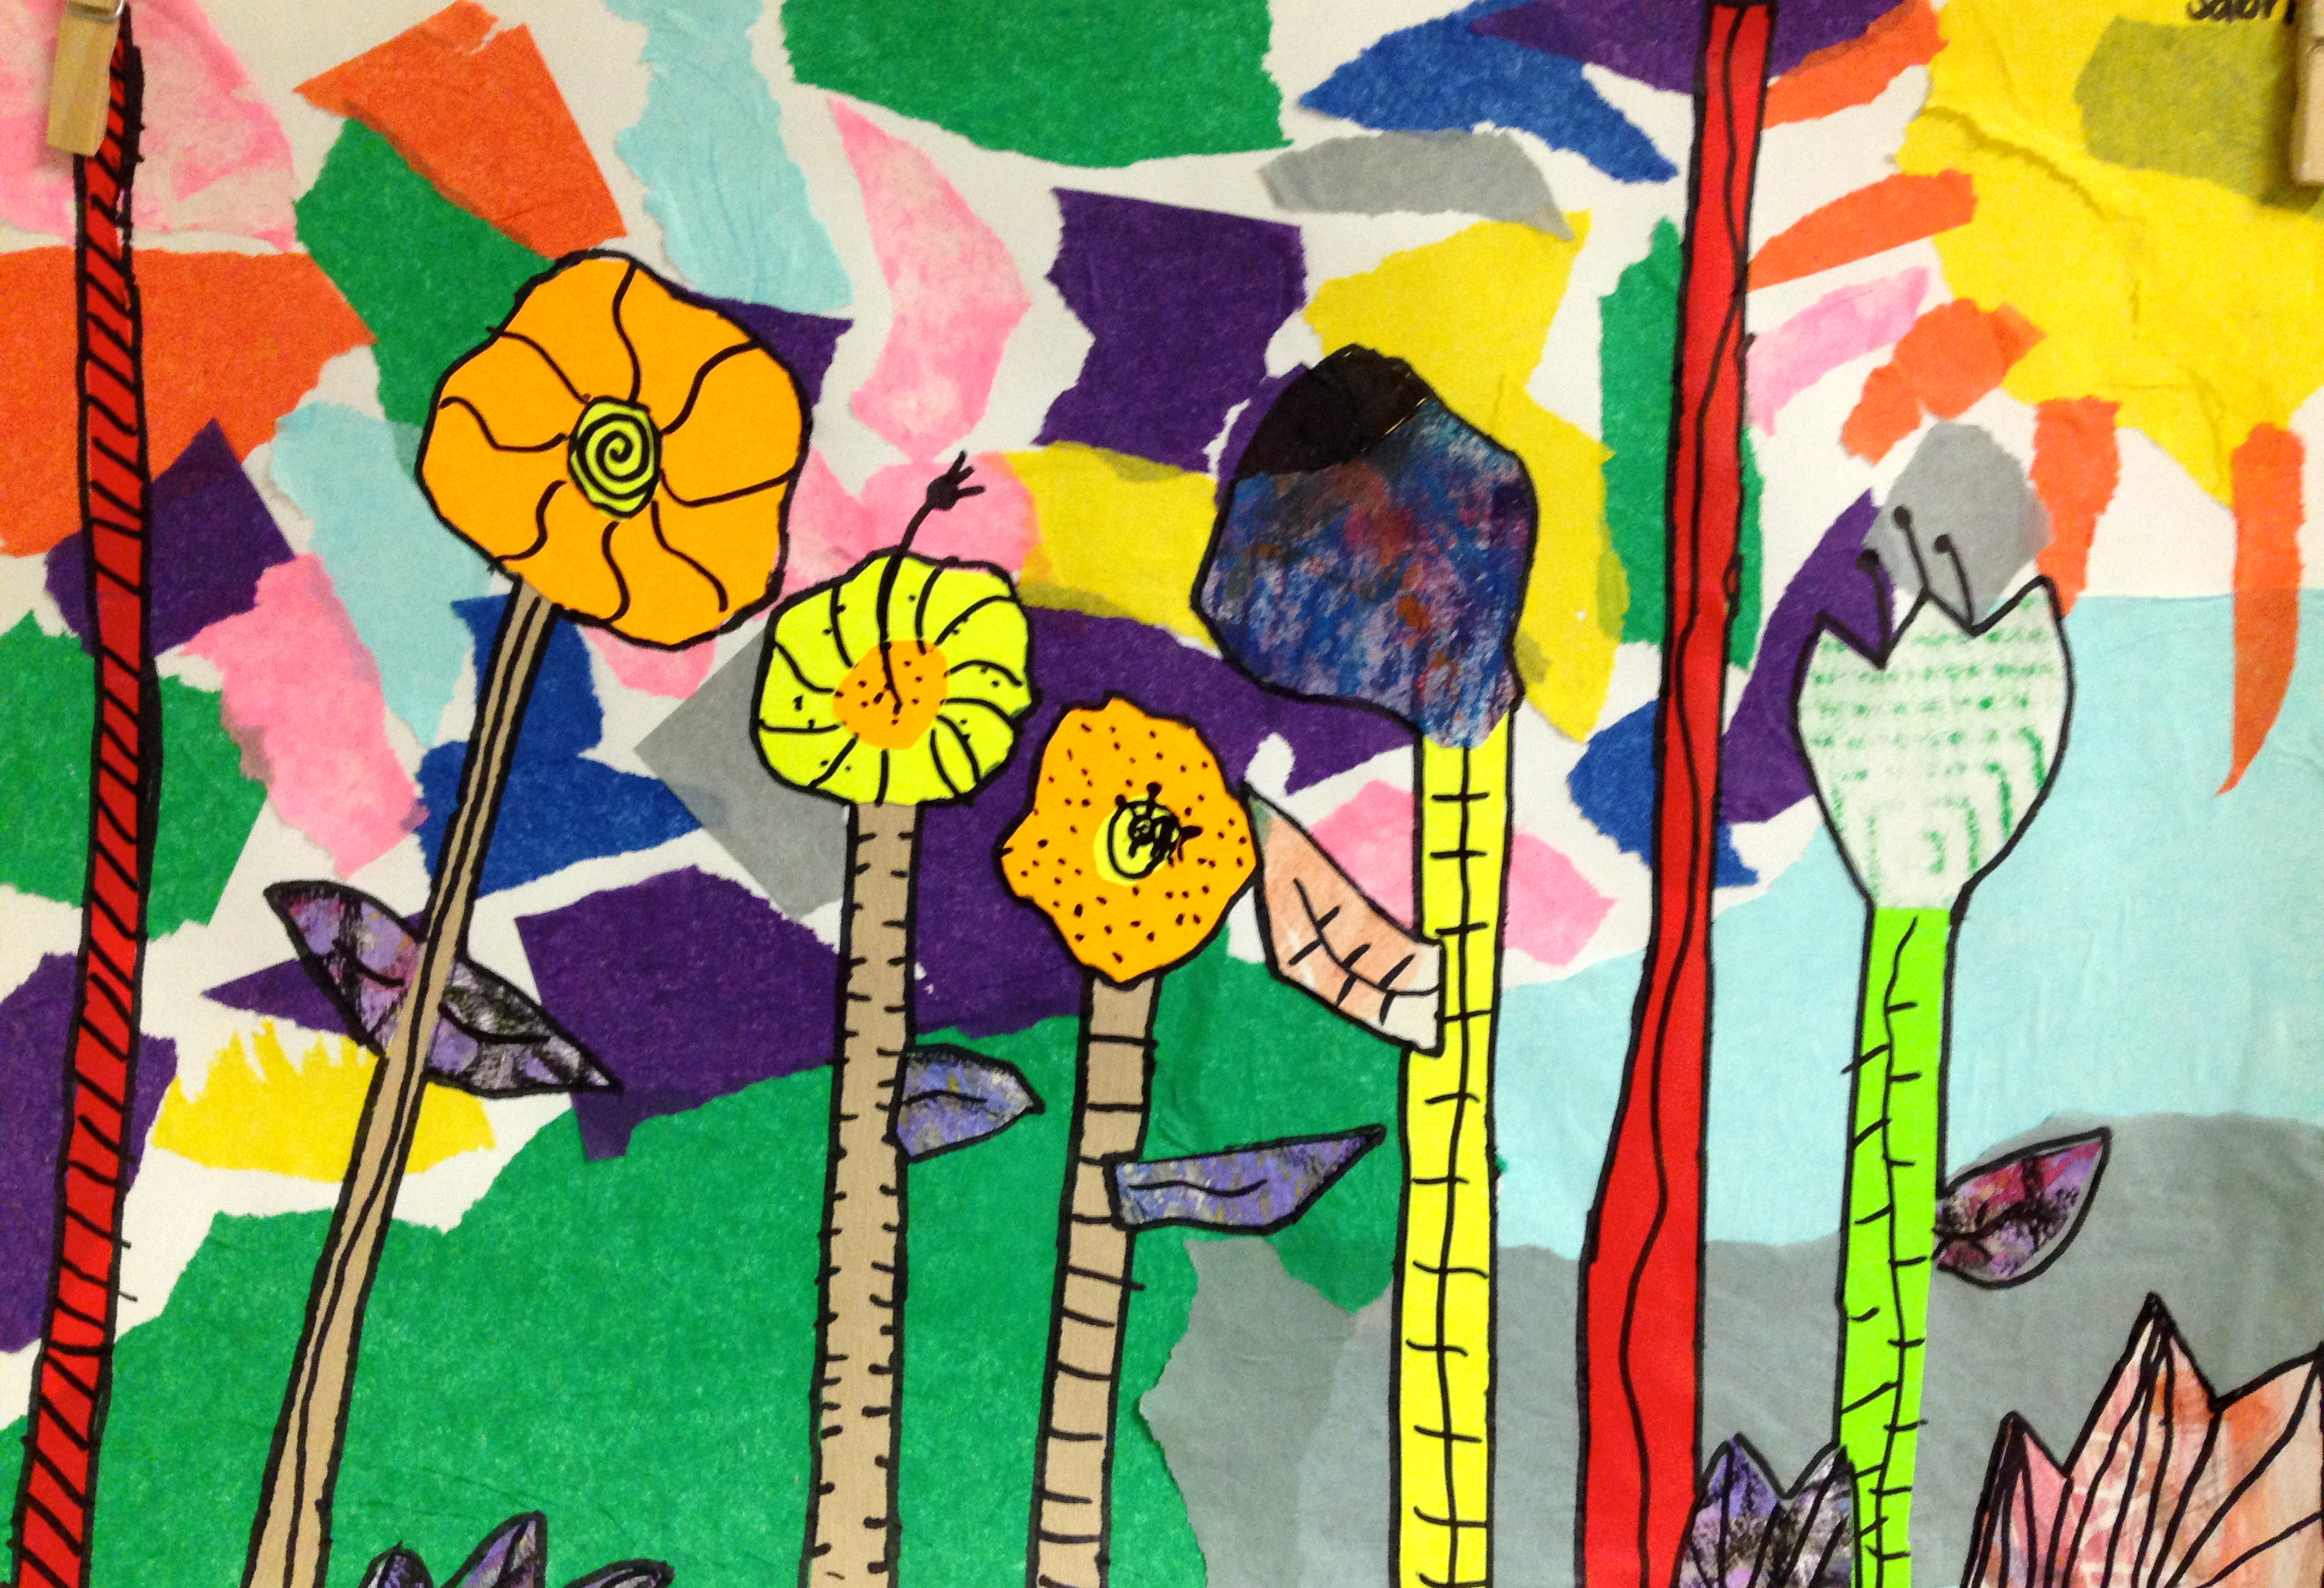
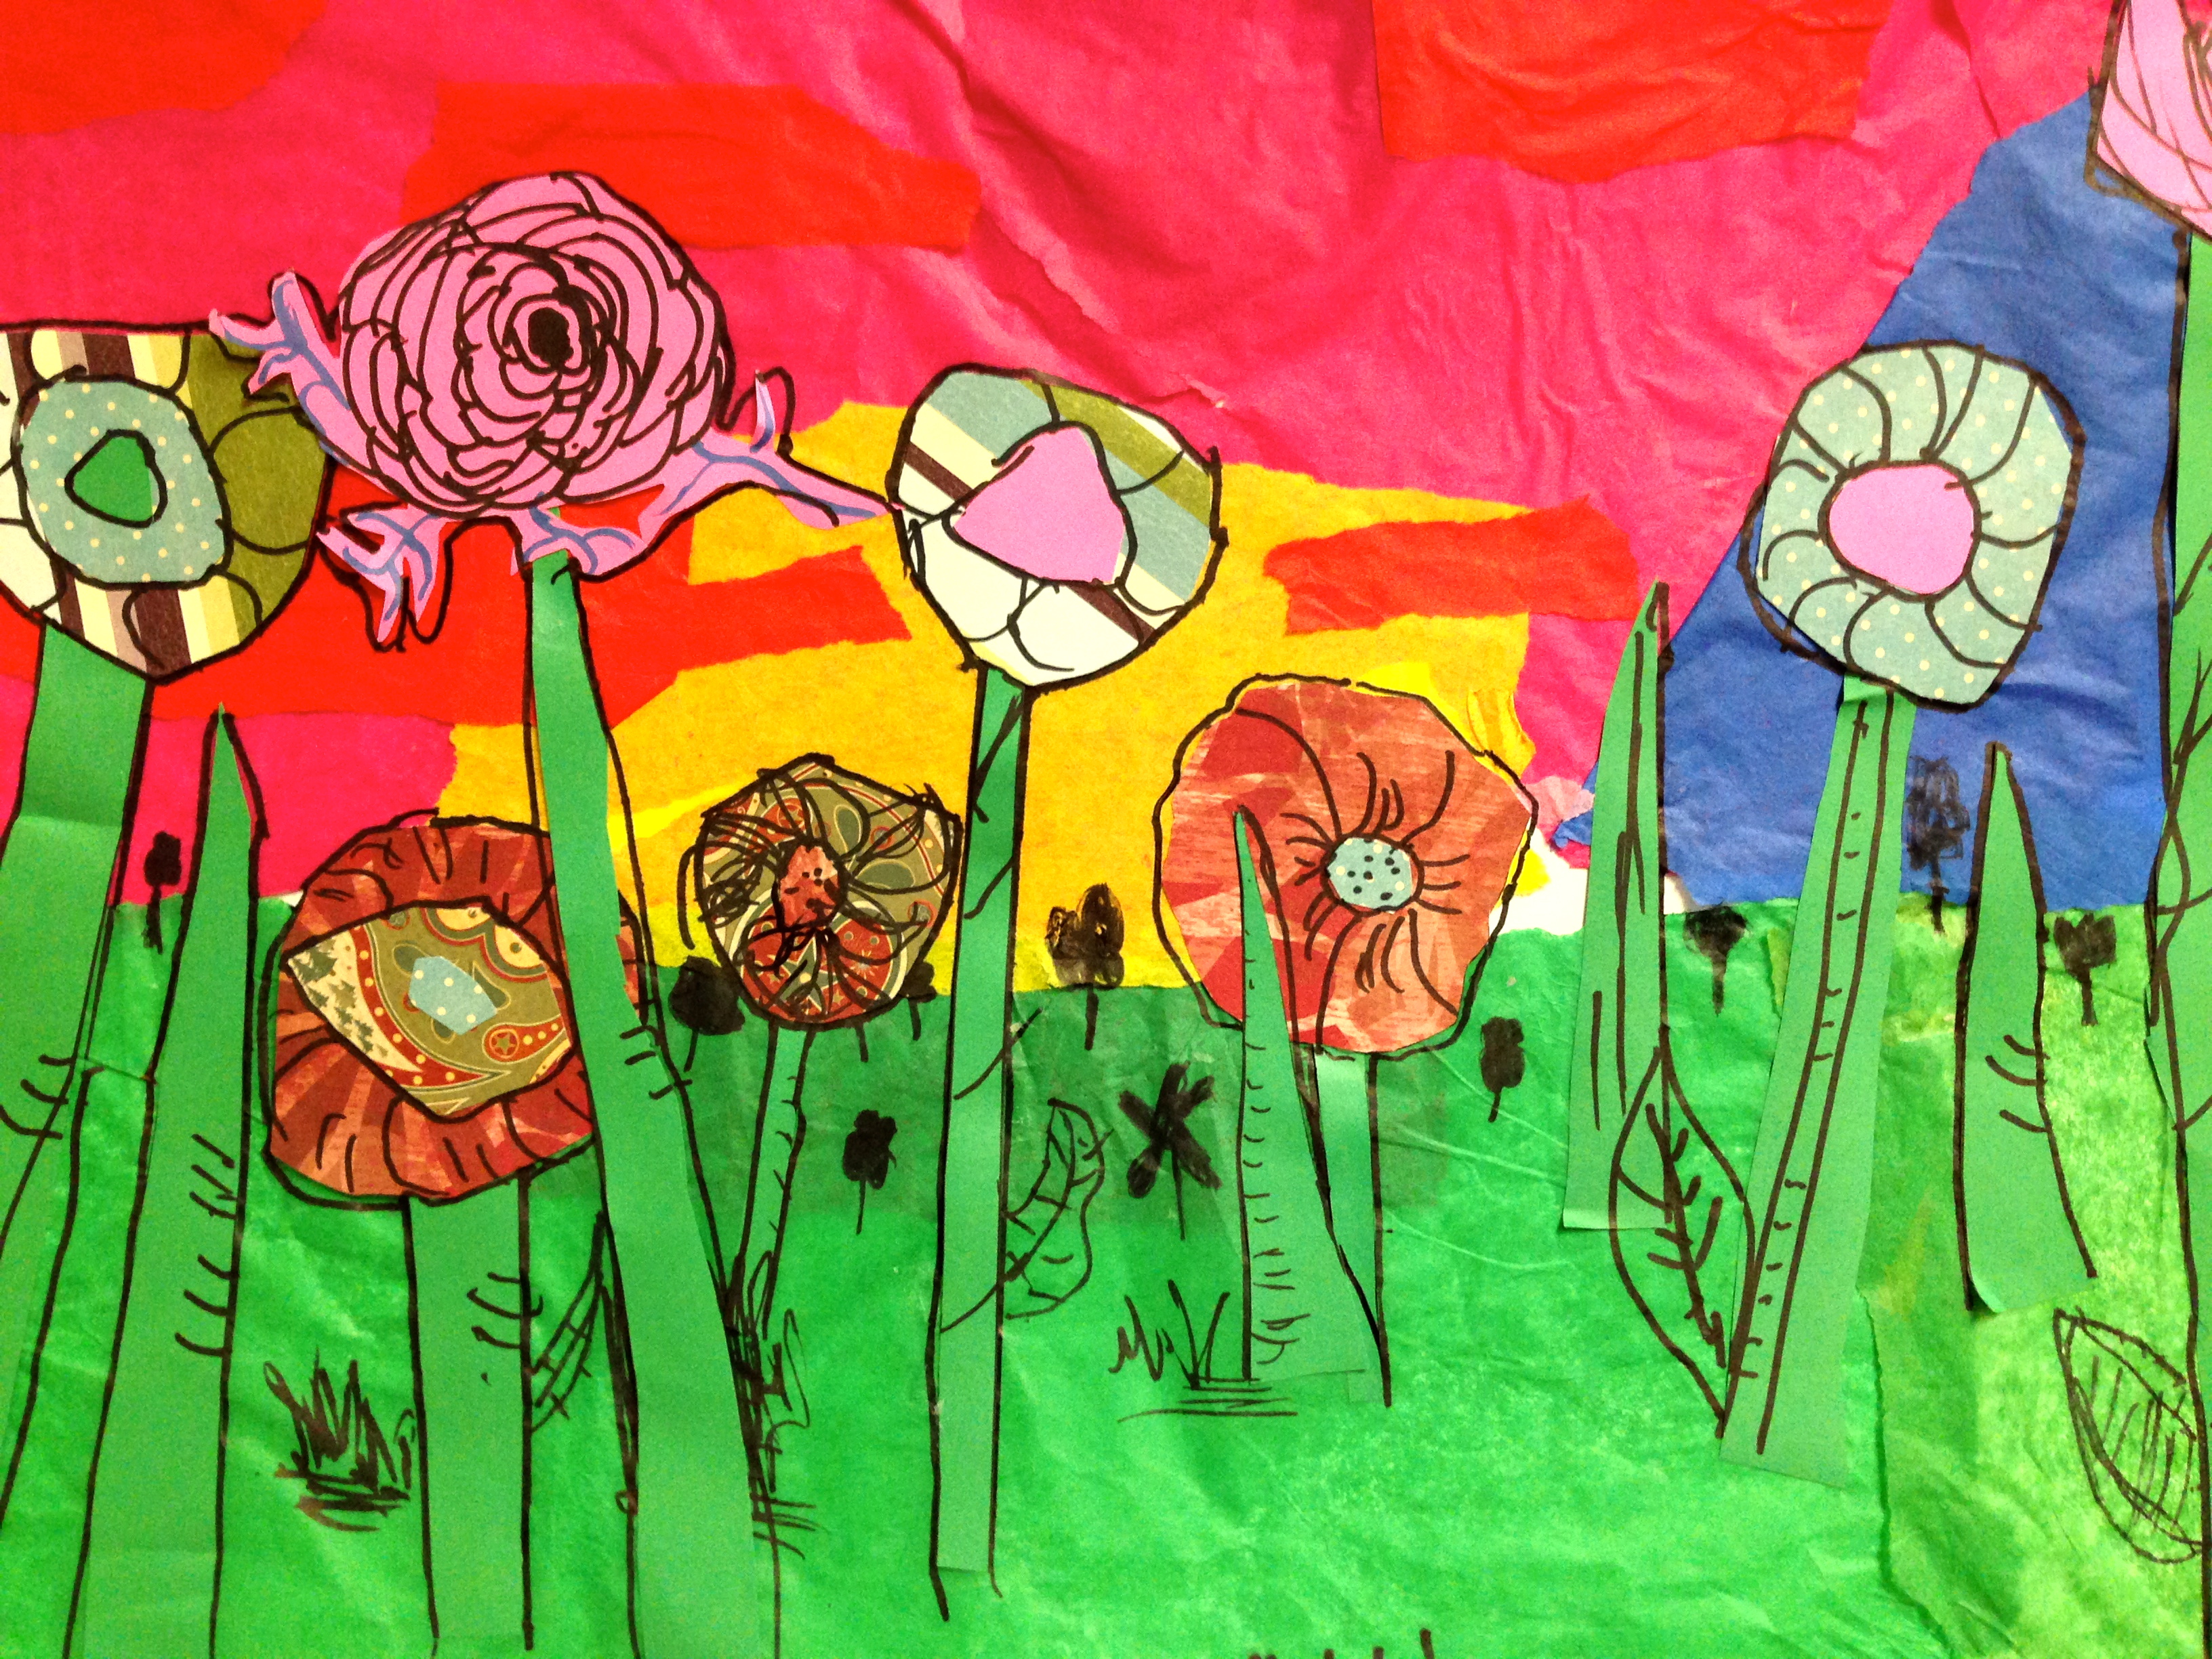
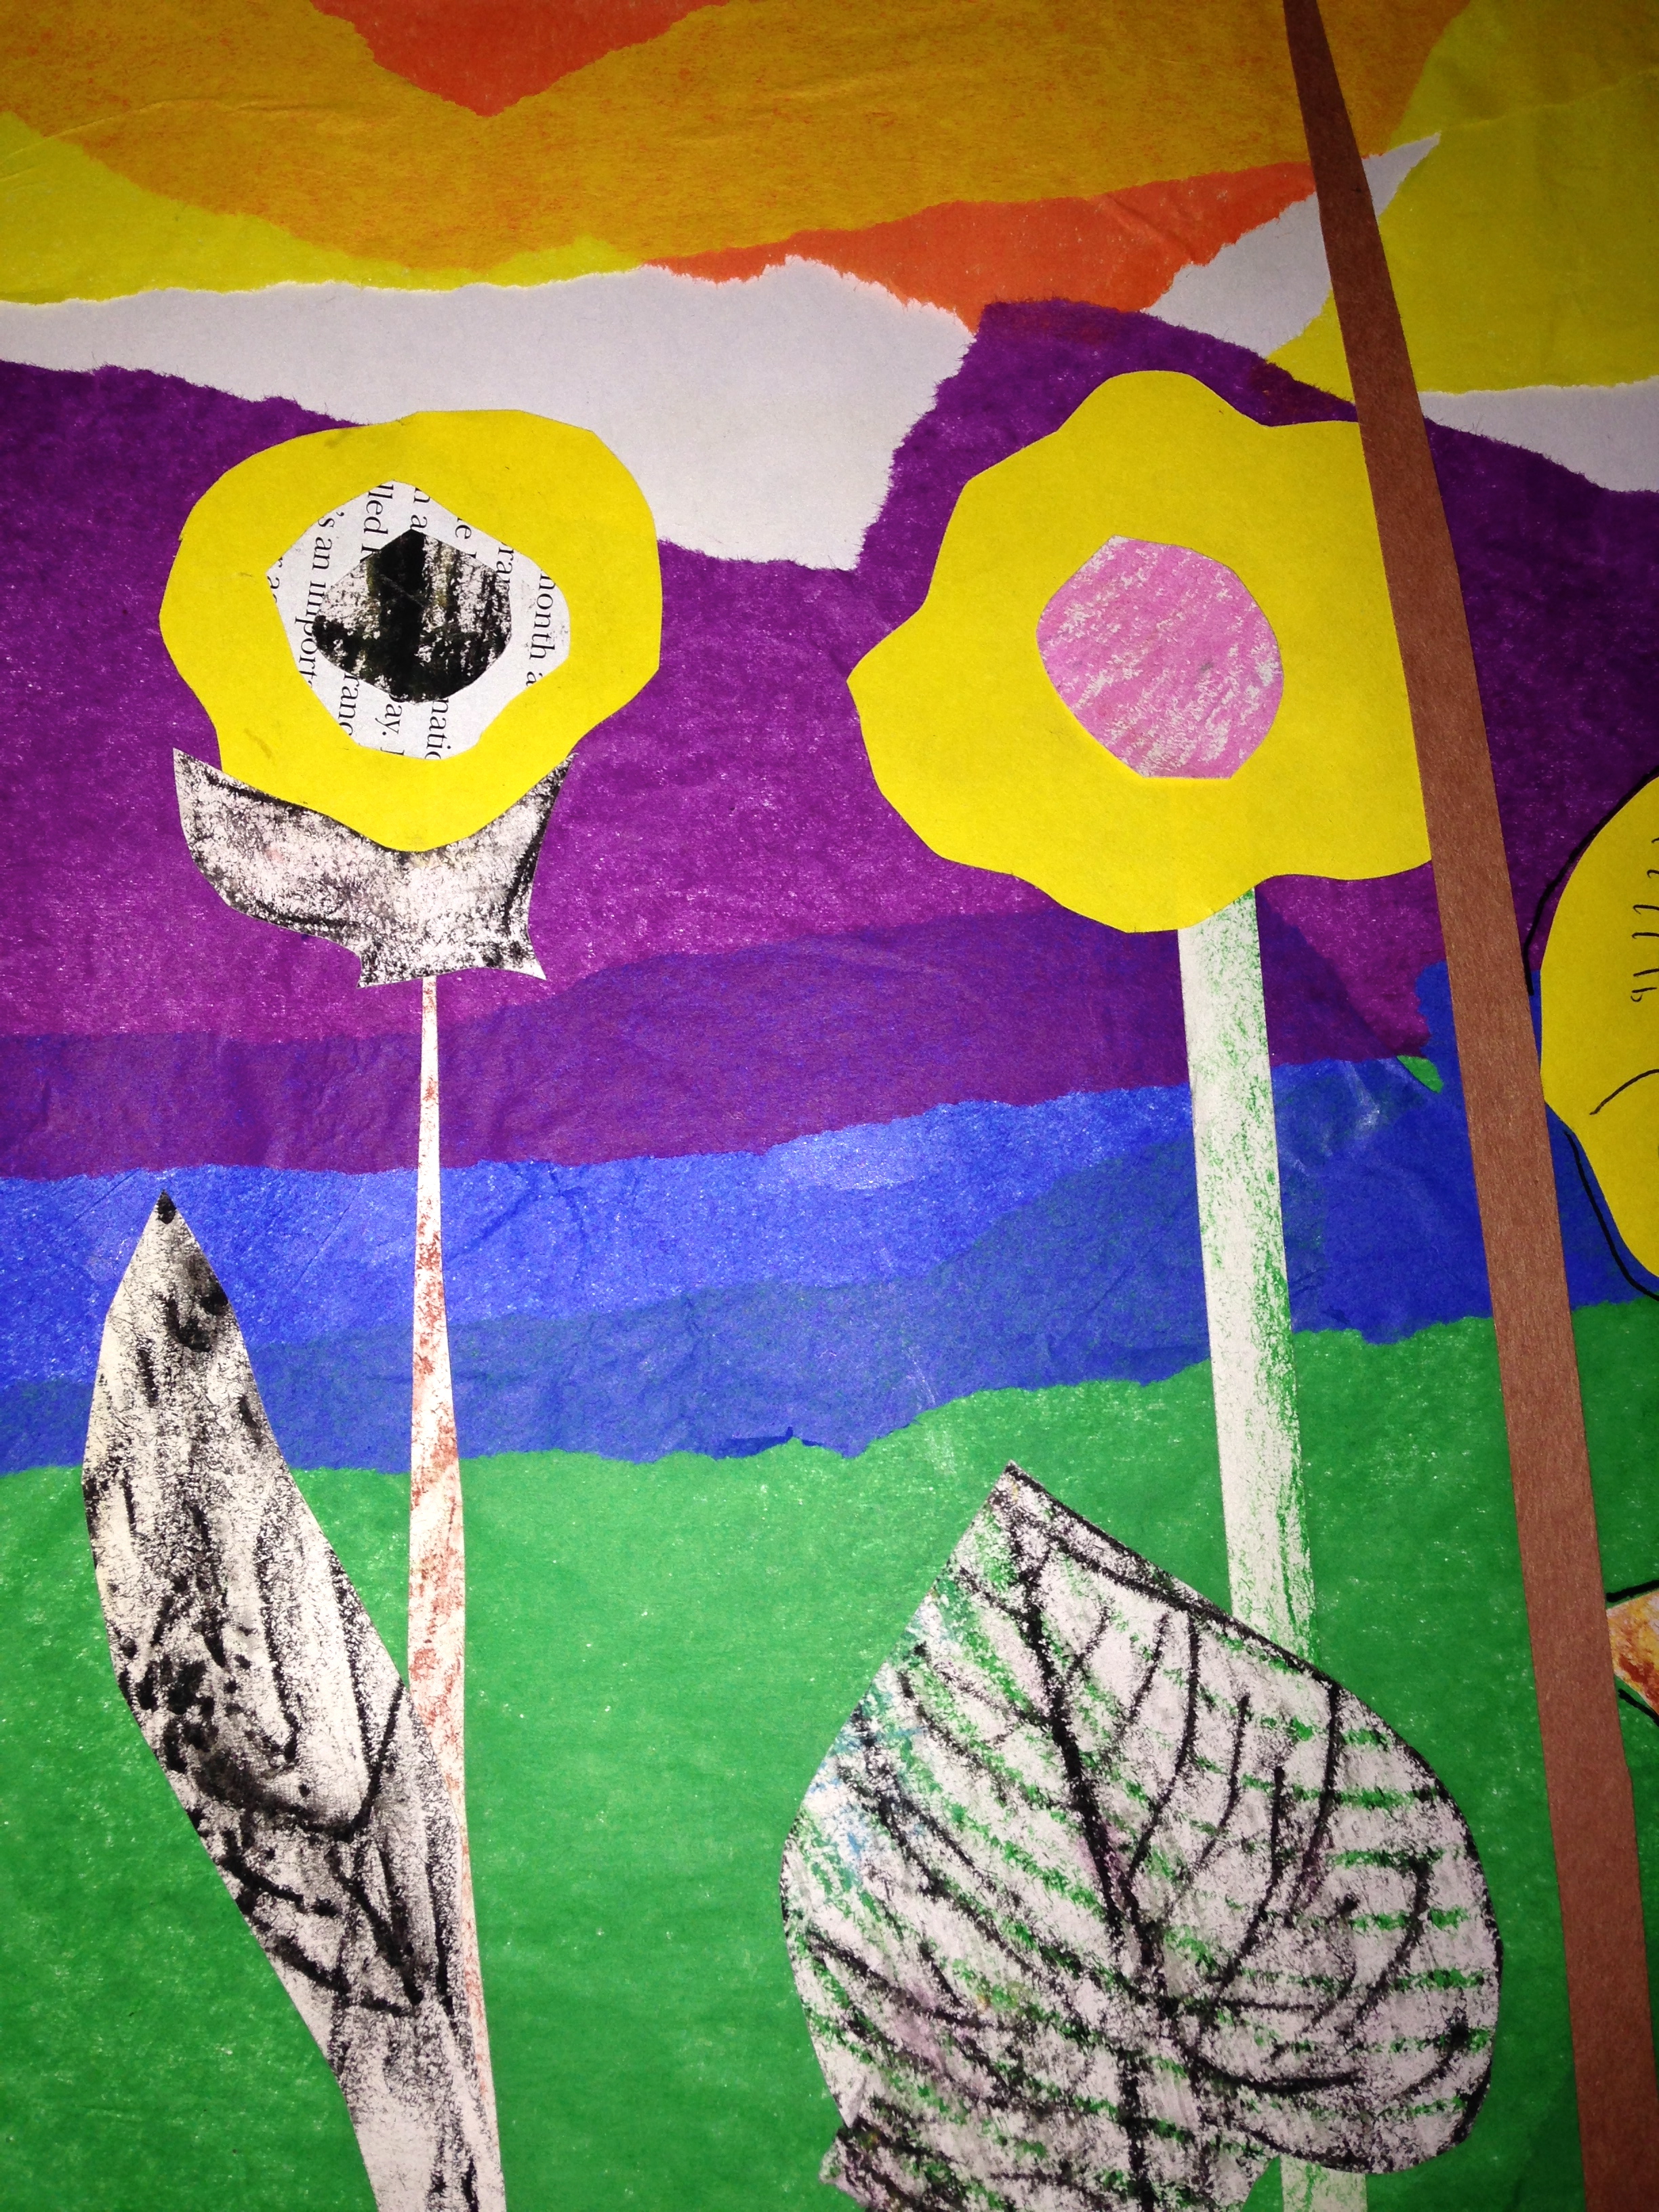
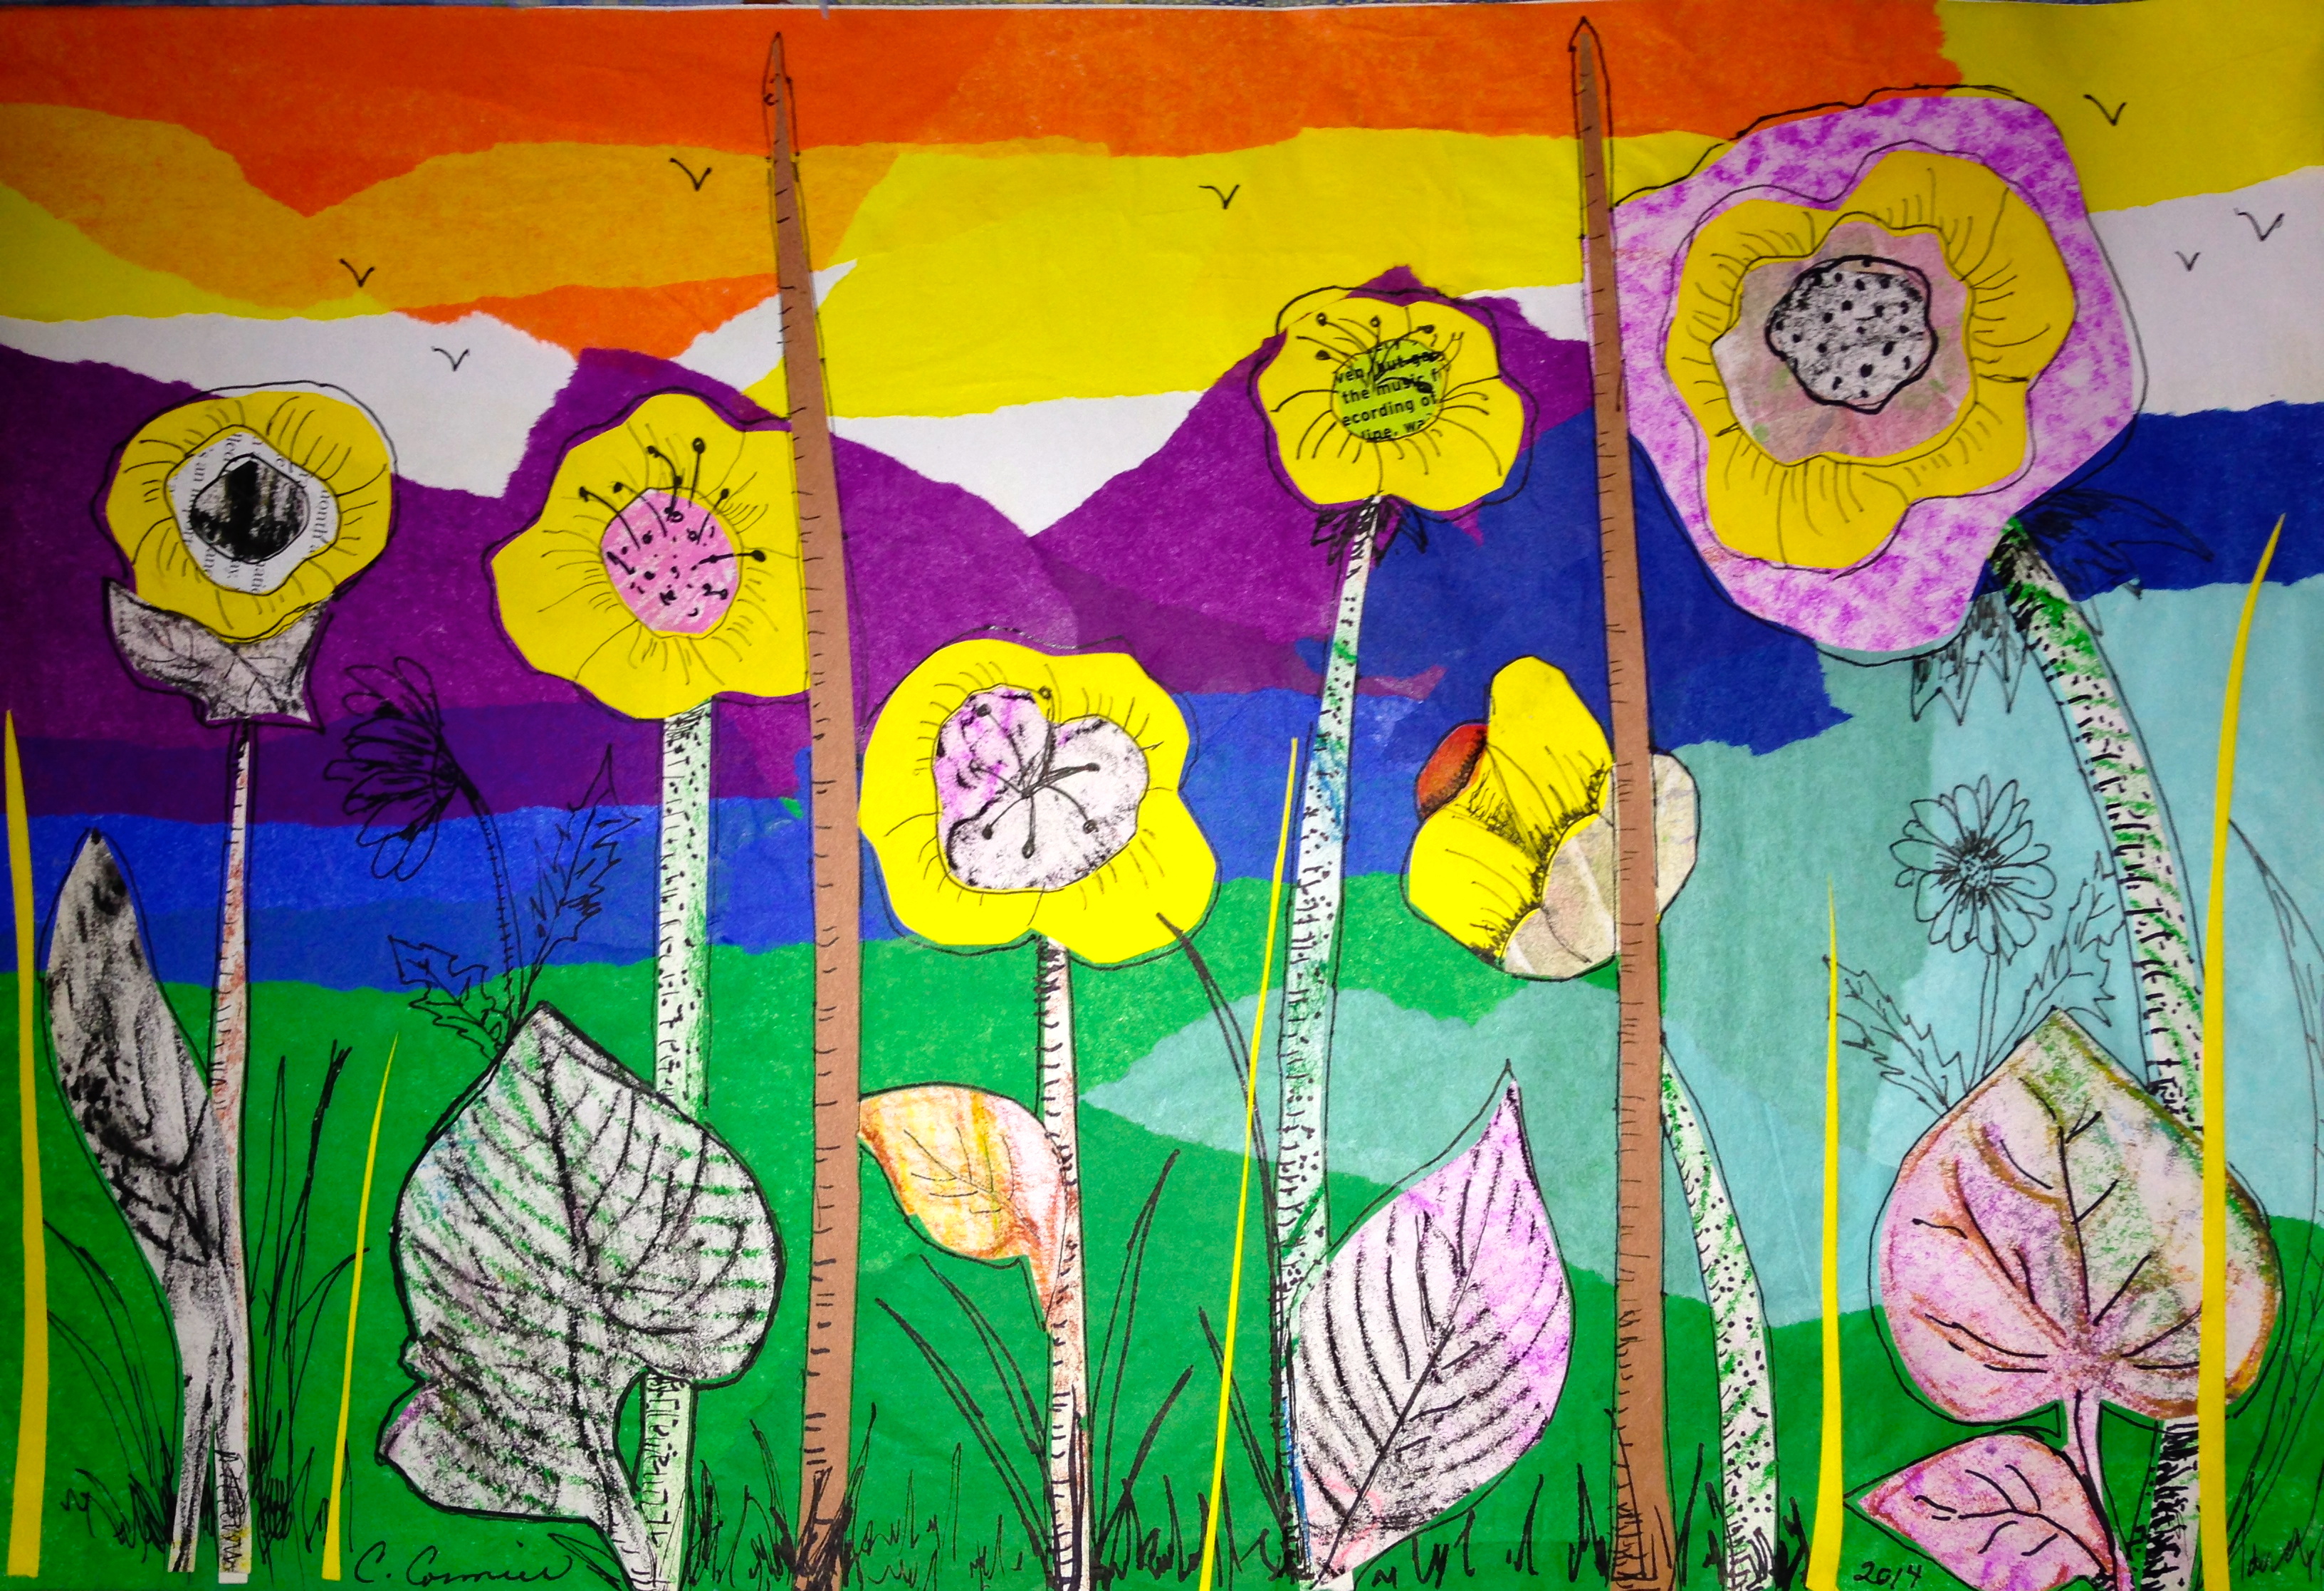
We talked about landscapes and reviewed the components: foreground, background and horizon line. I demonstrated how to tear the tissue and overlap the colours to give the picture more depth. I then explained that once the tissue layer was complete we were going to cut out shapes from construction paper, magazines and art papers that we had created last year to create a foreground of flowers.
In the first class most of the students only finished gluing down the tissue paper. In the next class they will cut out their shapes from different materials, glue them into place and then using a fine tip black marker they will add detail to their cut outs and add some line drawings behind their collaged flowers.
I had lots of art books and posters to demonstrate the technique and show a variety of flowers that they could draw. I didn’t want everyone to gravitate to the blue tissue for their sky so I read them Peter Reynolds new book Sky Colour. It’s a wonderful book that every teacher who teaches art should have in their library. All my classes loved the book and took the message to heart. Very few chose a solid blue for their sky colour.
I started a sample with the children as they worked so that they could visualize what I had in mind. I think that the process is more important than the product and I find giving them a sample to look at helps them better understand the process. No two pictures are ever the same.
Today I finished my sample at home. The first picture shows the tissue in the background and the simple cut outs that are glued on top. In the second picture you can see a close-up of the detail that I drew in after with a fine tip black Sharpie and the third picture is the entire finished piece.

I’m looking forward to seeing what my grade 3s come up with.
Cheers!
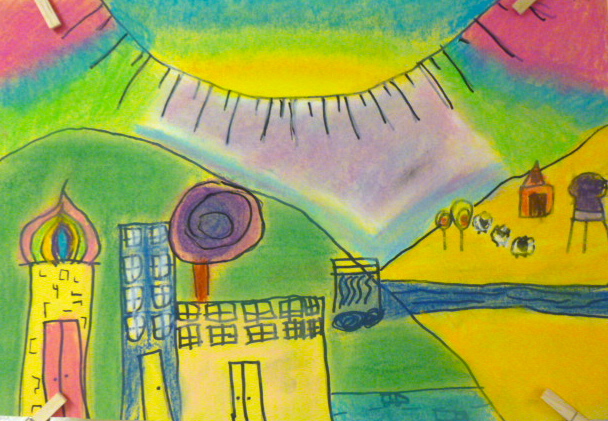
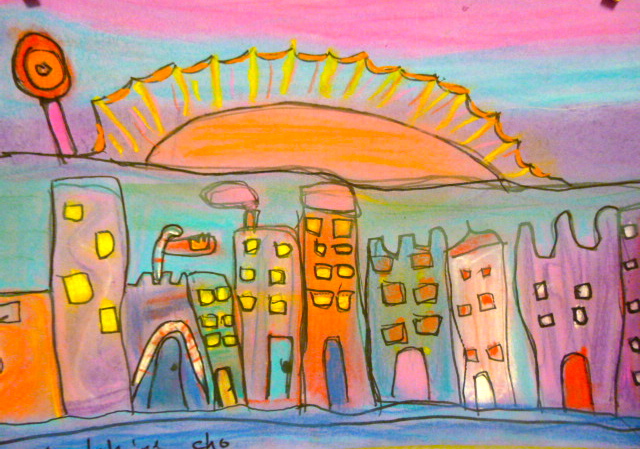
….in the Hundertwasser style
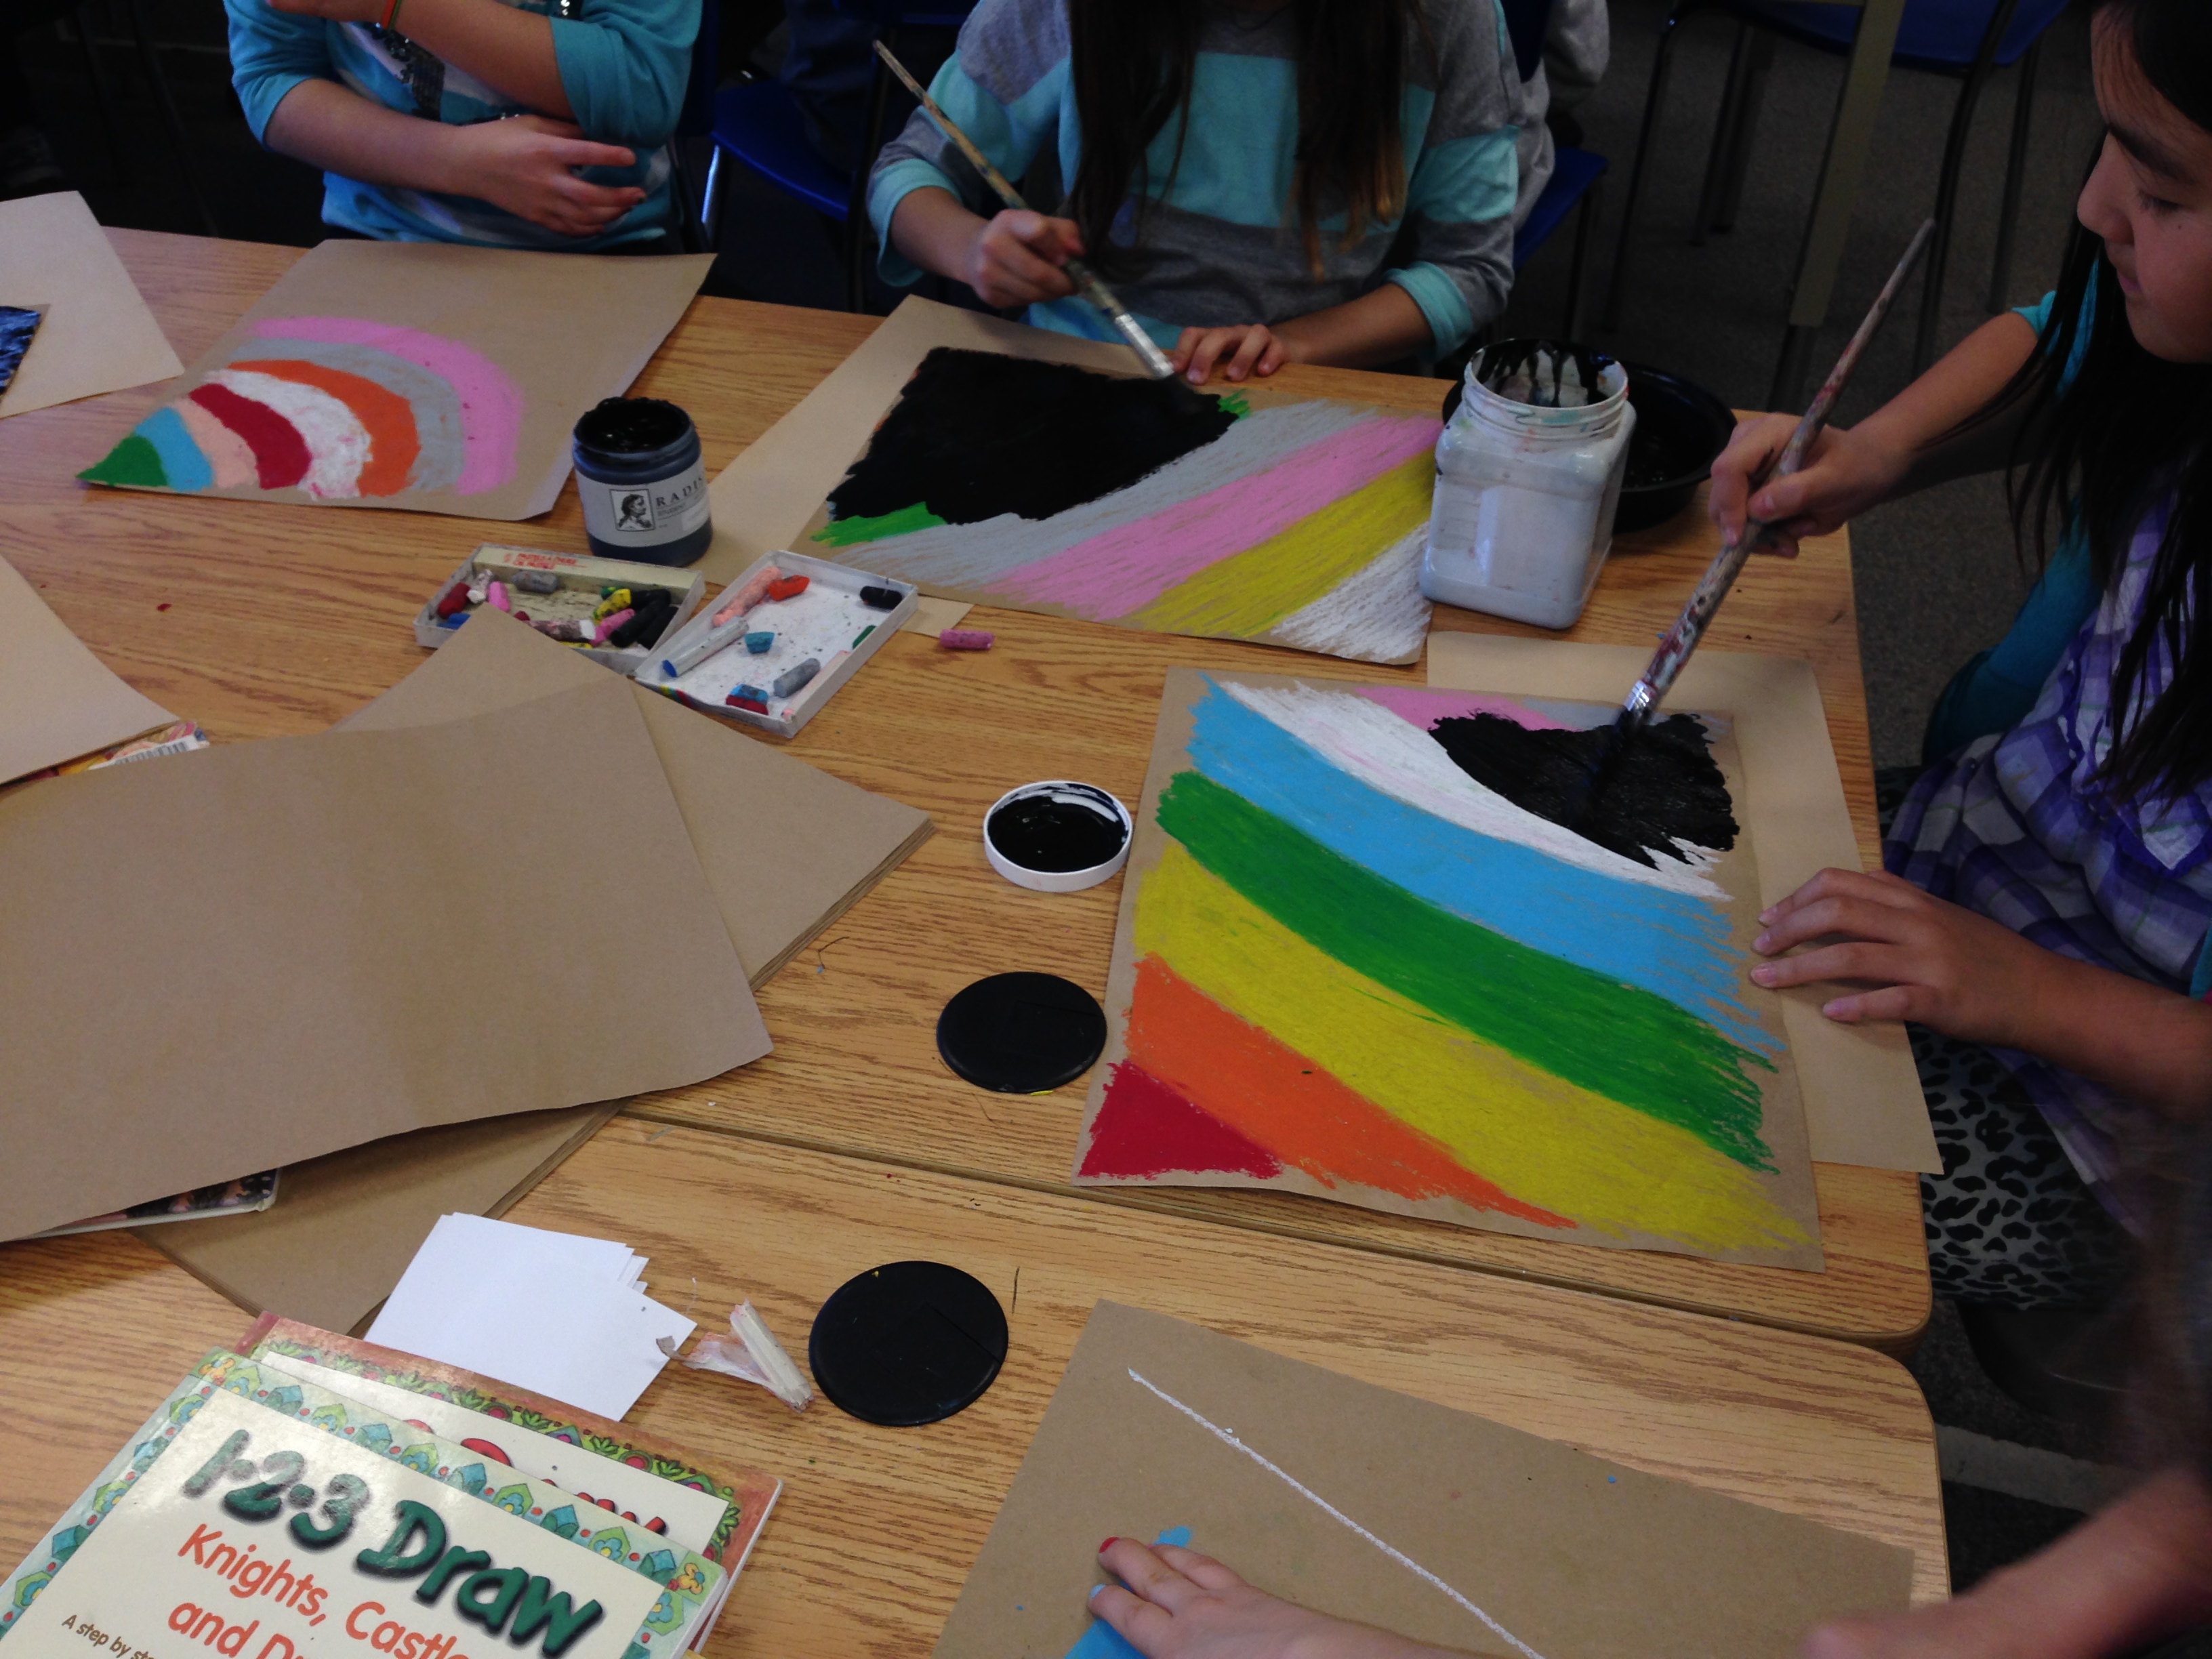
This week the grade 3 students have been working on their urban rural landscapes using vibrant chalk pastels.
We started the lesson discussing the components of a landscape; foreground, middle ground, background and horizon line. We talked about how objects in the foreground were larger and smaller in the background. I then showed the class images of Hundertwasser’s whimsical houses and lollipop trees.
The assignment was to draw city buildings in the foreground and a rural setting in the background. After drawing their rough copies, each student was allowed to choose a sheet of coloured construction paper and then redraw their landscape lines using first pencil and then black or silver marker.

Starting at the top of their paper they then started to add colour using chalk pastels. I showed them how to blend colours using their fingers and pieces of tissue paper. Once all the colour was in place, the black lines were redrawn as the last step. 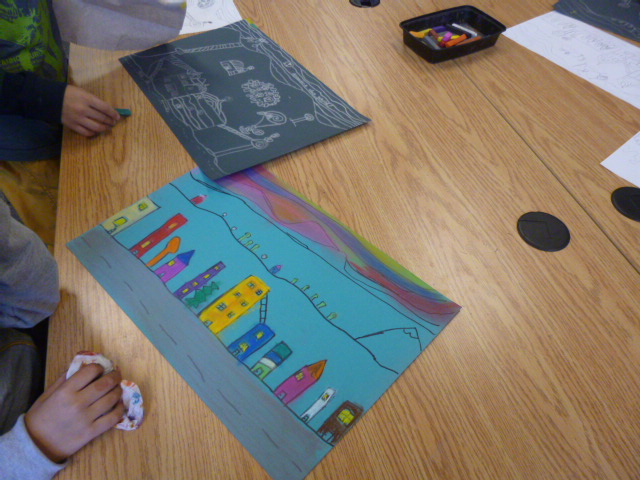
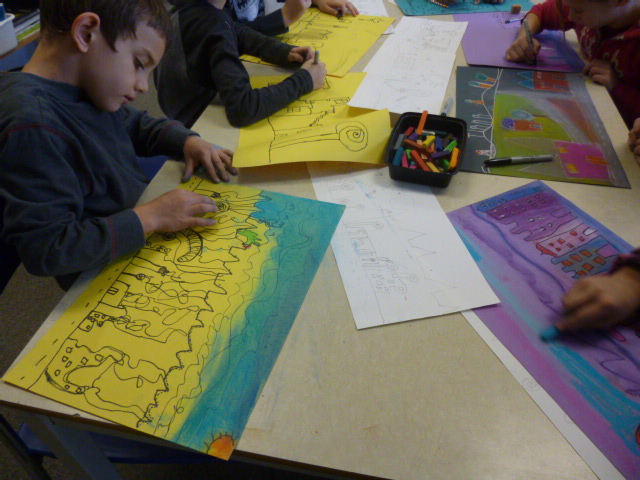
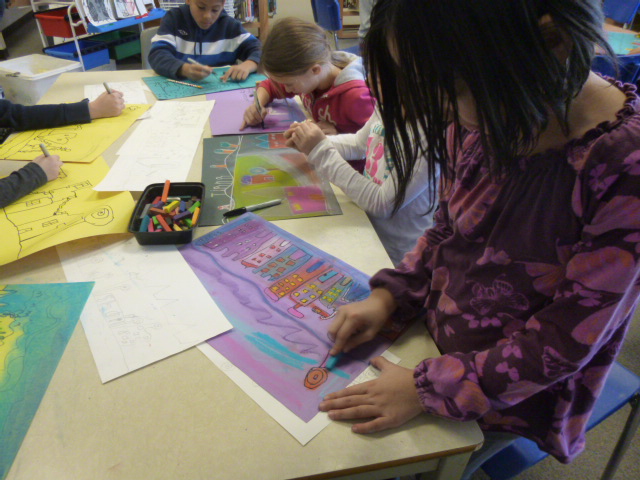
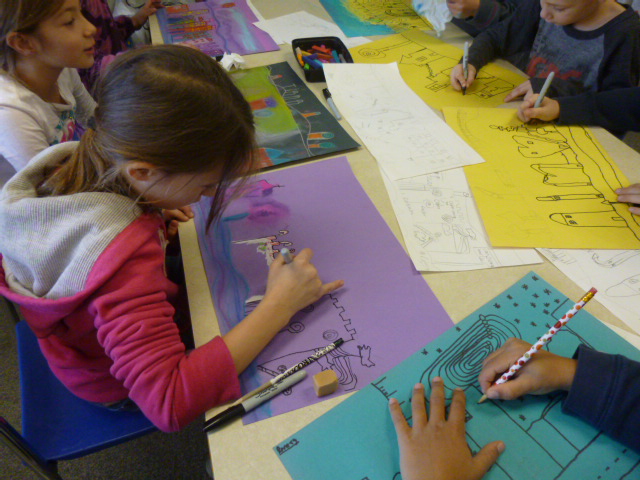
 The final results have been stunning. You be the judge. Enjoy!