….same process as the grade 1s but we learned how to mix primary colours to make secondary colours
Thanks to Carla Sonheim’s free kids on-line classes for this terrific lesson.


Click on each image to get the entire picture.

….same process as the grade 1s but we learned how to mix primary colours to make secondary colours
Thanks to Carla Sonheim’s free kids on-line classes for this terrific lesson.
Click on each image to get the entire picture.
….thanks to Carla Sonheim’s free on-line kid’s art lessons for this idea
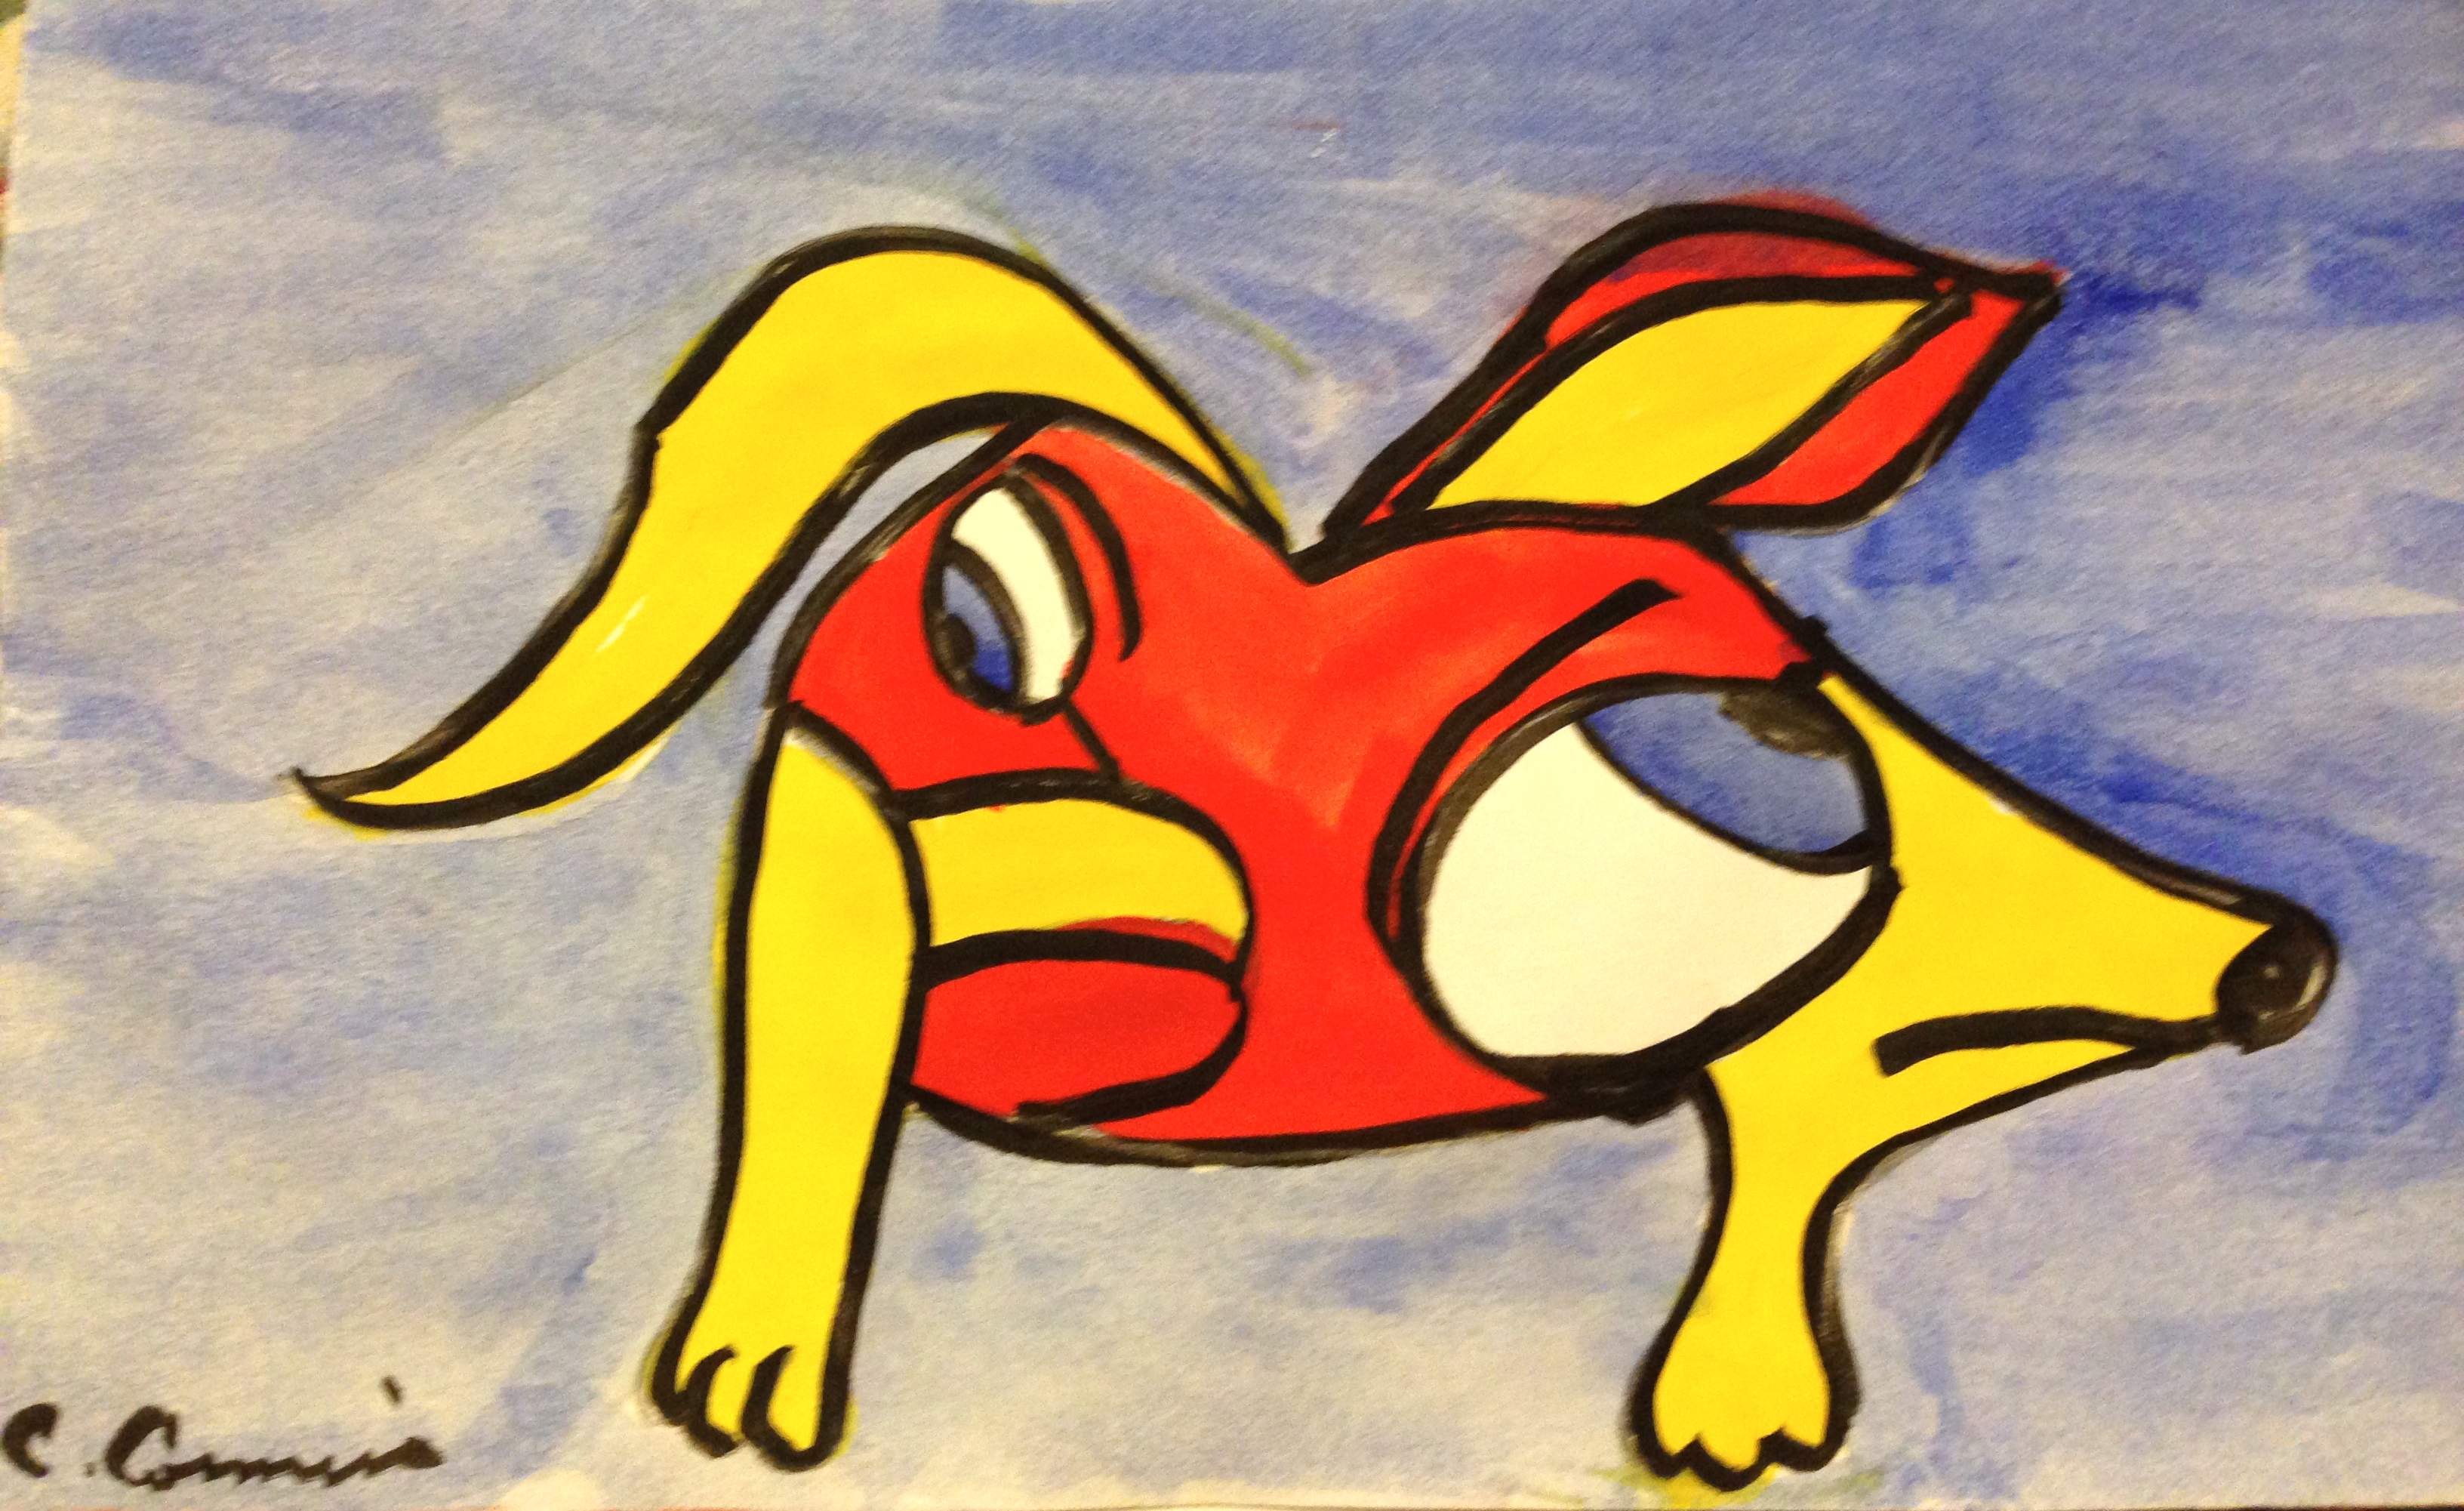
For my very first art lesson this year I introduced my grade one, two and three classes to Pablo Picasso. We looked at his traditional vs abstract paintings and explored some of his unusual portraits. Carla’s unique approach to drawing an abstract dog made the assignment fun and less intimidating than drawing a traditional human face.
After we practised drawing some dog features (snouts, eyes, ears, tails, paws) I gave each child a piece of watercolour paper and instructed them to draw an eye, turn the paper and draw a larger eye and continued like this until there were six or seven features on the paper. Then they had to turn the paper and find the layout they liked best and start joining the features to create a dog. They could change things around and add more features as they went along. This took up pretty much all the time we had in our first class. I collected the papers and stored them away for a week.
The following week we discussed what the primary colours are and I demonstrated how to hold a brush and apply paint to the paper. I returned their work from the week before and handed out the paints. For many in grade one it was a challenge to stay in the lines but for the most part they managed to keep the colours from blending into one another. We used tempera paint so it took a while to dry. I asked the homeroom teacher to give the students time to go over the pencil lines with a black Sharpie so that their dogs would reappear.
I loved their finished works of art. I’ve selected a few to share with you.

….another great art lesson for kids
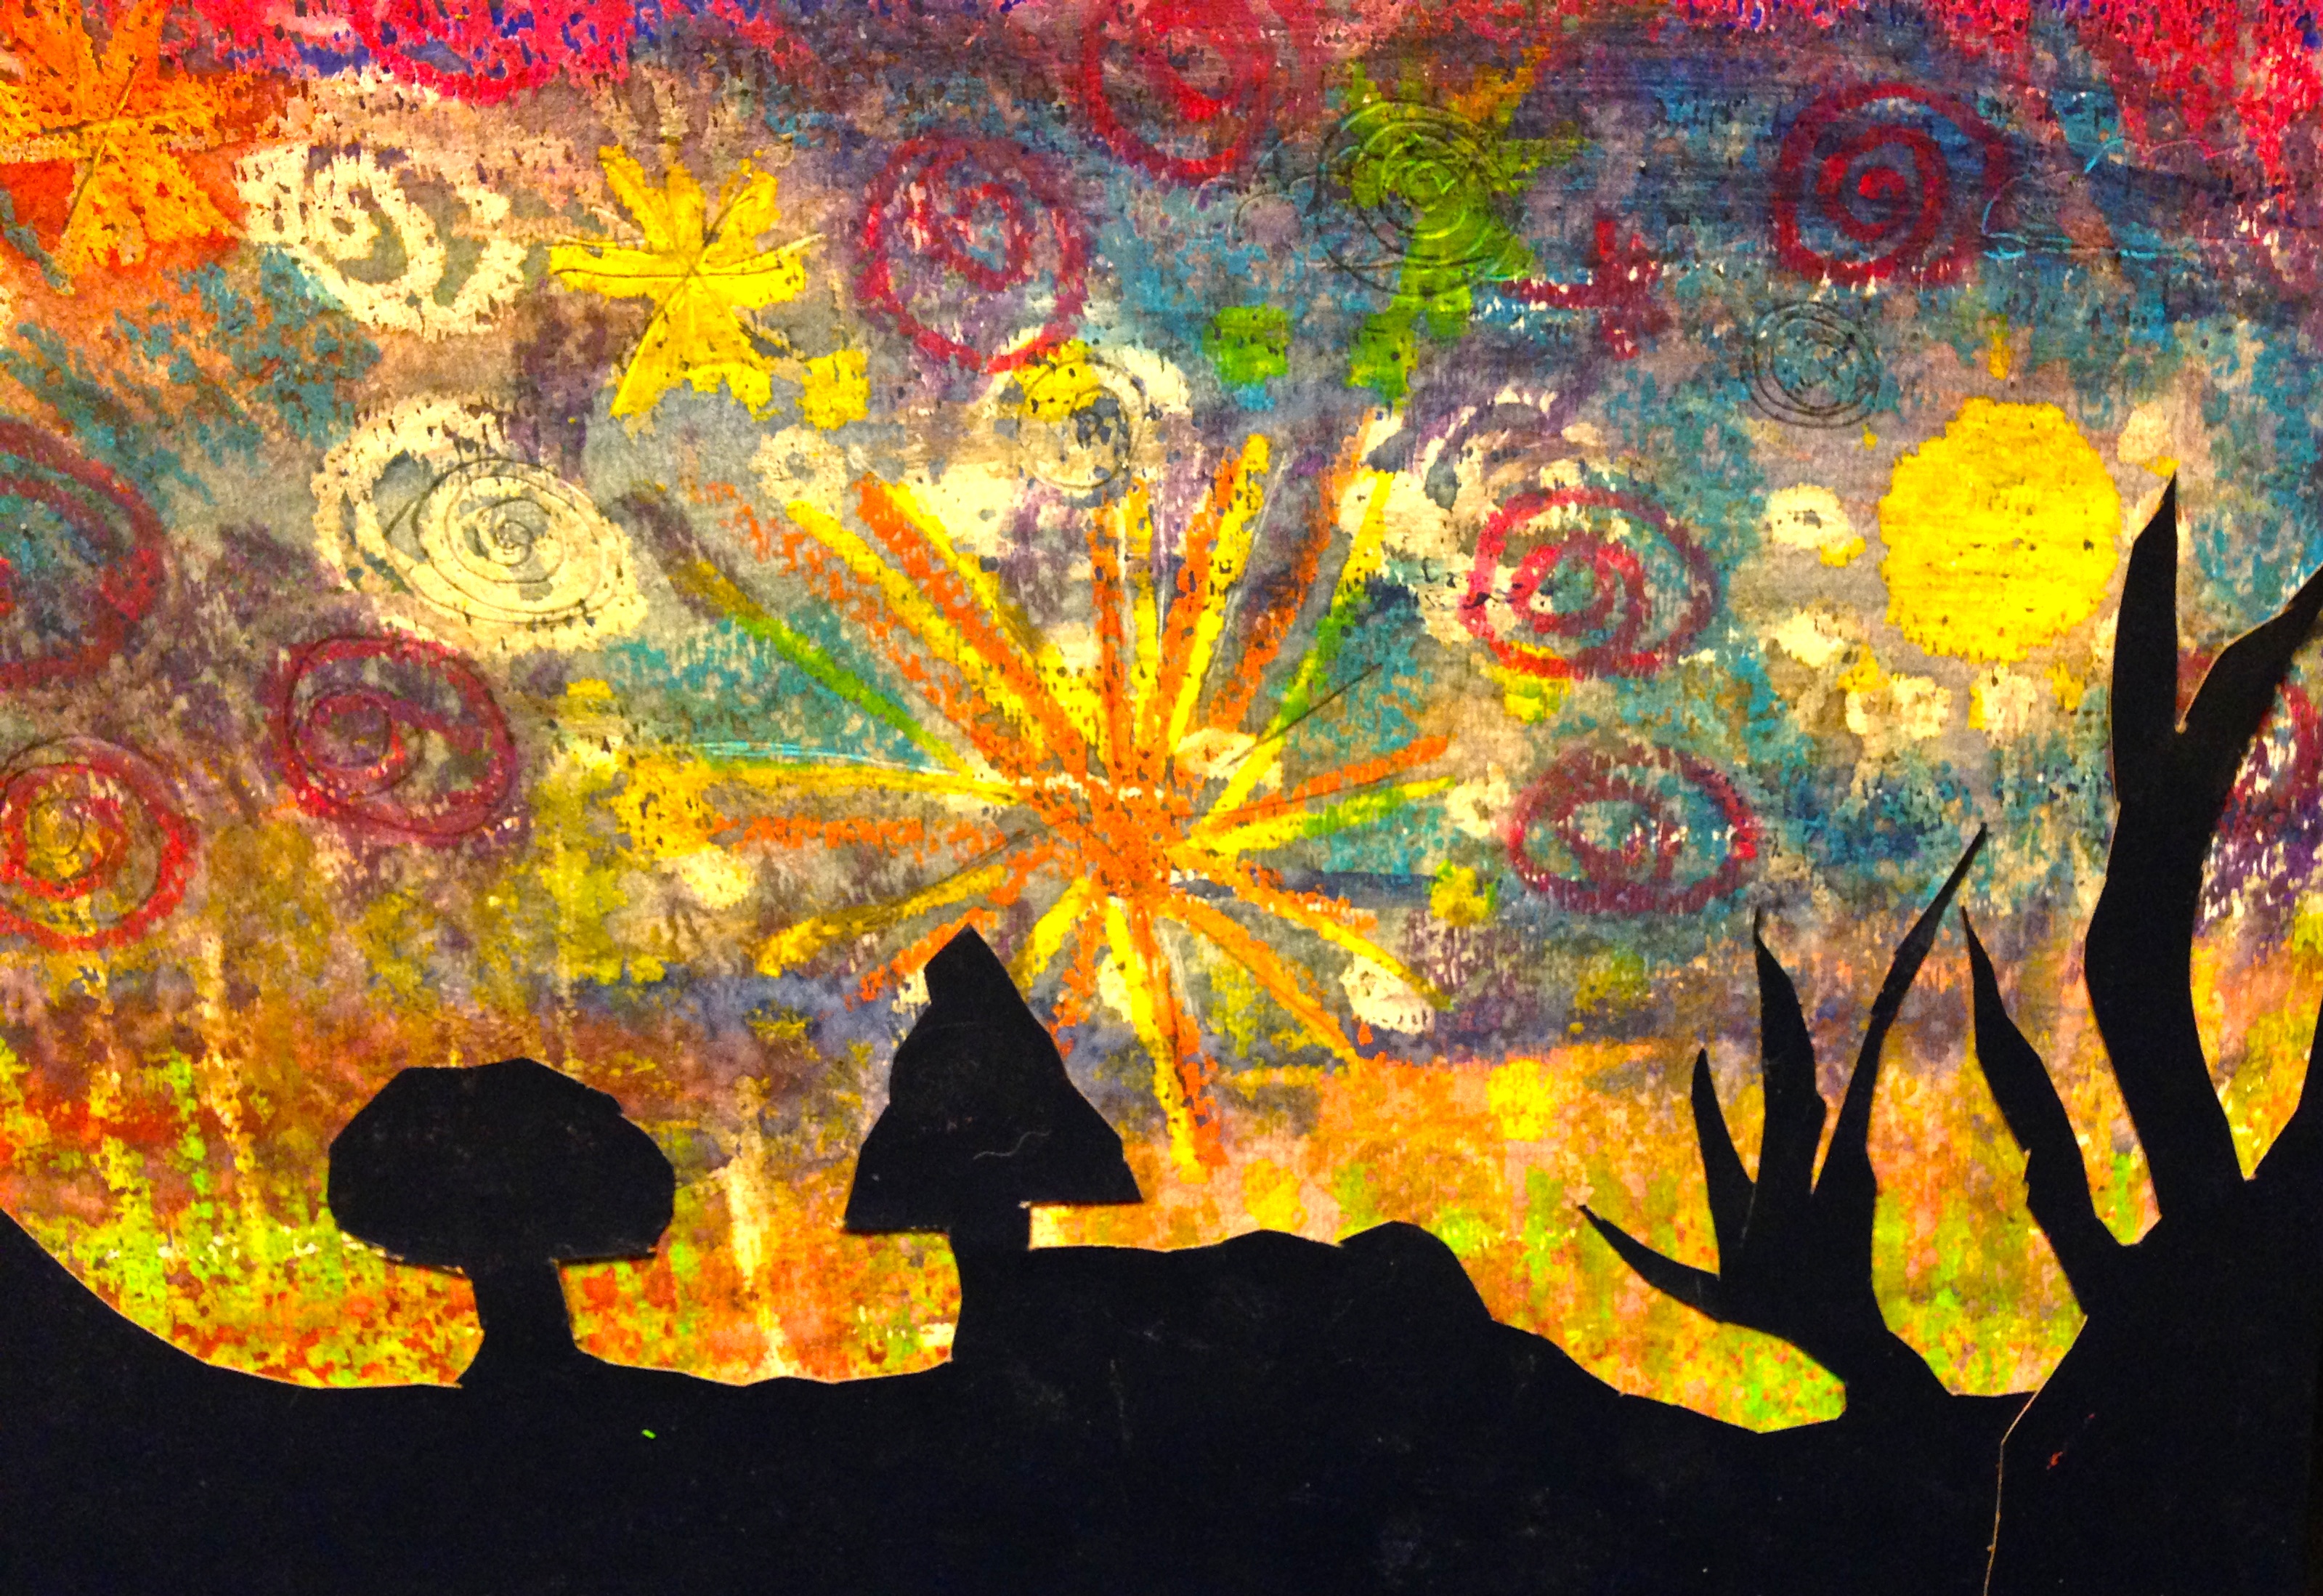
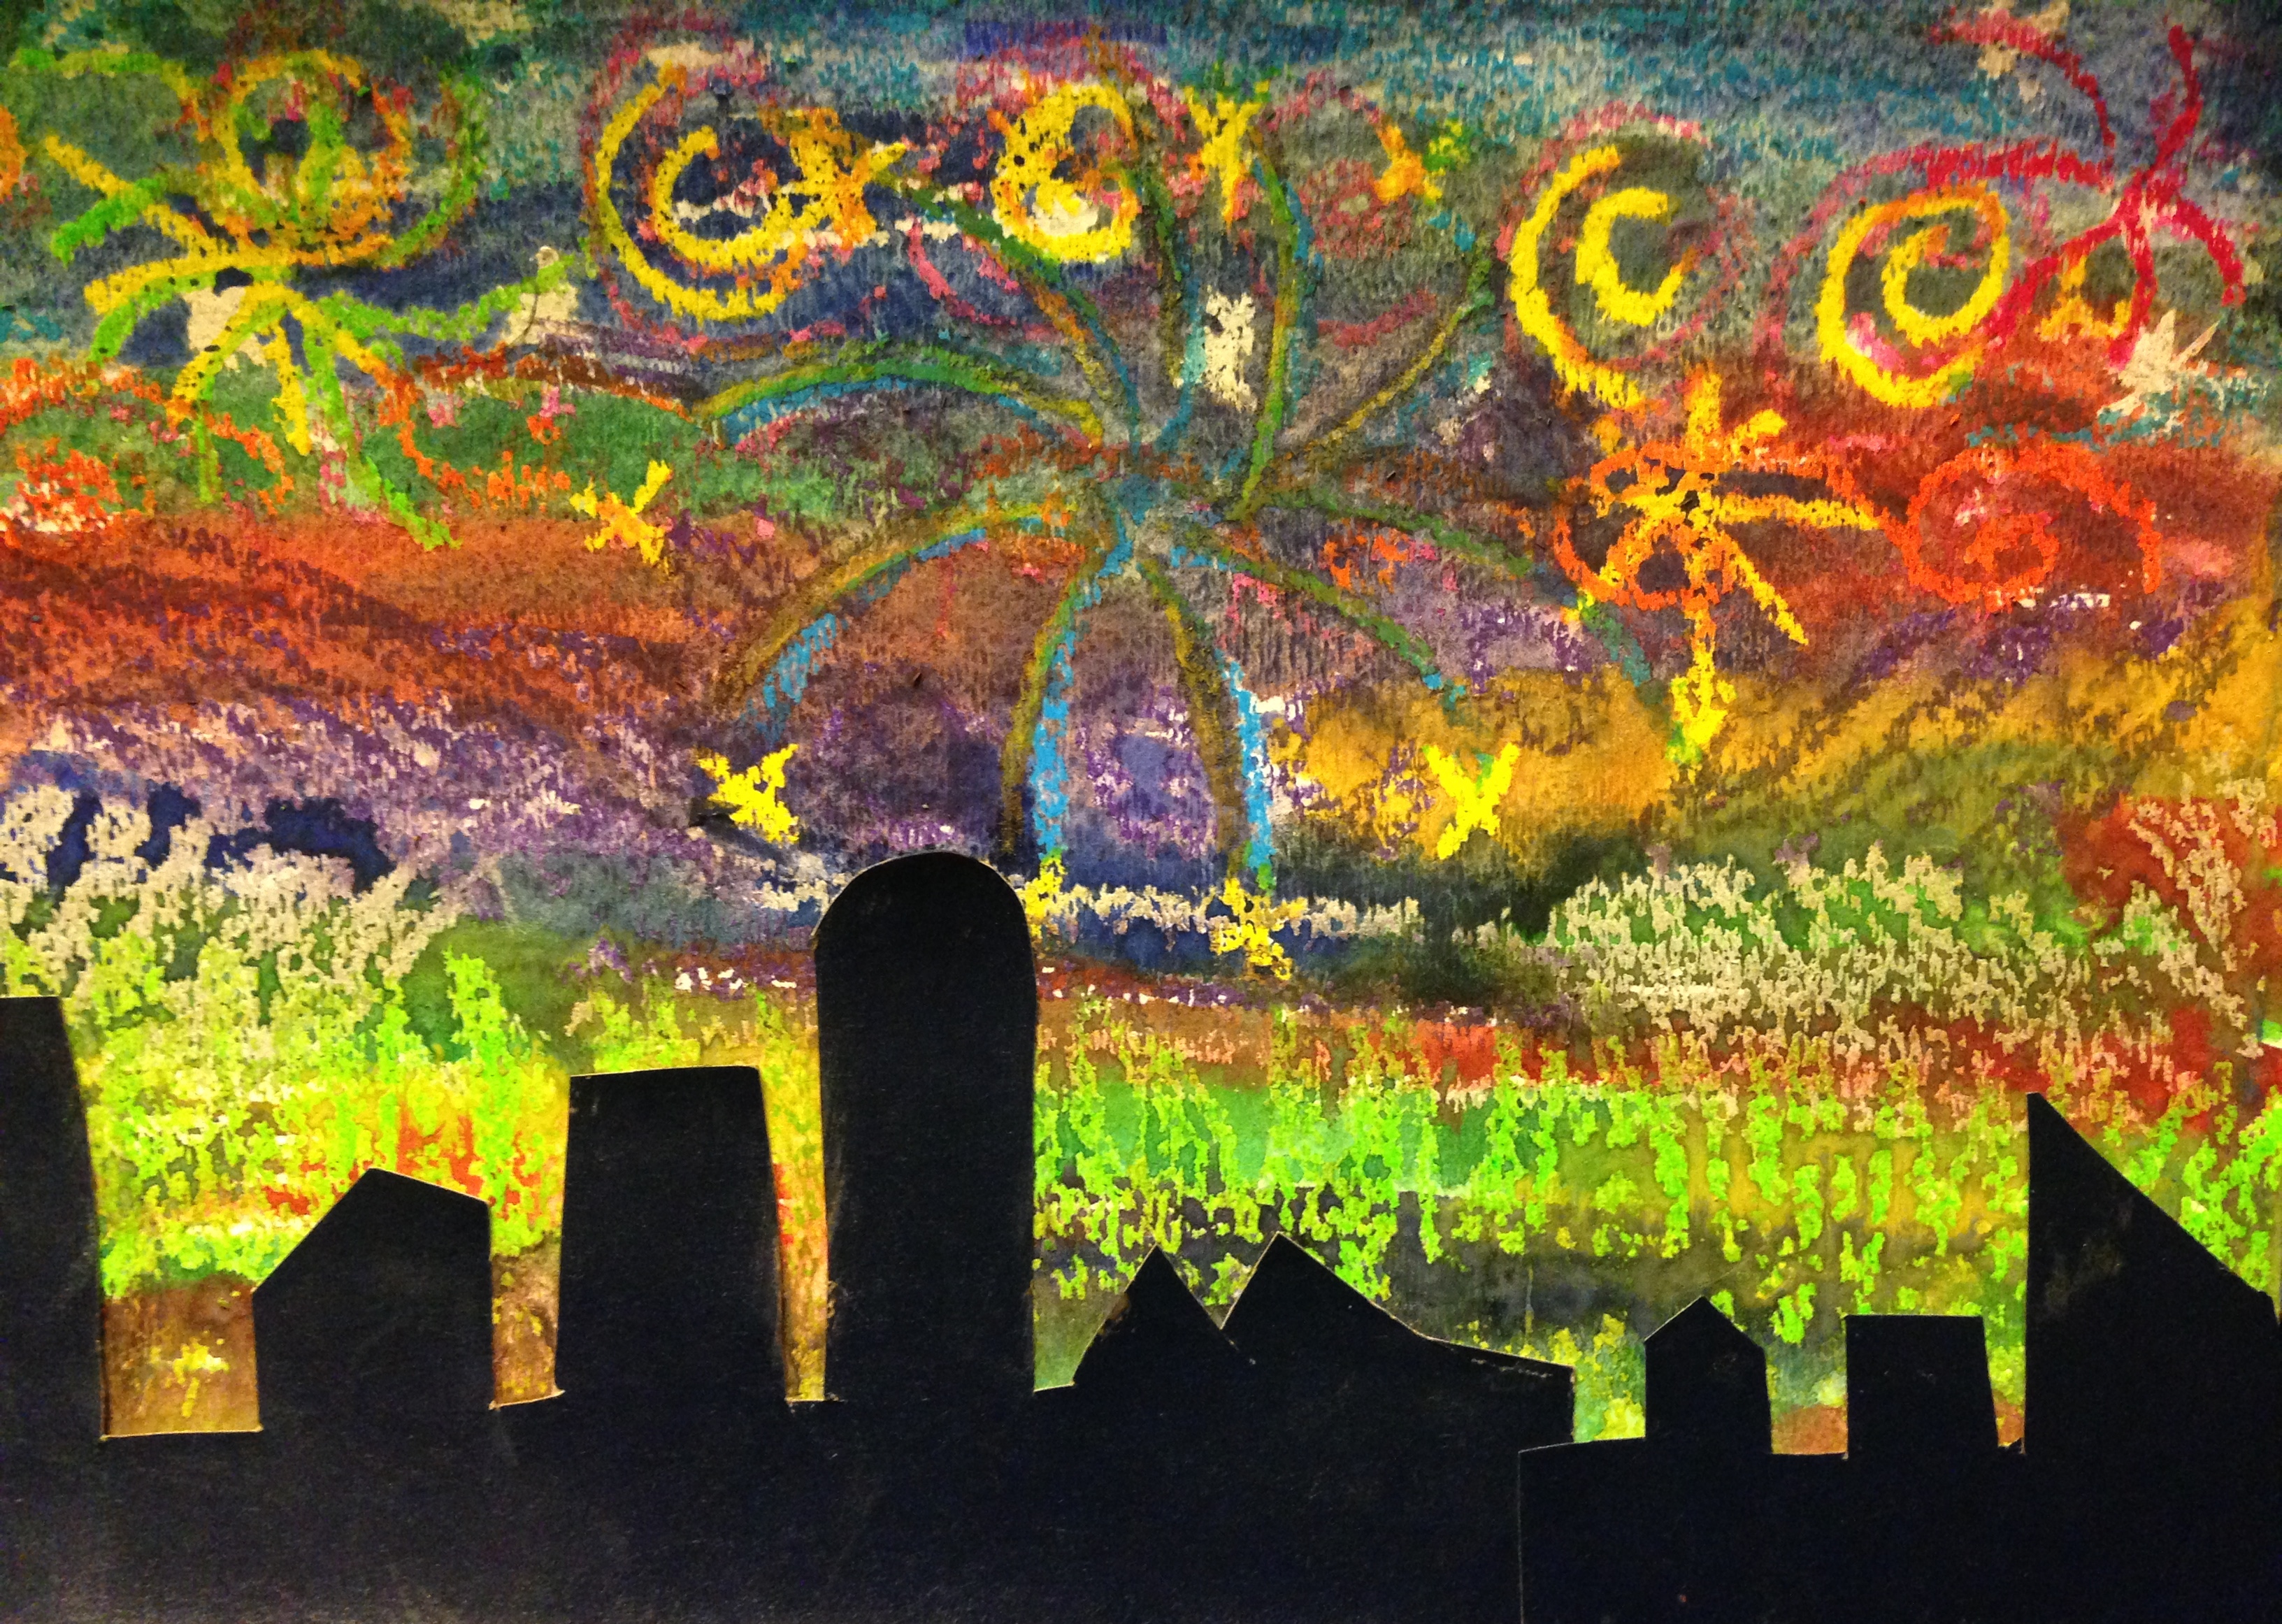
Thanks to Carla Sonheim and Diane Culhane from Kids Art Week for this great lesson called Crayon Resist Night Sky.
This would be a great introduction to Vincent Van Gogh and his famous painting Starry Night. I used oil pastels but wax crayons would also work for this project. Students should be encouraged to use lighter colours from the crayon box, especially white. They make the most impact after the water colour is washed over them.
This could also be a lesson on texture so colouring in various directions and pressing quite hard are essential. Swirls and stars will add visual interest and are details seen in Van Gogh’s painting. Be brave and experiment with lots of different colours. Don’t limit yourself to colours that you think are sky colours. Reds, pinks and yellows and even greens make for very interesting night skies. Think of the Northern Lights and have fun.
Once the paper is filled with crayon or oil pastels move on to the water colours. Make them quite watery and start with the darker colours at the top of the page. Again use a variety of colours but avoid black. While the paint is wet you can also add salt to give your painting even more texture.
Using black or a very dark paper cut out silhouette shapes to add to the bottom of your painting. This can be anything you like; forests, hills, mountains, houses, fences and city skylines. When the paint is dry glue the shapes to the bottom of the paper. There you have it, your very own Starry Night painting.
…..thanks to Carla Sonheim and her free Kid’s Art Week
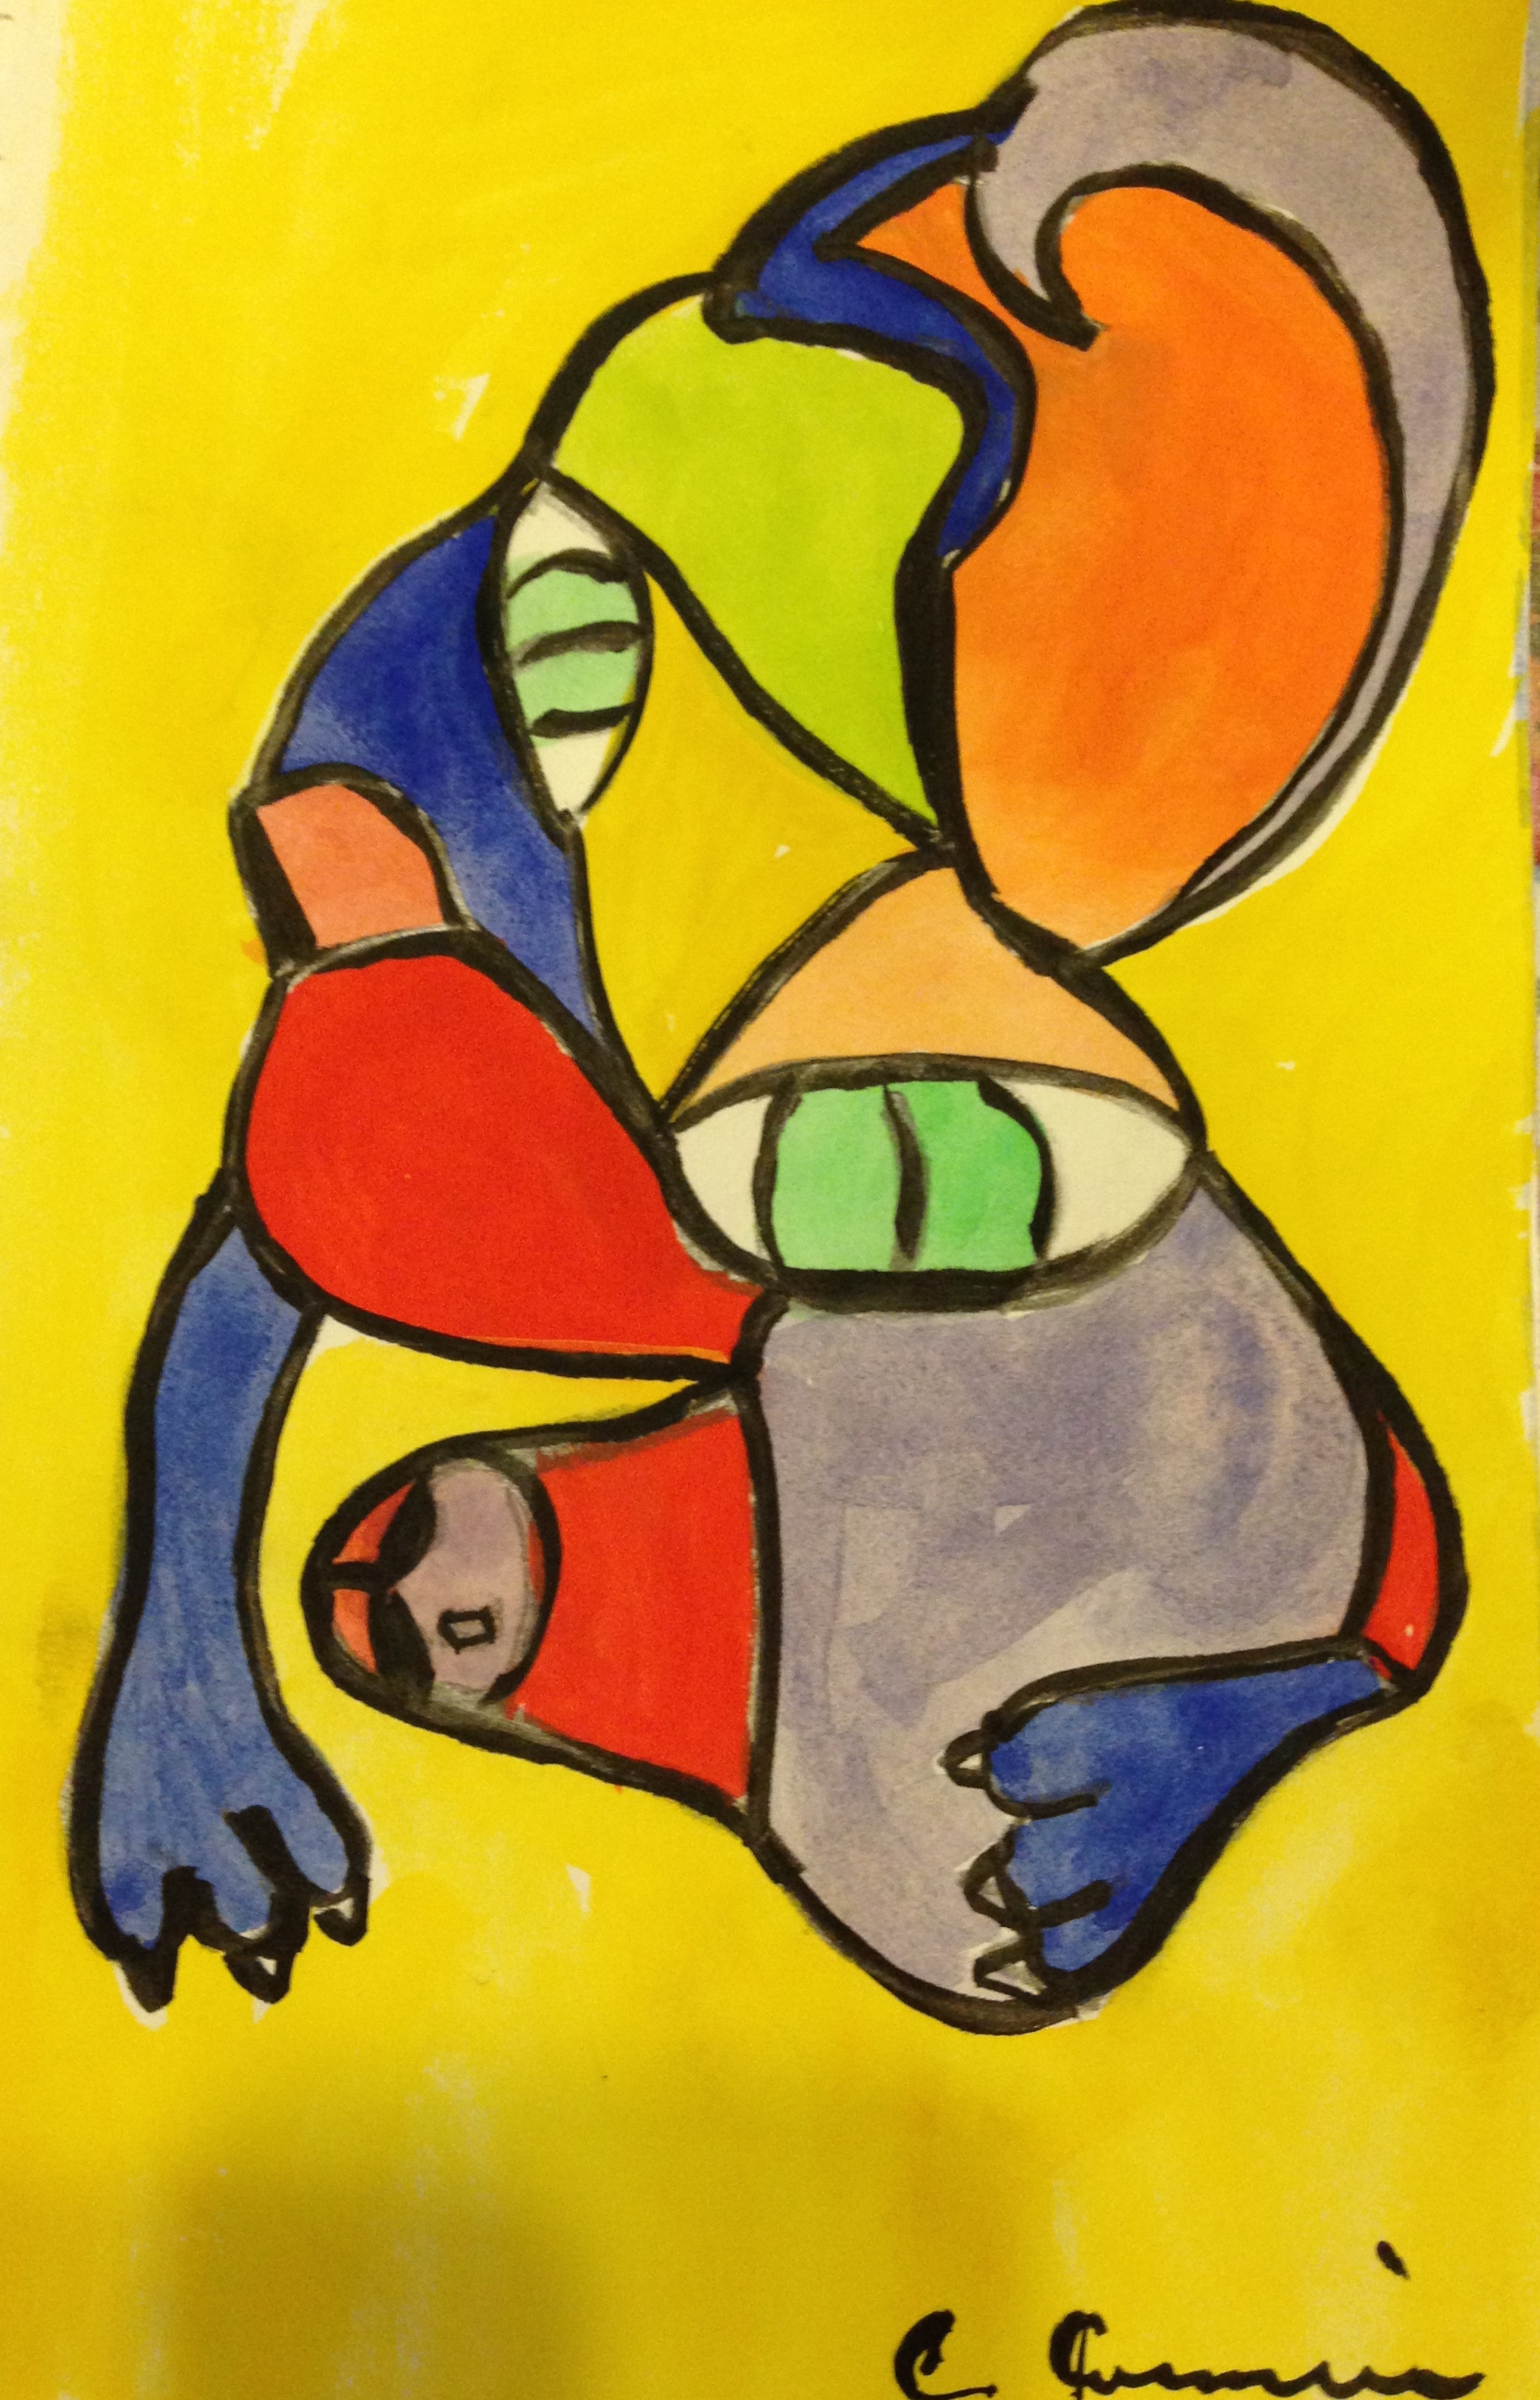
I’m always looking for new and fun ways to teach art to my students. Next year I’ll be teaching grades 1,2, and 3. I like to combine a little art history with the elements of design when I introduce a lesson. Carla’s Picasso Dogs is perfect. The kids will learn a little bit about Picasso, cubism and primary and secondary colours.
Students will be given a small piece of watercolour paper and a pencil or black oil pastel. They will be instructed to draw individual items that pertain to a dog or any animal that they choose. After drawing the first body part they will turn their papers 90 degrees and then draw the second part. They will do this six or seven times and then they will connect all the parts to create their Picasso animal or alien.
Once the parts are all connected the students will be given further instructions to draw lines across the animal to divide it into smaller sections (this is the cubism part). The first animal will use only primary colours. Once that piece is finished they may create a second animal and I will teach them how to mix the primary colours to create secondary colours. This animal will only be painted with secondary colours. The final step is to go over all the pencil lines with a black marker.
For students who work quickly they may draw a third animal and use a combination of primary and secondary colours. Here are my samples:

….there were plenty of gifts made for moms in the kindergarten classes last week
I wanted to come up with a nice piece of art to put on a card that the children would be excited to give to their moms. I decided to to teach the children how to draw simple hearts and flower line drawings using paint. When the paint dried they could add more interesting detail using black (or coloured) markers.
When the children were happy with their creation they could use the entire piece and glue it down onto a sheet of card stock or they could have their favourite section trimmed to fit onto a card. Some of them took it a step further and actually cut up their shapes and then glued them down individually.
We wrote a message on the board for the children to copy in their own hand to add to their cards to create their original Mother’s Day Card. What do you think? Of course I’m biased but I think they’re fabulous.


fins
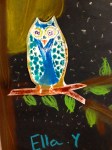
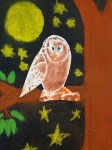
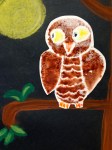
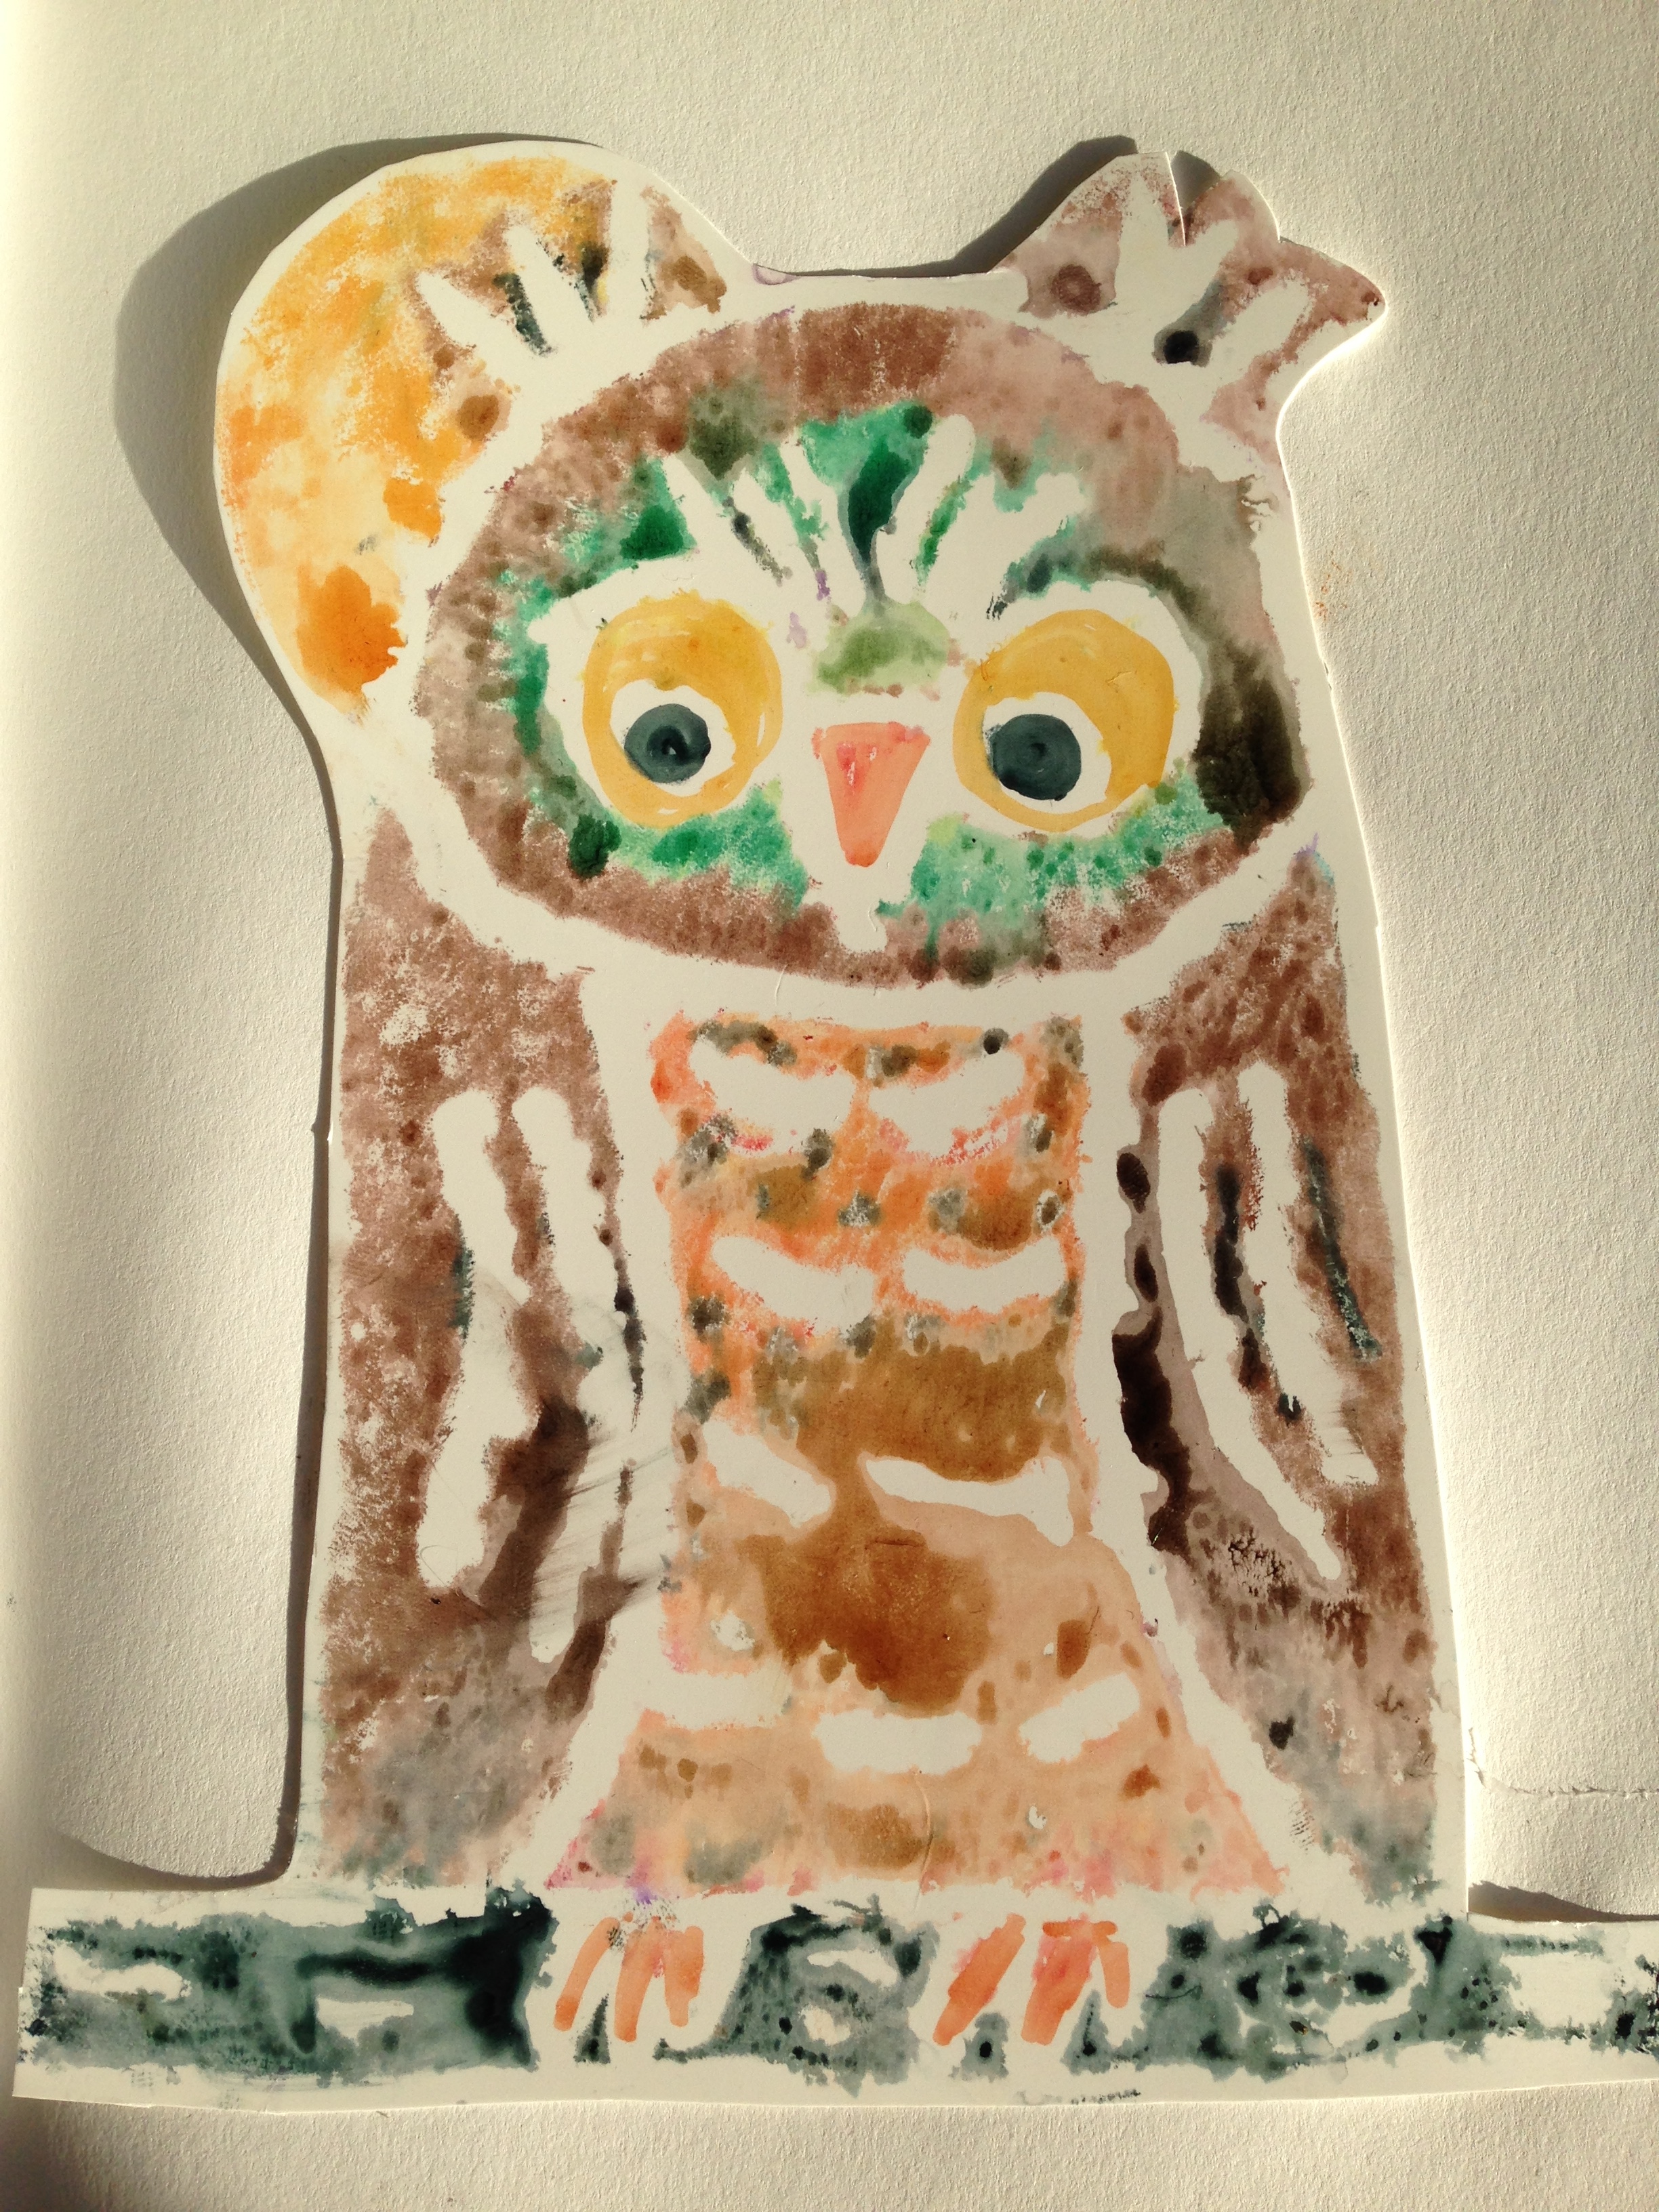
…..after printing several owls each child had to choose one for the library wall and another for their chalk pastel tree
From the beginning of this assignment I told the children that they had to have at least two good owls; one for the Forest of Reading wall in front of the library and another one to glue to another piece of art.
I wanted each student to experience using chalk pastels. After a quick lesson on how to blend the colours and how to draw a somewhat realistic branch I gave the children a choice of black or dark blue construction paper. The concept of creating a realistic looking branch was a little foreign to some students and I had to encourage them to look out the window and study the trees outside.
A few students decided to have a family of owls sitting in their tree. One student accidentally glued his owl upside down on the branch and decided to call him an owl bat. I love the variety of owls that were created, from very realistic to very whimsical. Enjoy!

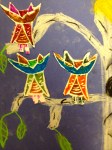


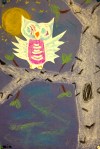

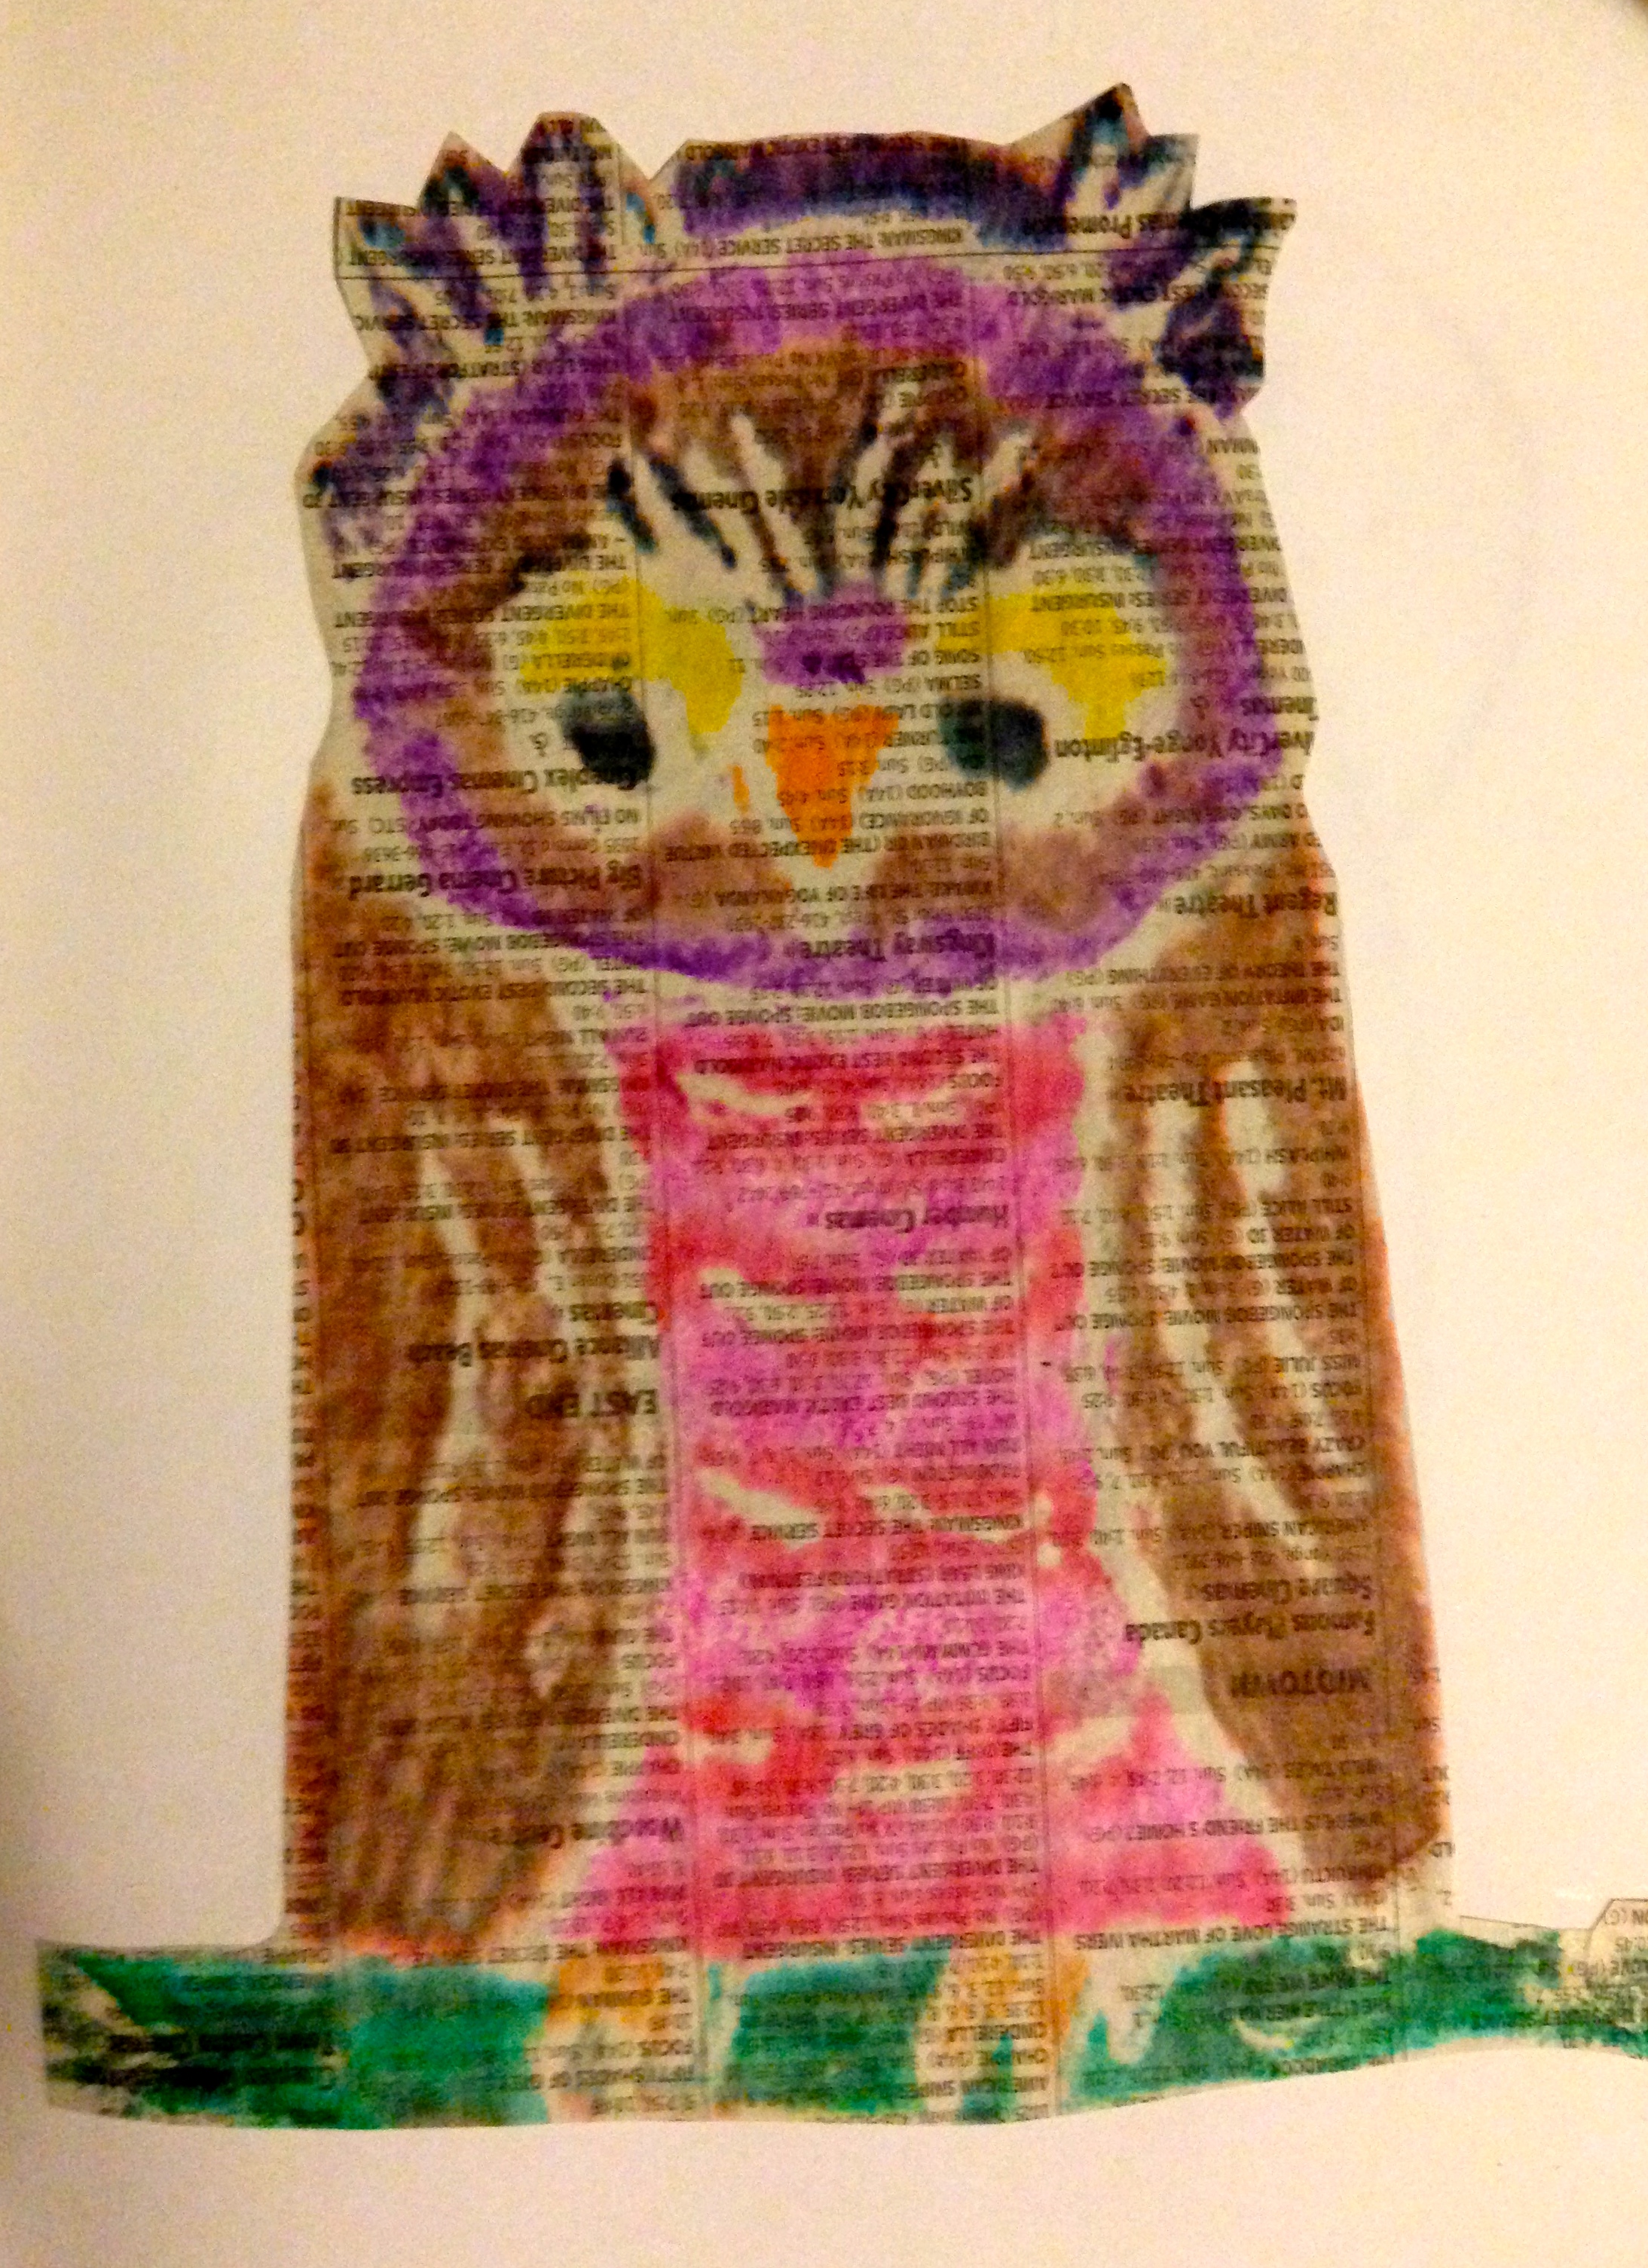
…..a real ‘hoot’ of an art lesson
About a month ago I introduced a print making lesson using styrofoam boards. The grades 2 and 3 classes were introduced to a variety of owls and were instructed to sketch several different styles of owl. Then they had to choose their favourite sketch and transfer the pattern onto the styrofoam plate. Once the design was impressed into the foam the children were given water based markers and they filled in the owl shape with lots of colour.
I showed the students a variety of owl prints that I had done using the same pattern but different colours and different papers. Here are some of my examples:

When the students finished colouring their plates they brought them to me and selected the paper they wanted to print on. I sprayed the paper and wiped off the excess water and then laid the plate on the paper. We used a roller to press the paper down onto the plate and finished off by using our fingers to push on the details like the eyes, beaks and feet to transfer the marker onto the paper.
There was a lot of trial and error but we quickly figured out what worked and what didn’t. Too much water and the colours all ran together, not enough and the print was too faint. A plain solid colour worked better than a busy print but newsprint with text on it was quite effective. The paper that worked best was card stock and water colour paper.
In front of the library I put up a forest of birch trees for our Forest of Reading Book Club and the leaves represent all the books that have been read by the members of the club. I asked each student in my art classes to donate one of their owls to place on the trees.


Stay tuned for part 2 of this lesson. I’ll post that in a day or two.
…..the book, Young Frank, Architect, inspired our art lesson in Kindergarten
Two weeks ago I reminded my kindergarten class of the book we read in the library. The book was Young Frank, Architect by Frank Viva and published by MOMA.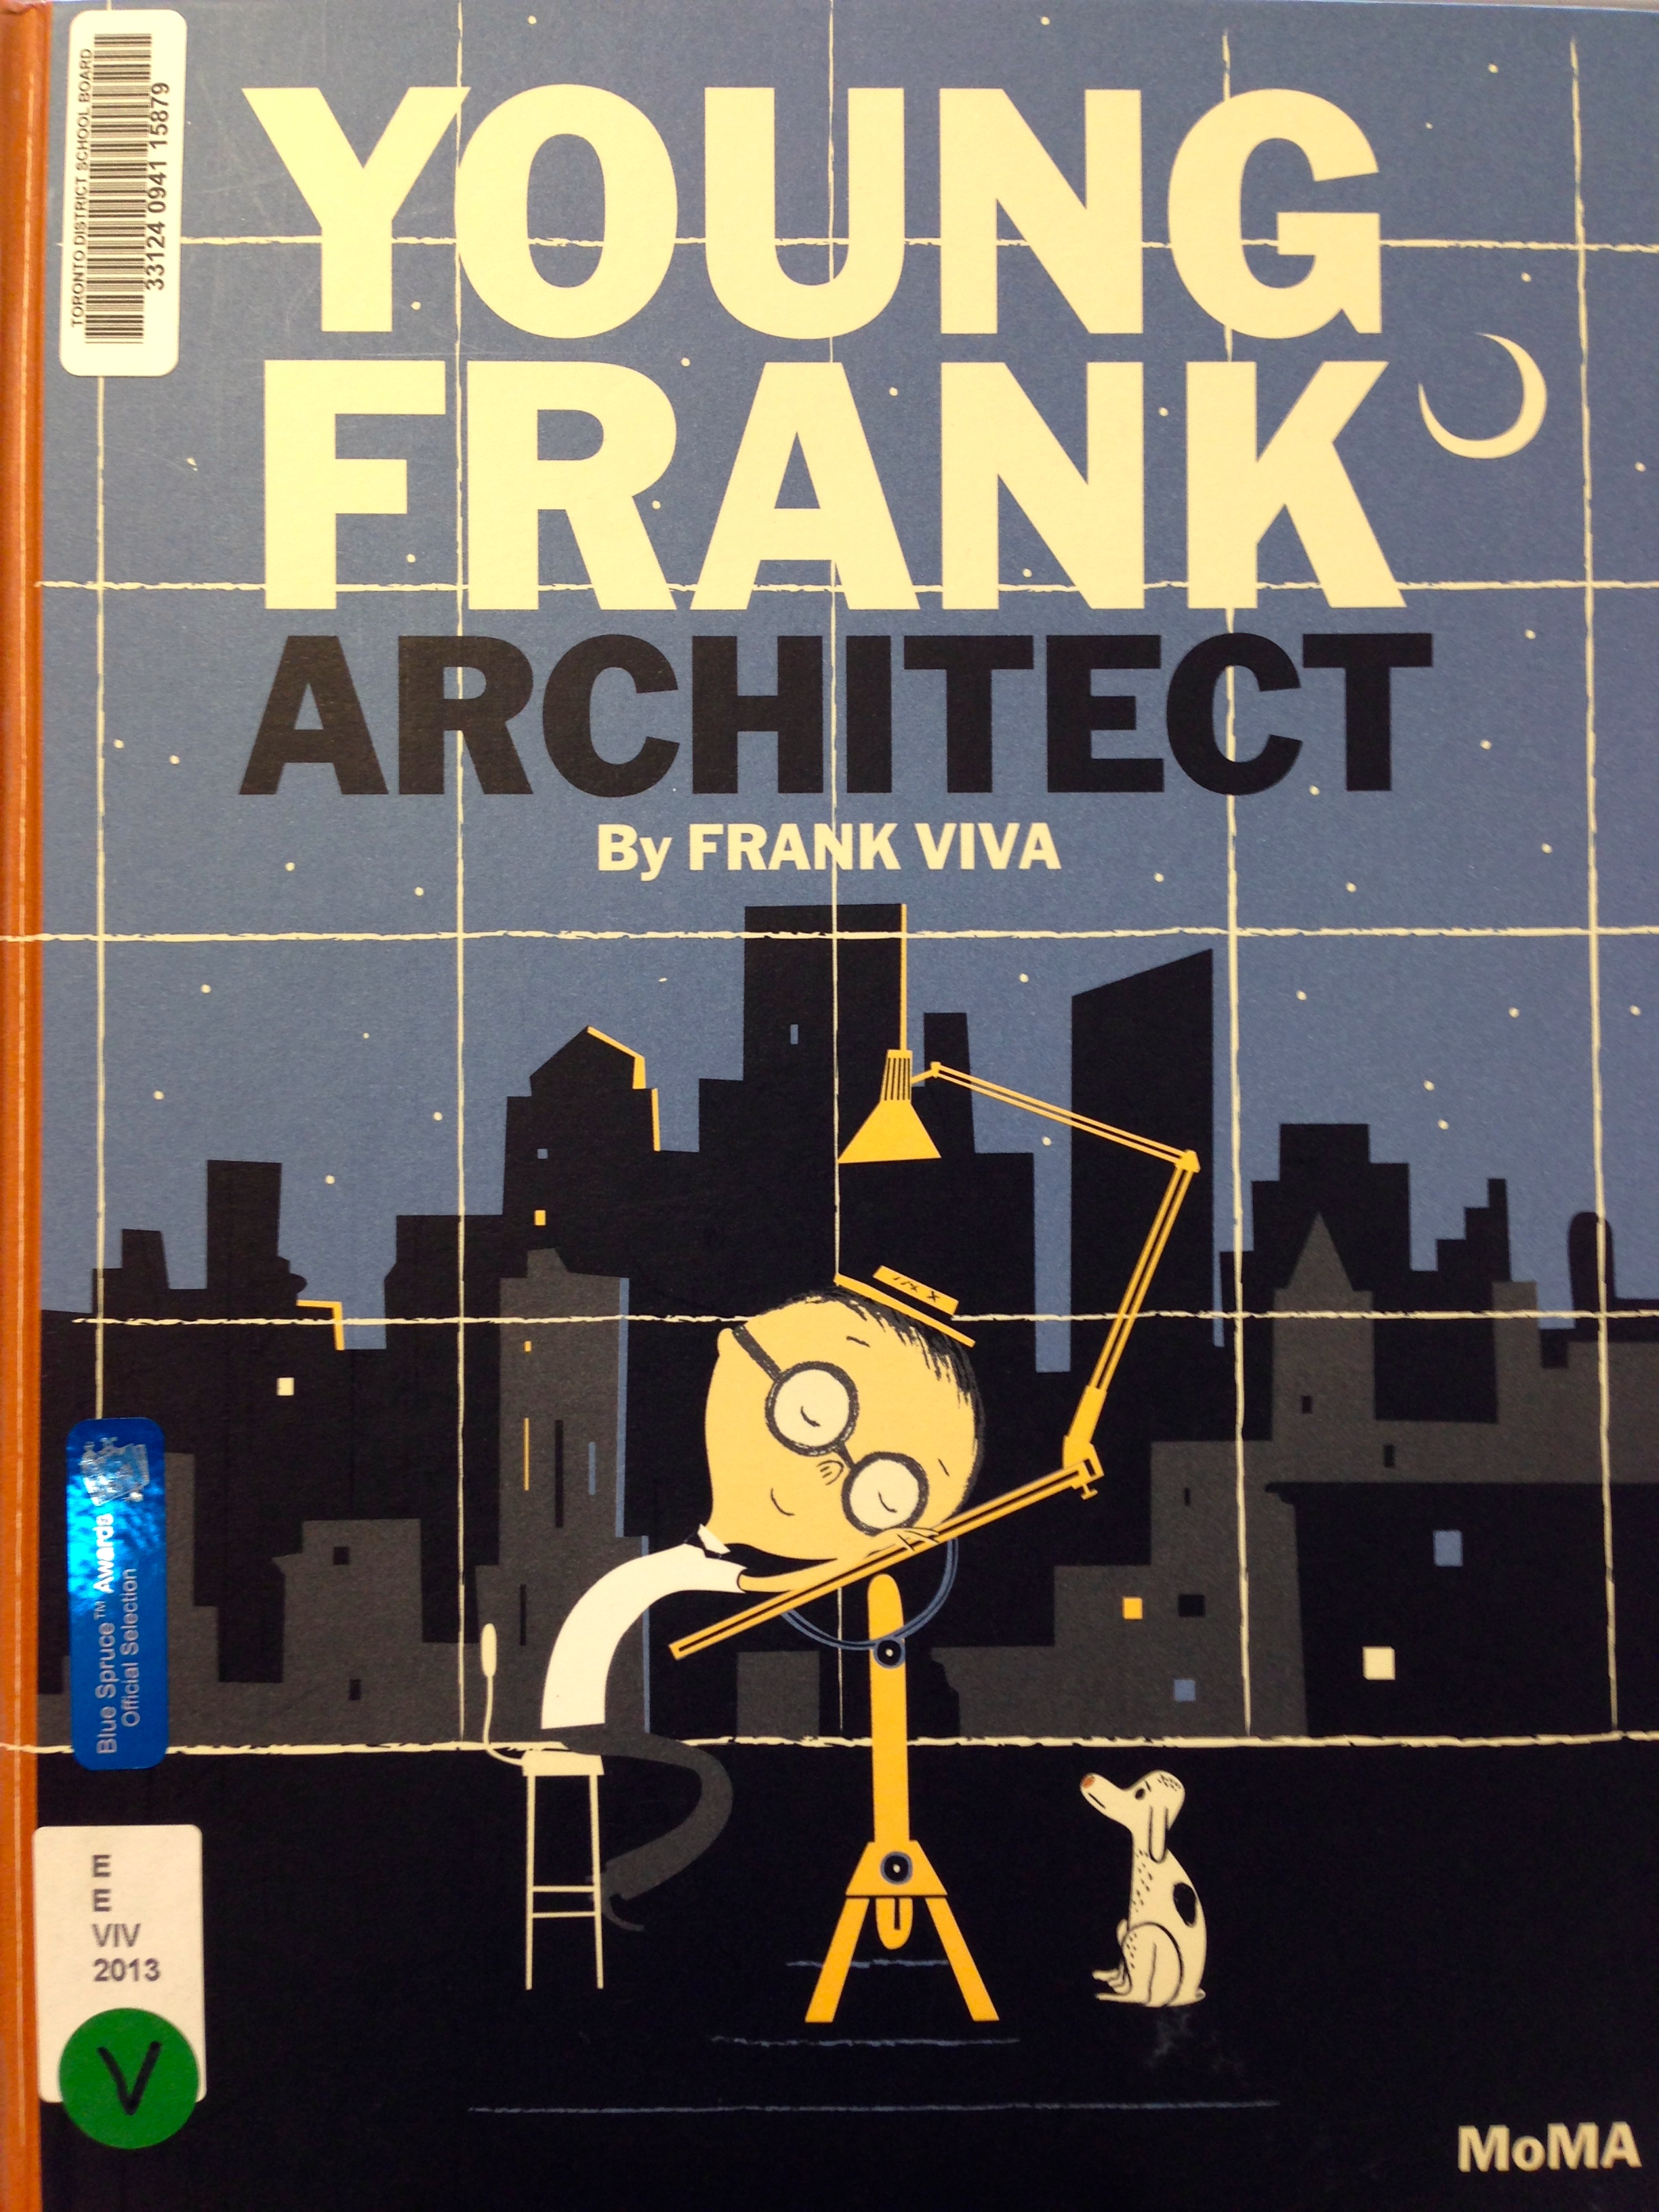
The story is about a young boy named Frank and his grandfather, also named Frank. Both Franks are architects. Young Frank builds chairs, curvy buildings and models of entire cities. His grandfather tells him that architects don’t design chairs, buildings should be straight and architects design one building at a time and cities take a hundred years to develop. Young Frank is discouraged and he doesn’t want to be an architect any longer. Old Frank decides to take Young Frank to the museum, the MOMA, so that he can show his grandson the buildings that architects design. In the end it is Old Frank who learns that he was mistaken and he apologizes to Young Frank. The book ends with briefs bios about Frank Lloyd Wright and Frank Gehry.
The art lesson introduced the kindergarteners to collage and city landscapes. They were reminded about foreground and background and were taught how to create a night sky with stars and a moon. Students were encouraged to cut out at least three high rise buildings and make windows and doors in different shapes. It was up to them whether they wanted to create straight or curvy ‘Frank’ buildings. The shapes of some of the buildings are delightful. It’s amazing how much their scissor skills have improved since last September. Enjoy!


…..another great art idea from Carla Sonheim that I introduced to my kindergarten art class
You may recall a post where I shared some art that I did with scraps of paper. By simply adding a beak, eyes and feet you can make fun bird shapes. I turned them into cards and small framed gifts that I gave to friends and family.
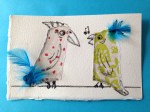

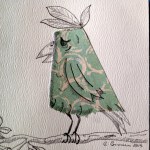
A couple of weeks ago I introduced this concept to my kindergarten art class. They made a very simple tree shape with 5 to 6 branches and then on each branch they glued a scrap piece of paper and then drew on the details to create their birds. Here are some of their creations.
…..make wonderful art
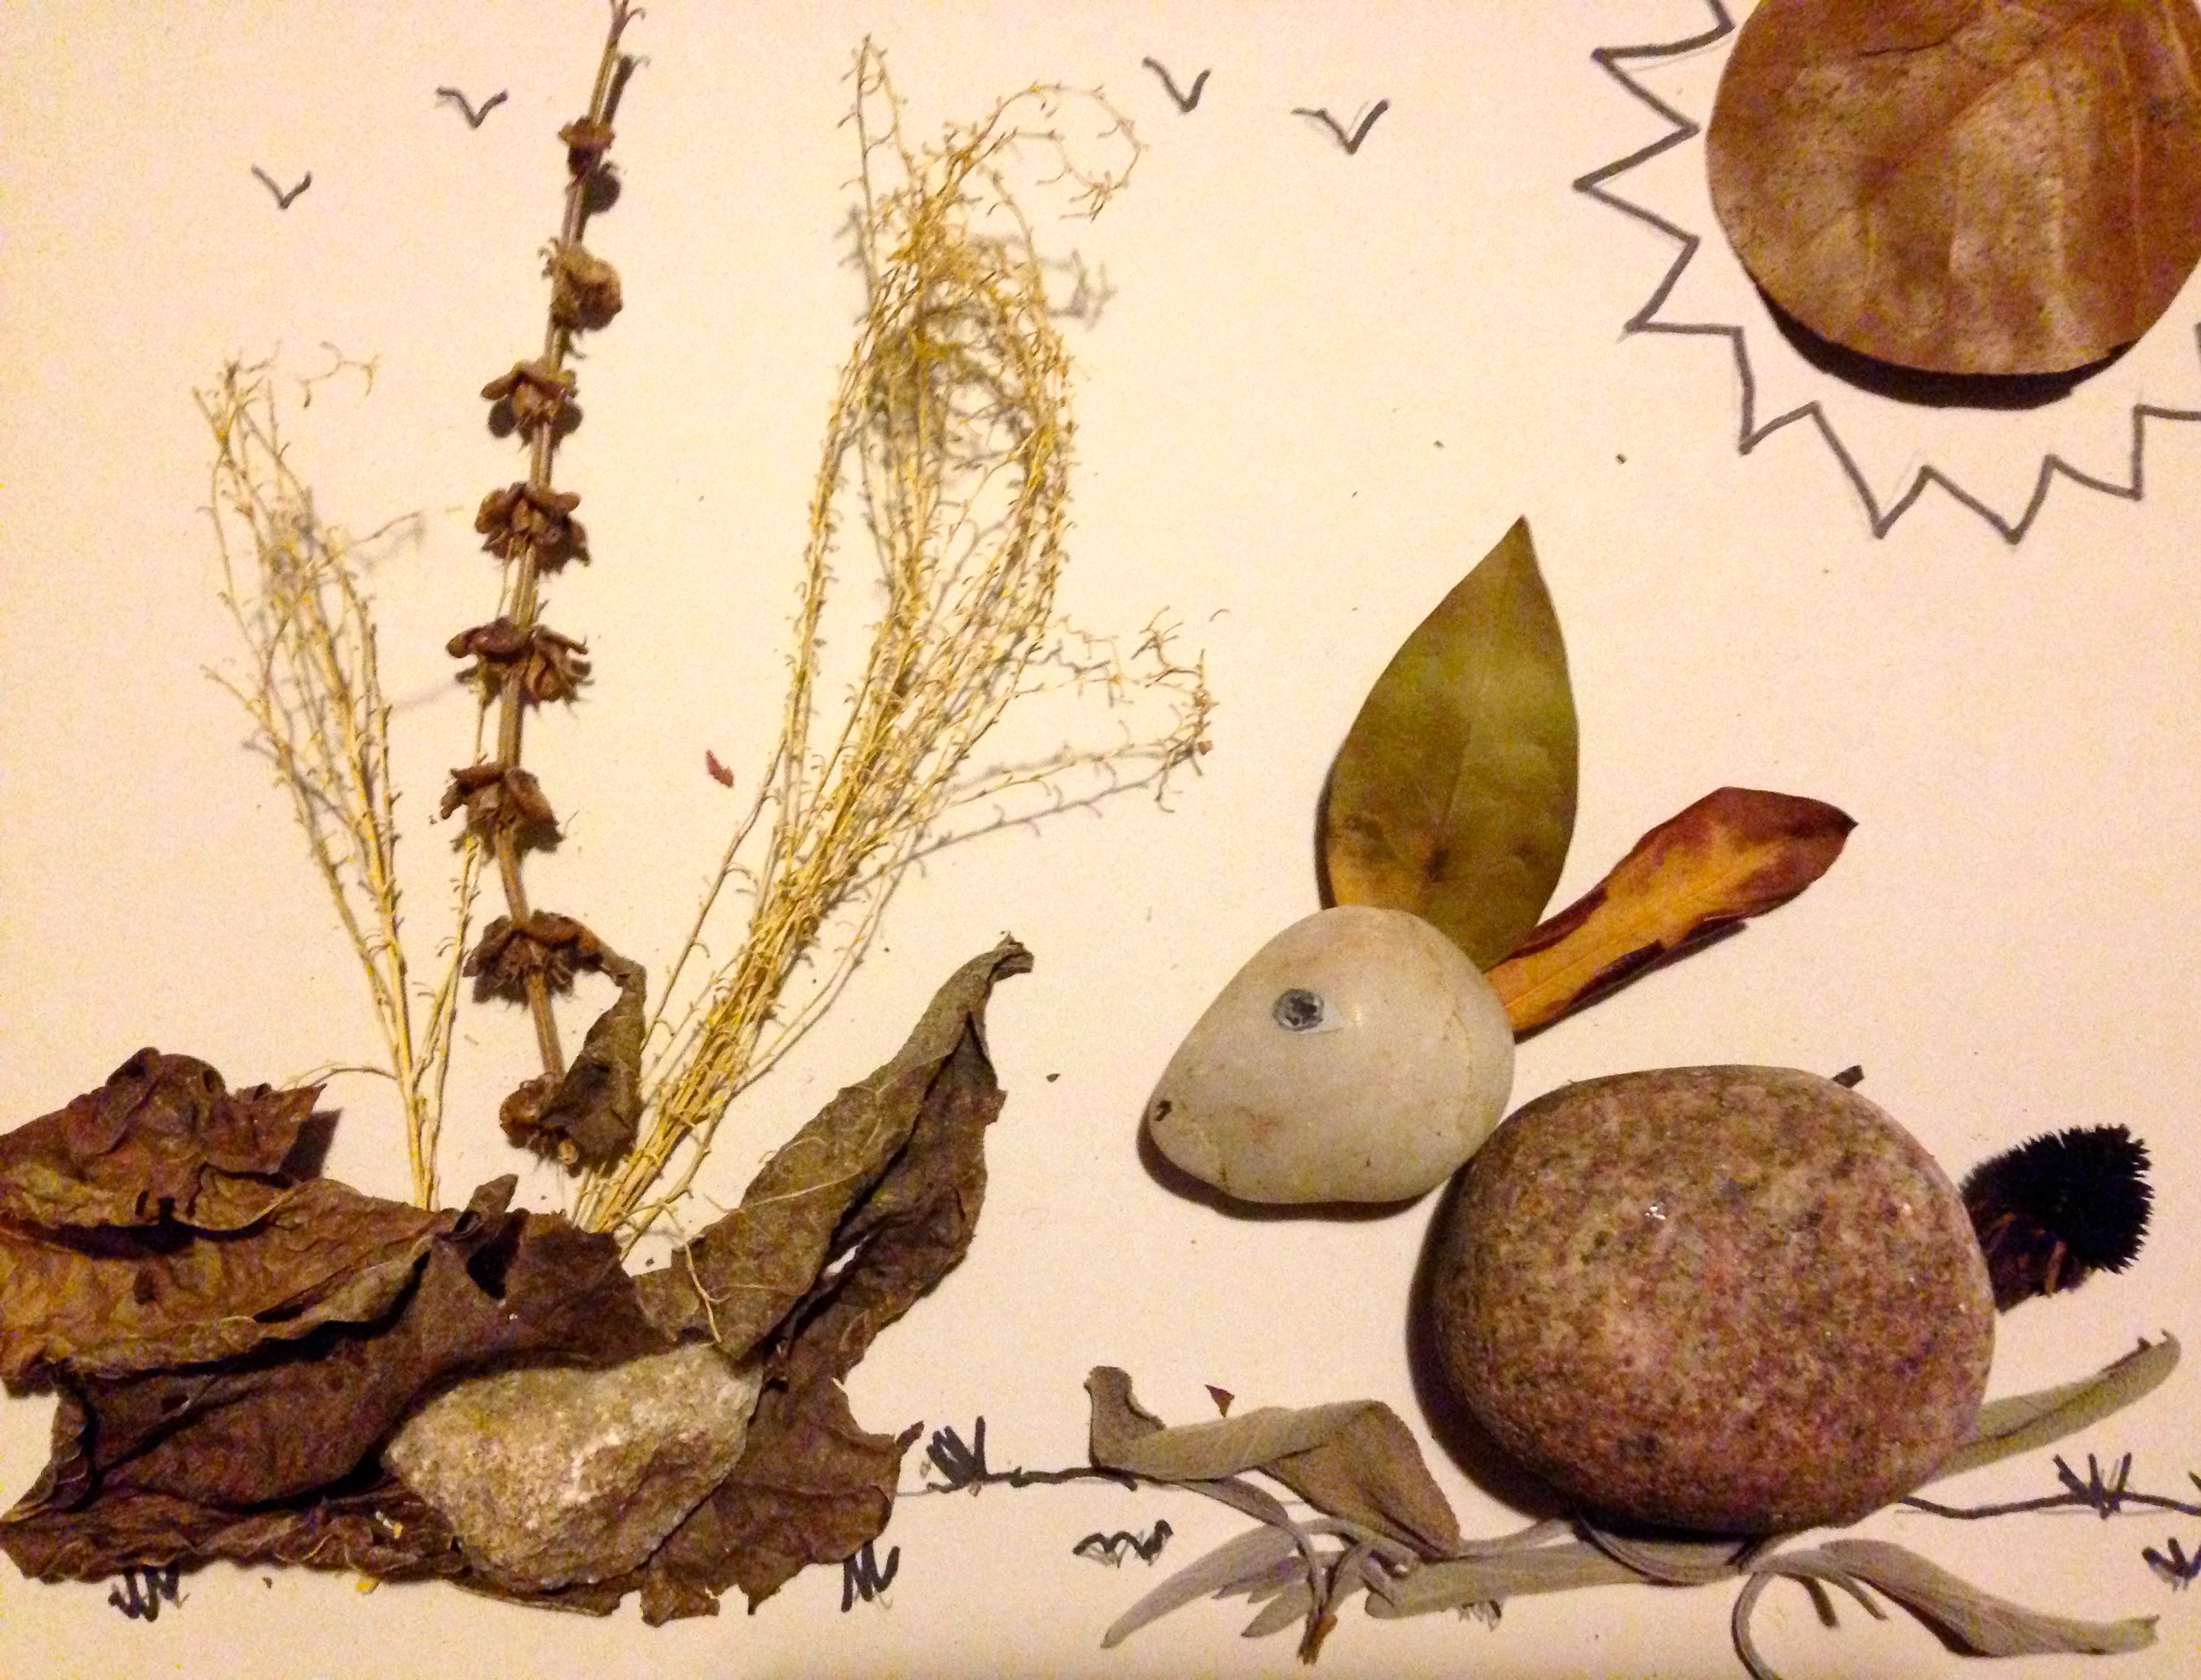
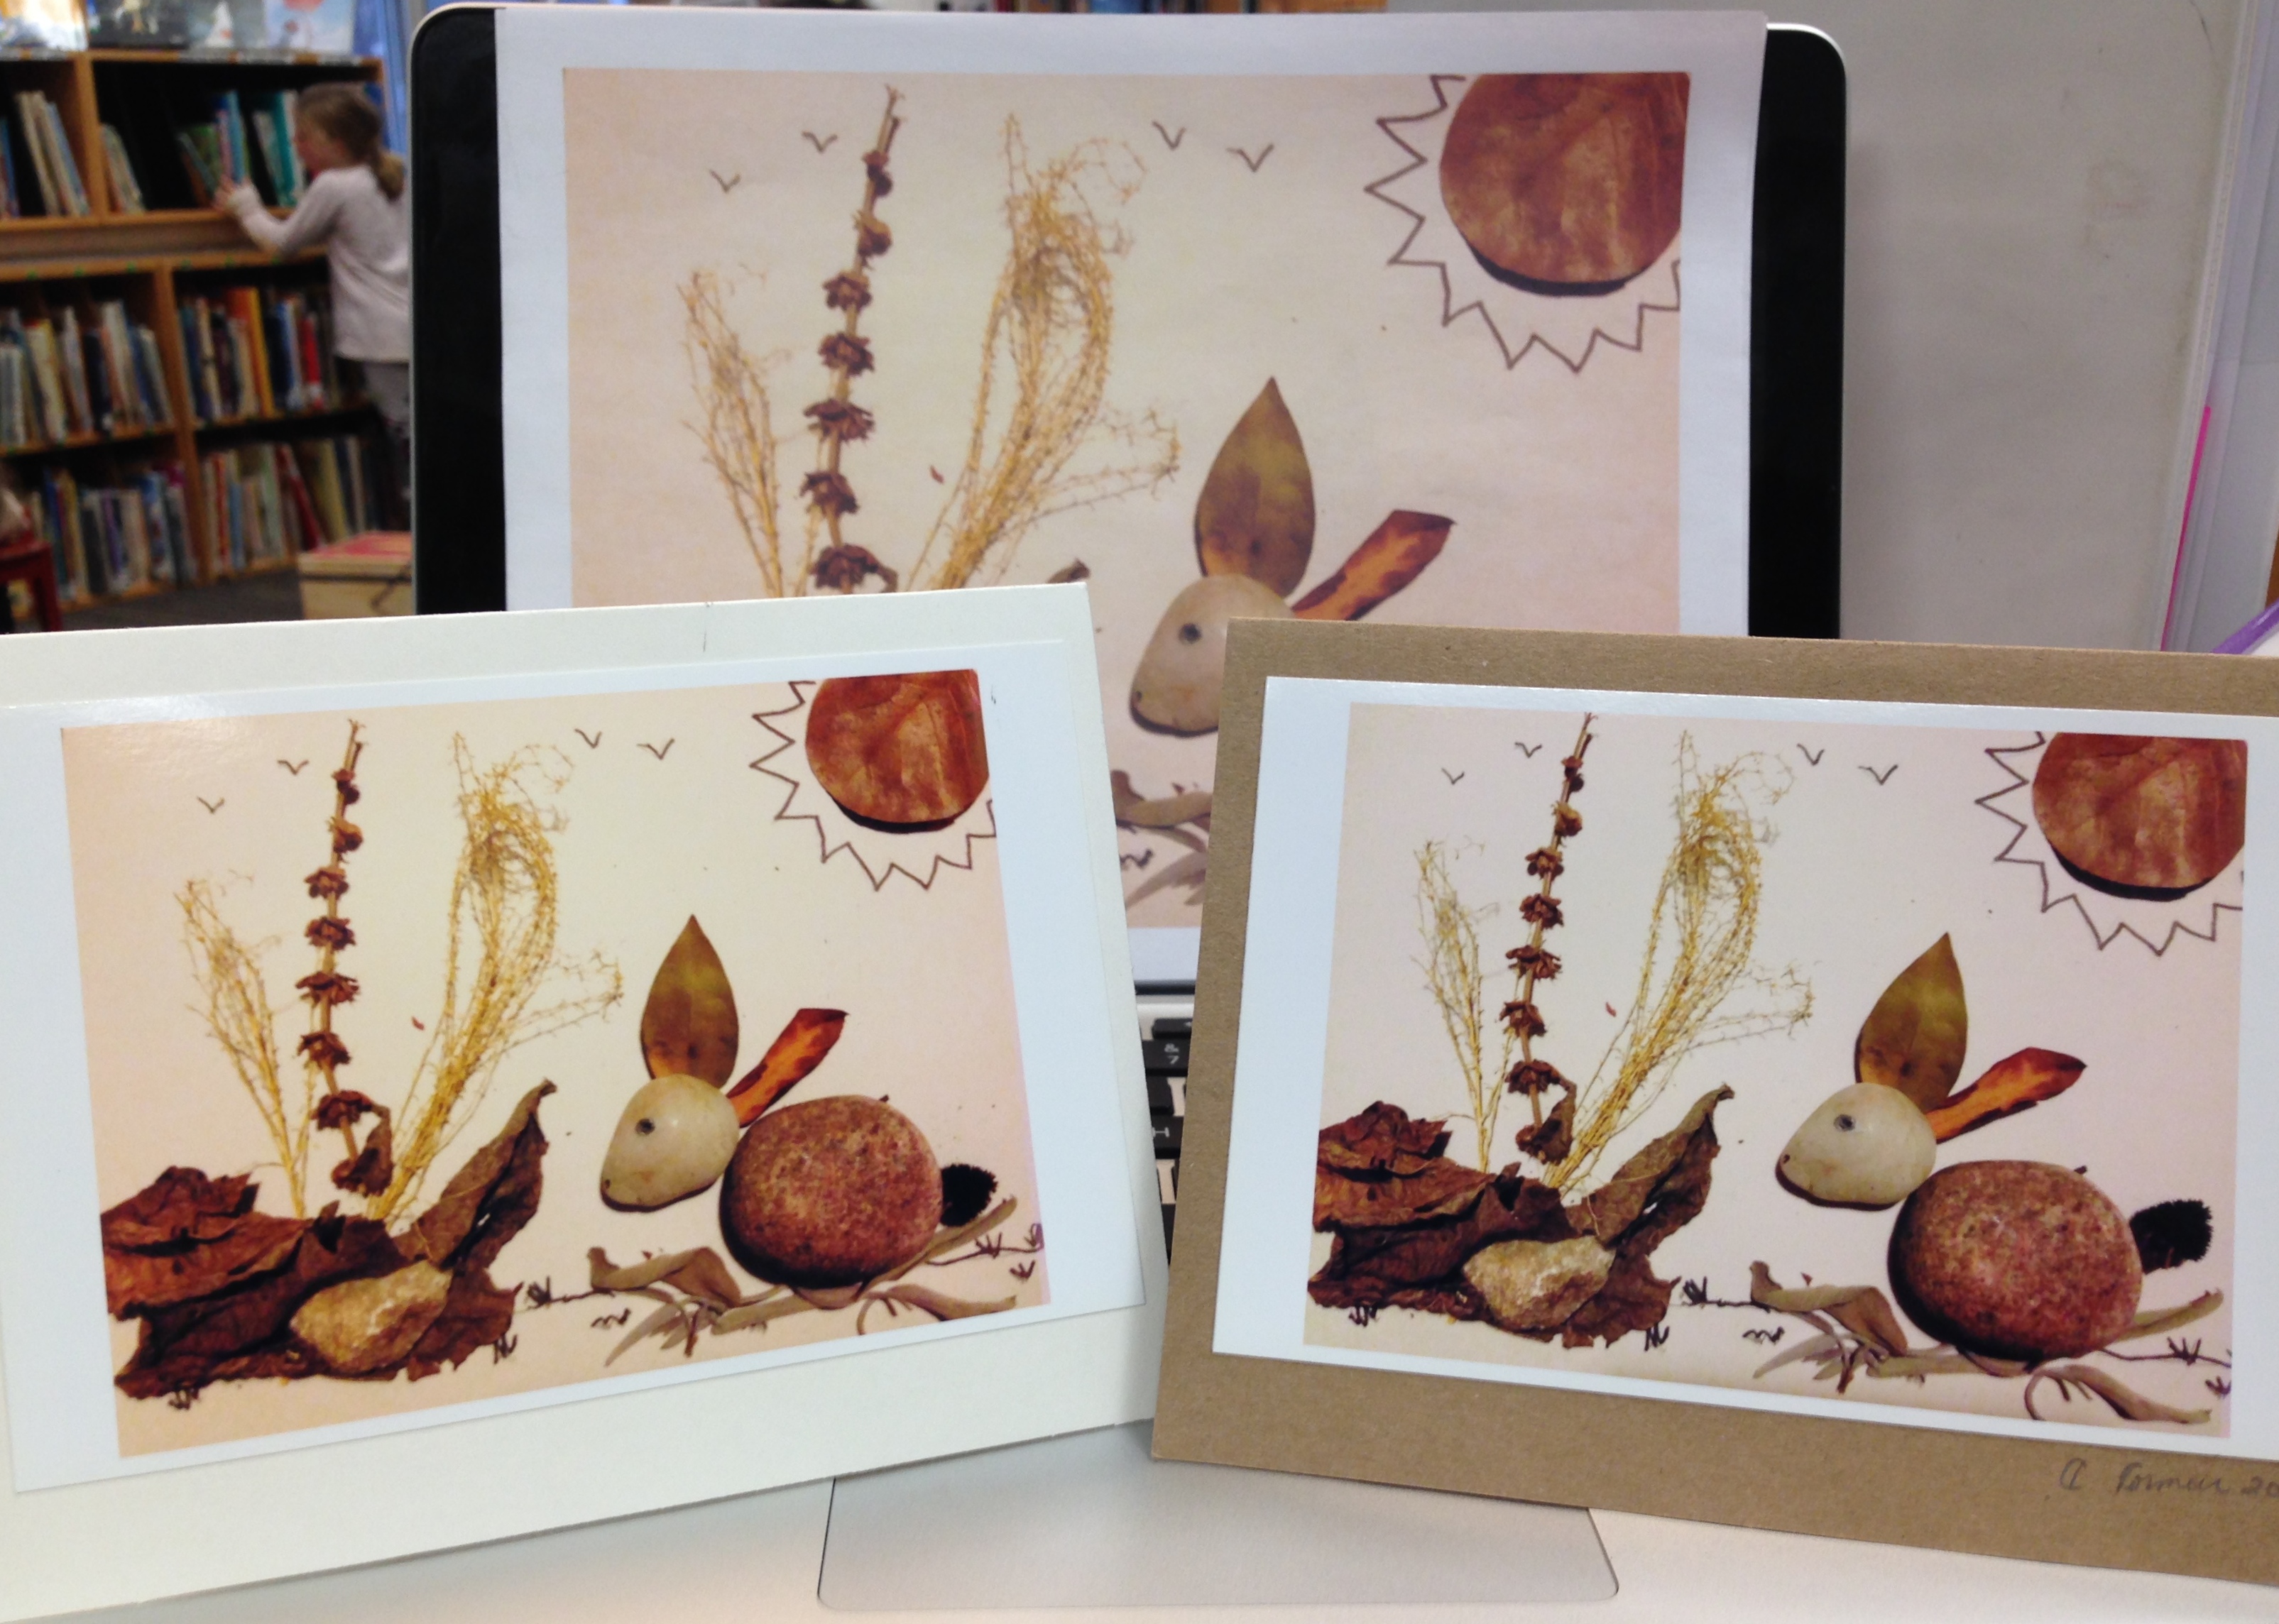
Last week I was assigned a project that involved gathering up bits of nature to create a temporary work of art. After we finished creating we could photograph our masterpieces and then return the bits back to the environment or leave our creations somewhere outside where others could enjoy what we made. This idea came from Lynn Whipple who is one of the artists from Year of the Spark. This is a year long on-line art class brought to us by Carla Sonheim and Lynn. Every month they take turns coming up with wonderful and innovative assignments that bring out our inner spark. Every two weeks we get a new assignment.
I was really inspired by this project and came up with my own ‘Learning Stick’ and a composition of stones and dried foliage and grasses that I turned into a card. 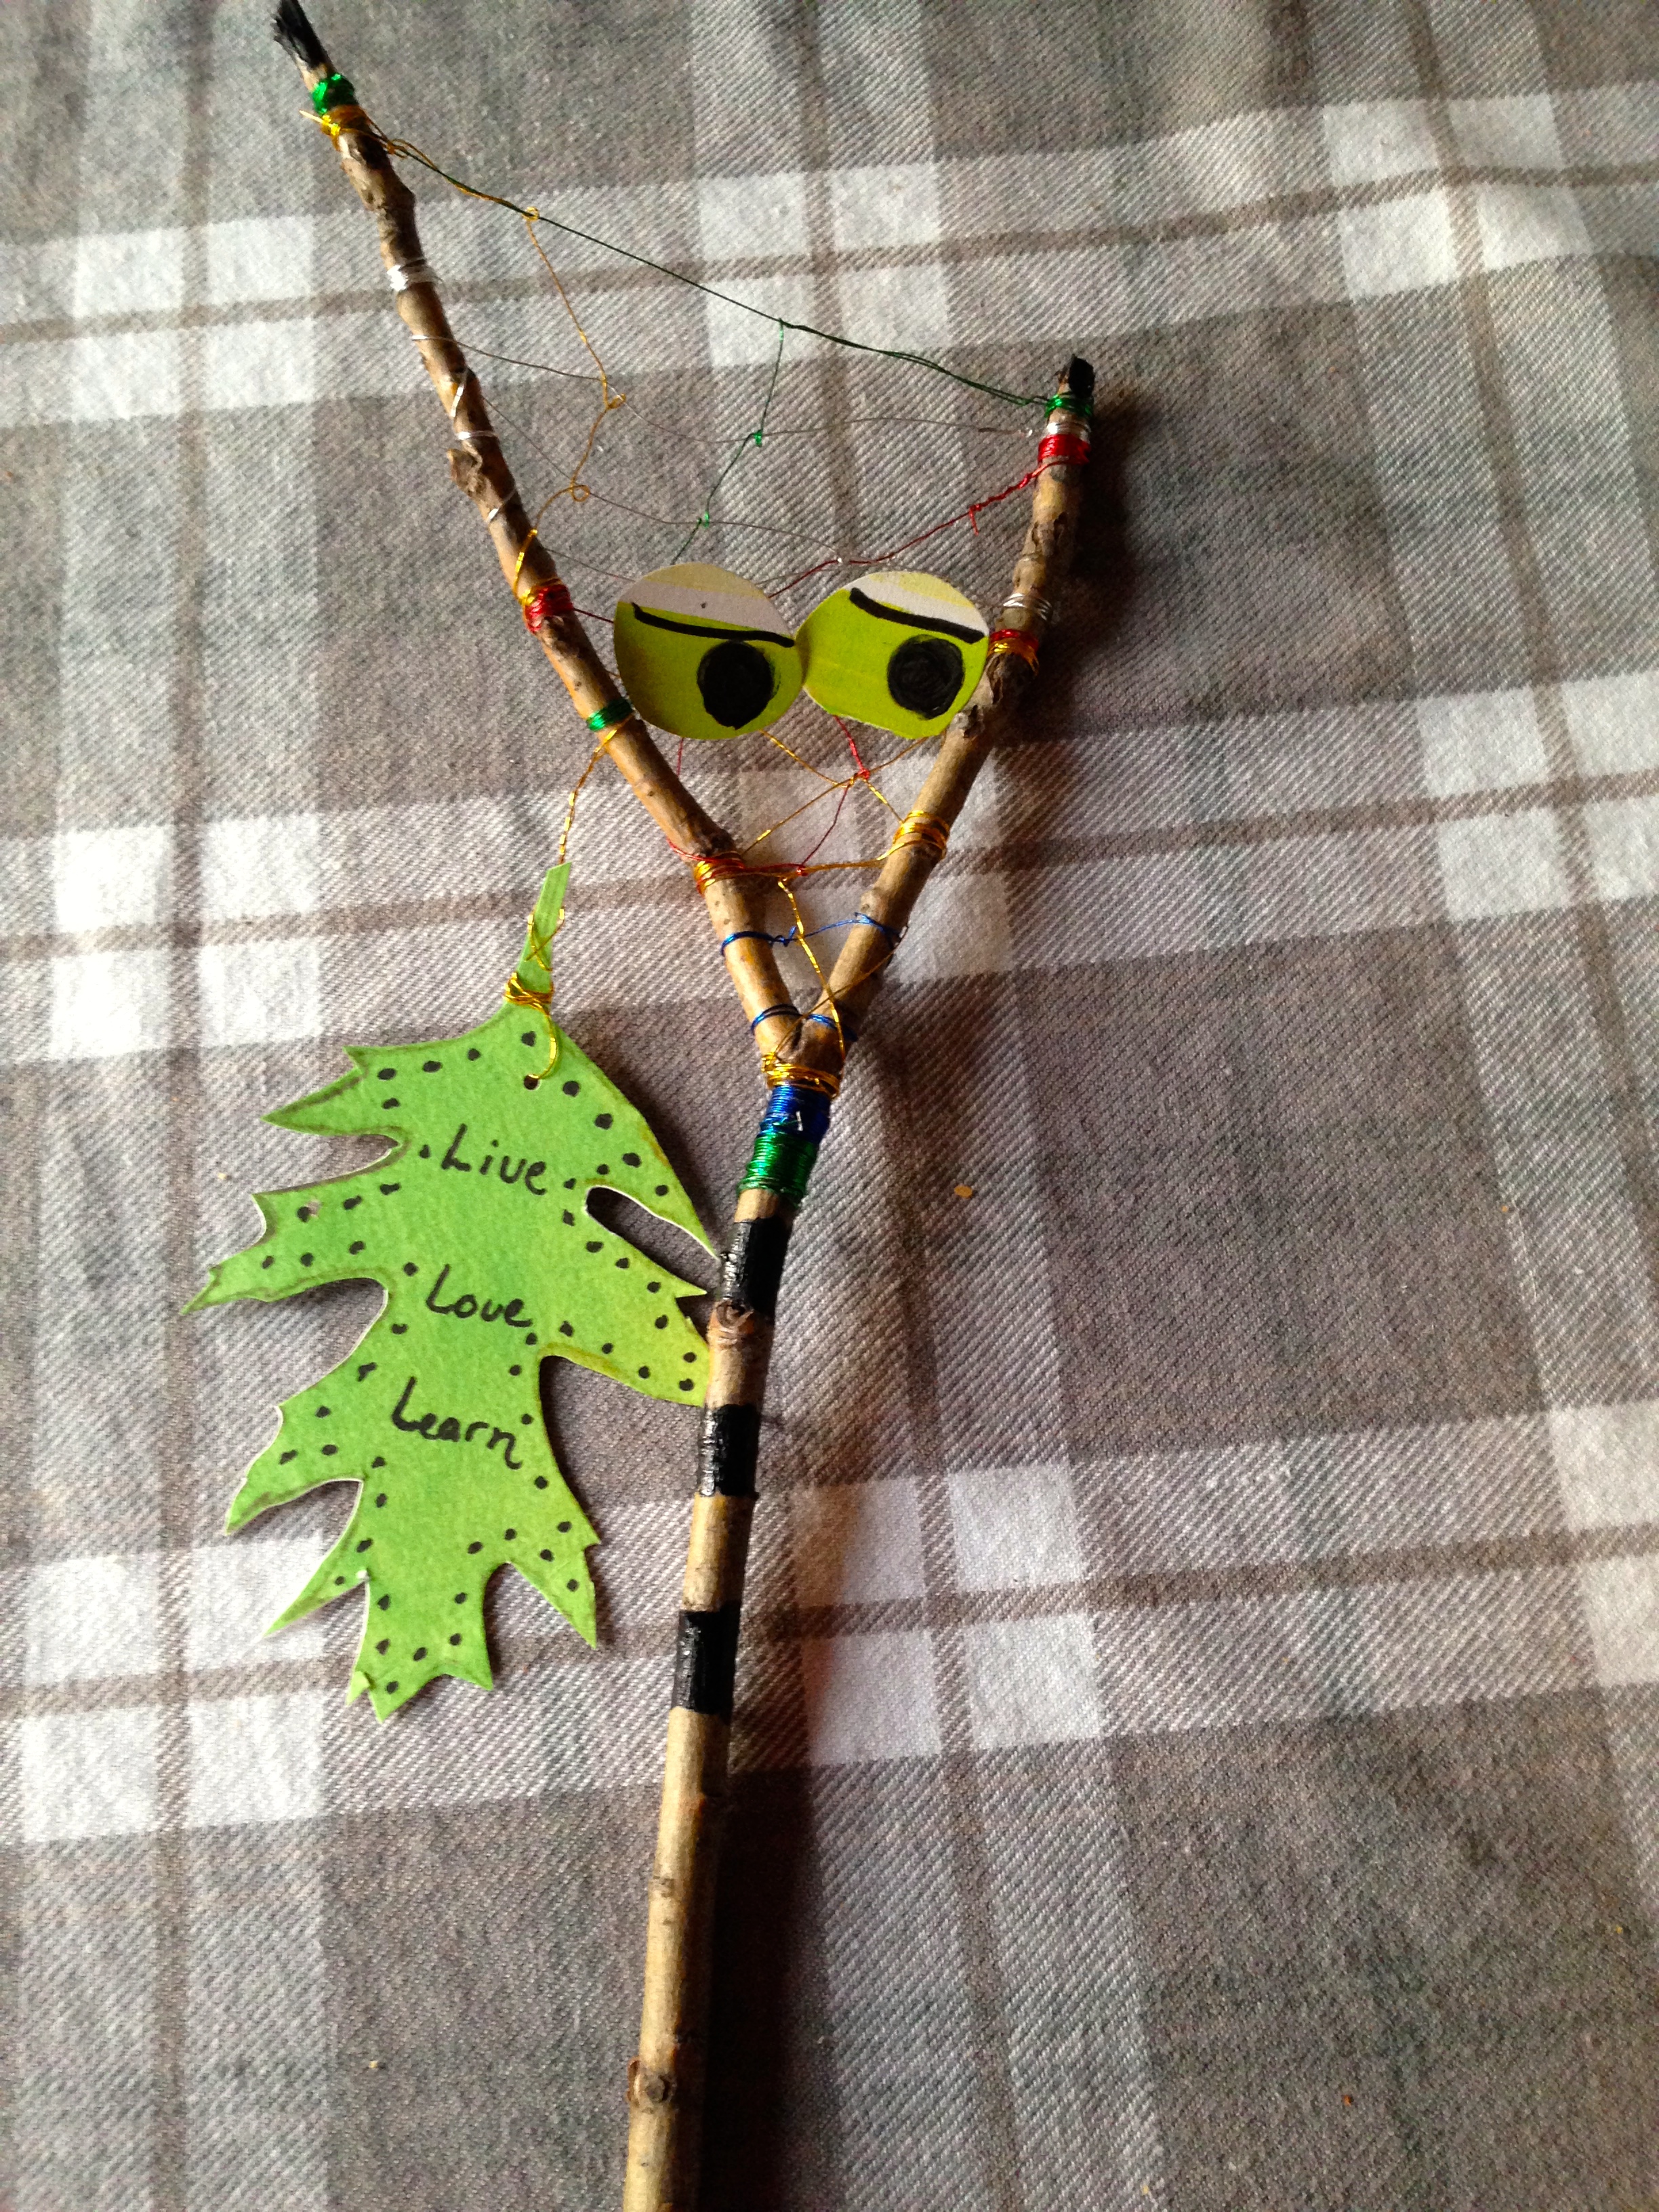
I’m hoping to make more but in the meantime I offered this assignment to my kindergarten class and they ate it up.
Before I arrived for our regular weekly art class, the children took a walk around the school yard and gathered up as many bits of nature that they could find. Between me and the ECE teacher and what the children gathered we had a very nice collection of materials to work with.
I told the children that we weren’t gluing anything down and when their picture was done I would come around and photograph it and then we would take it apart and if they wanted they could make another picture. When we finished with the materials we would return them to nature.
I printed the photographs on my printer at home onto regular sized photocopy paper and then I made one 4 x 6 glossy print to mount onto a card. Here’s what mine looked like.
After we mounted all the photographs onto a black background they were put up outside the kindergarten class for all to enjoy. Today they were moved to a more central part of the school so that more people would see them. The cards that I made will be given to the parents as a special gift on Earth Day.


